
A cheap remote solution for Yaesu FT-857
|
A hardware/software solution to make the Yaesu FT-857 base and front panel connect over the internet using Raspberry Pi, at a cost of only a few hundred NOK. |
Introduction
In our new house all signalling is based on ethernet (and CAN bus, but that's another story), and I really didn't want to bother with getting coax out of the house, so my trusted old Yaesu FT-857 has been gathering dust for a while. Looking at the the Remote Rig solutions I knew the transceiver to front panel connection could be extended over a high latency internet connection, but at 500 USD it was way too expensive in my opinion. This couldn't be that complex, could it? This project was started in 2018, put in the shelf for two years, and just finished now in 2020.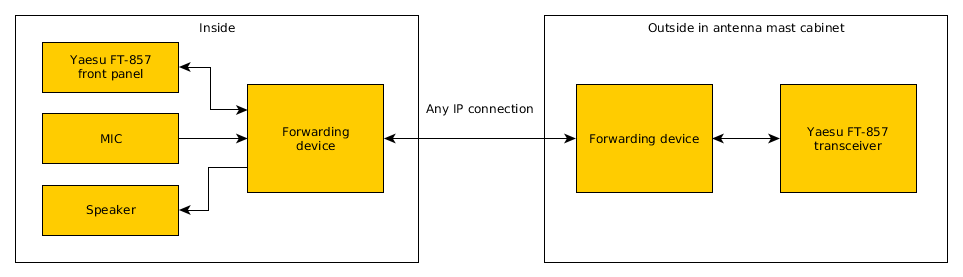
I started to dive into the communication protocol between the transceiver and the panel.
The protocol
This is the pinout on the transceiver connectors:| Pin # | Mic connector | Display connector |
|---|---|---|
| 1 | Button: Down | RX audio |
| 2 | Button: Up | Button: Power |
| 3 | 5V supply | Gnd |
| 4 | Mic negative | 8V supply, 118-155 mA depending on backlight color |
| 5 | Mic positive | Bidirectional UART at 62000 baud (display TX) |
| 6 | Button: PTT | Display RX |
| 7 | Gnd | |
| 8 | Mic fast |
Even though UART is full duplex by nature, Yaesu have made a simplex protocol on top which requires channel access to avoid collisions.
Data packet:
- A sends "request to send" (0xA5): Claim access to the communication channel.
- B sends ACK (0x06): Allows A to send the rest of the packet OR B overrides A by sending RTS to turn around the communication. This can only be done by the display. The base is recessive.
- A sends data packet: First byte is length. Last byte is checksum (sum of all bytes between length and checksum).
- B sends ACK: Concludes transaction.
- Keepalive (0x90): Normally sent from base to display. Assumed to be acked by remote part.
- Abort (0x15): Abort the current transaction and start over.
Attempt 1 - simple forwarding
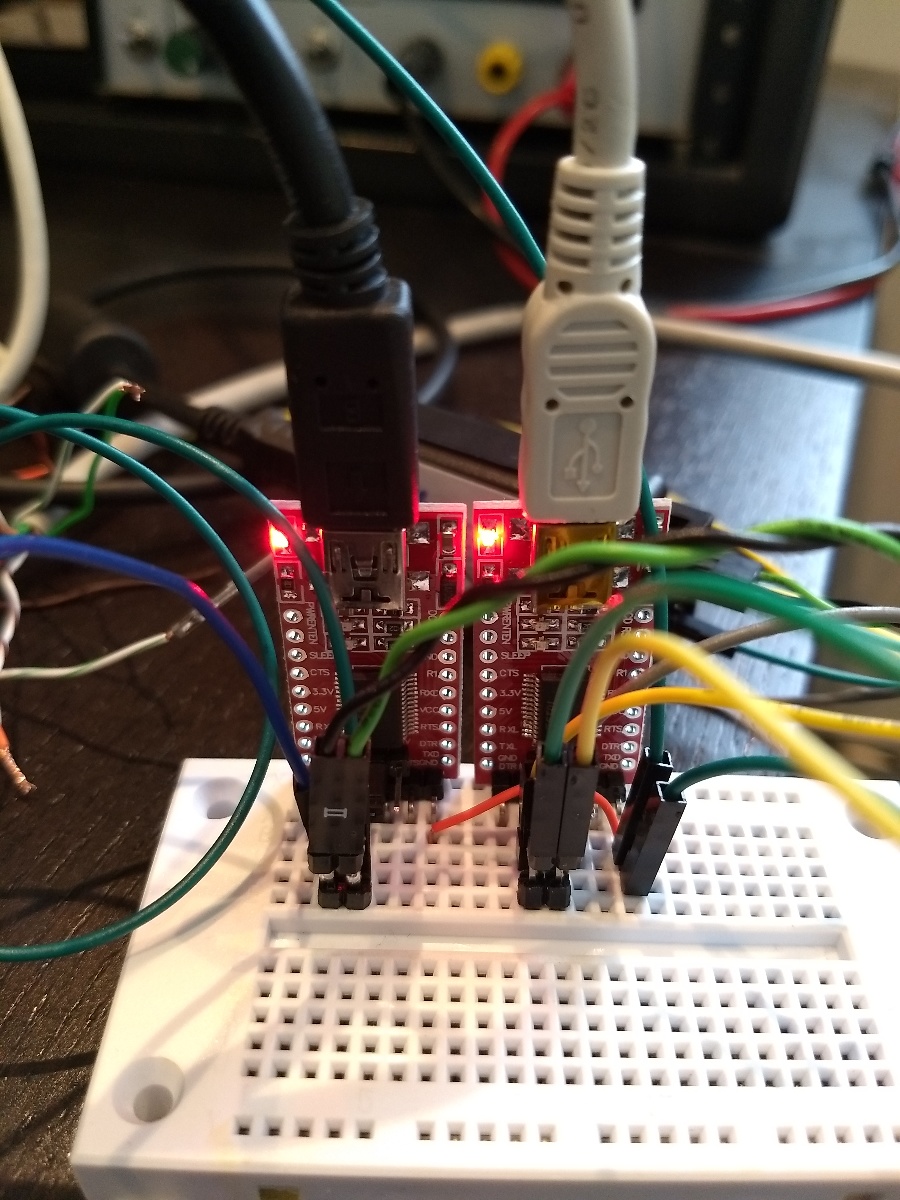
I connected all signals directly between the transceiver and the display except the UART. I set up a serial tunnel using TCP sockets and two FTDI converters. One end connected to the display and one connected to the transceiver. The FT-857 protocol assumes very short response time, so the transceiver didn't even power up. I had to make a local loopback between the FTDI converters before it started. Notice the huge delays during the transaction.

Attempt 2 - Python script to emulate remote device
At this point I implemented the Yaesu protocol in Python. The point was to emulate the counterpart in Python and reply to acks immediately rather than waiting for the data to go back and forth through the internet. I ran one instance for the display and one for the rig. Finally the thing actually started (with the physical signals like power, 8V to display etc. still directly connected), but the performance was sluggish and terrible. If I sent too many packets, e.g. by turning the tune dial too quickly, the communication timed out and the transceiver shut down.
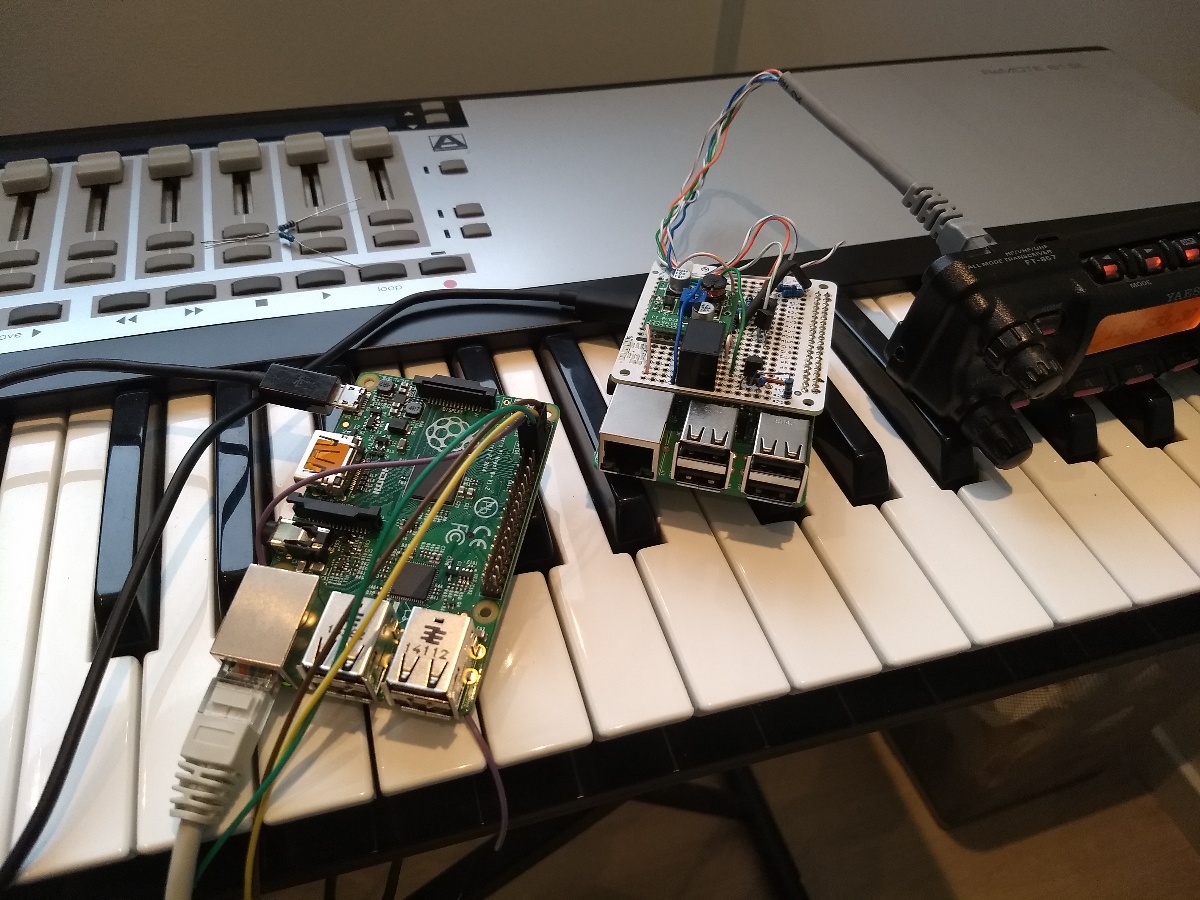
I also made a prototype hardware using Raspberry Pis instead, hoping that their native UARTs would provide lower latency than a USB based solution. Unfortunately the latency was still a big issue. The UART buffers, the interrupt latency in the OS and the driver buffers on a Linux computer accummulates a delay of a few milliseconds. This was no task for a computer running a non-realtime operating system...
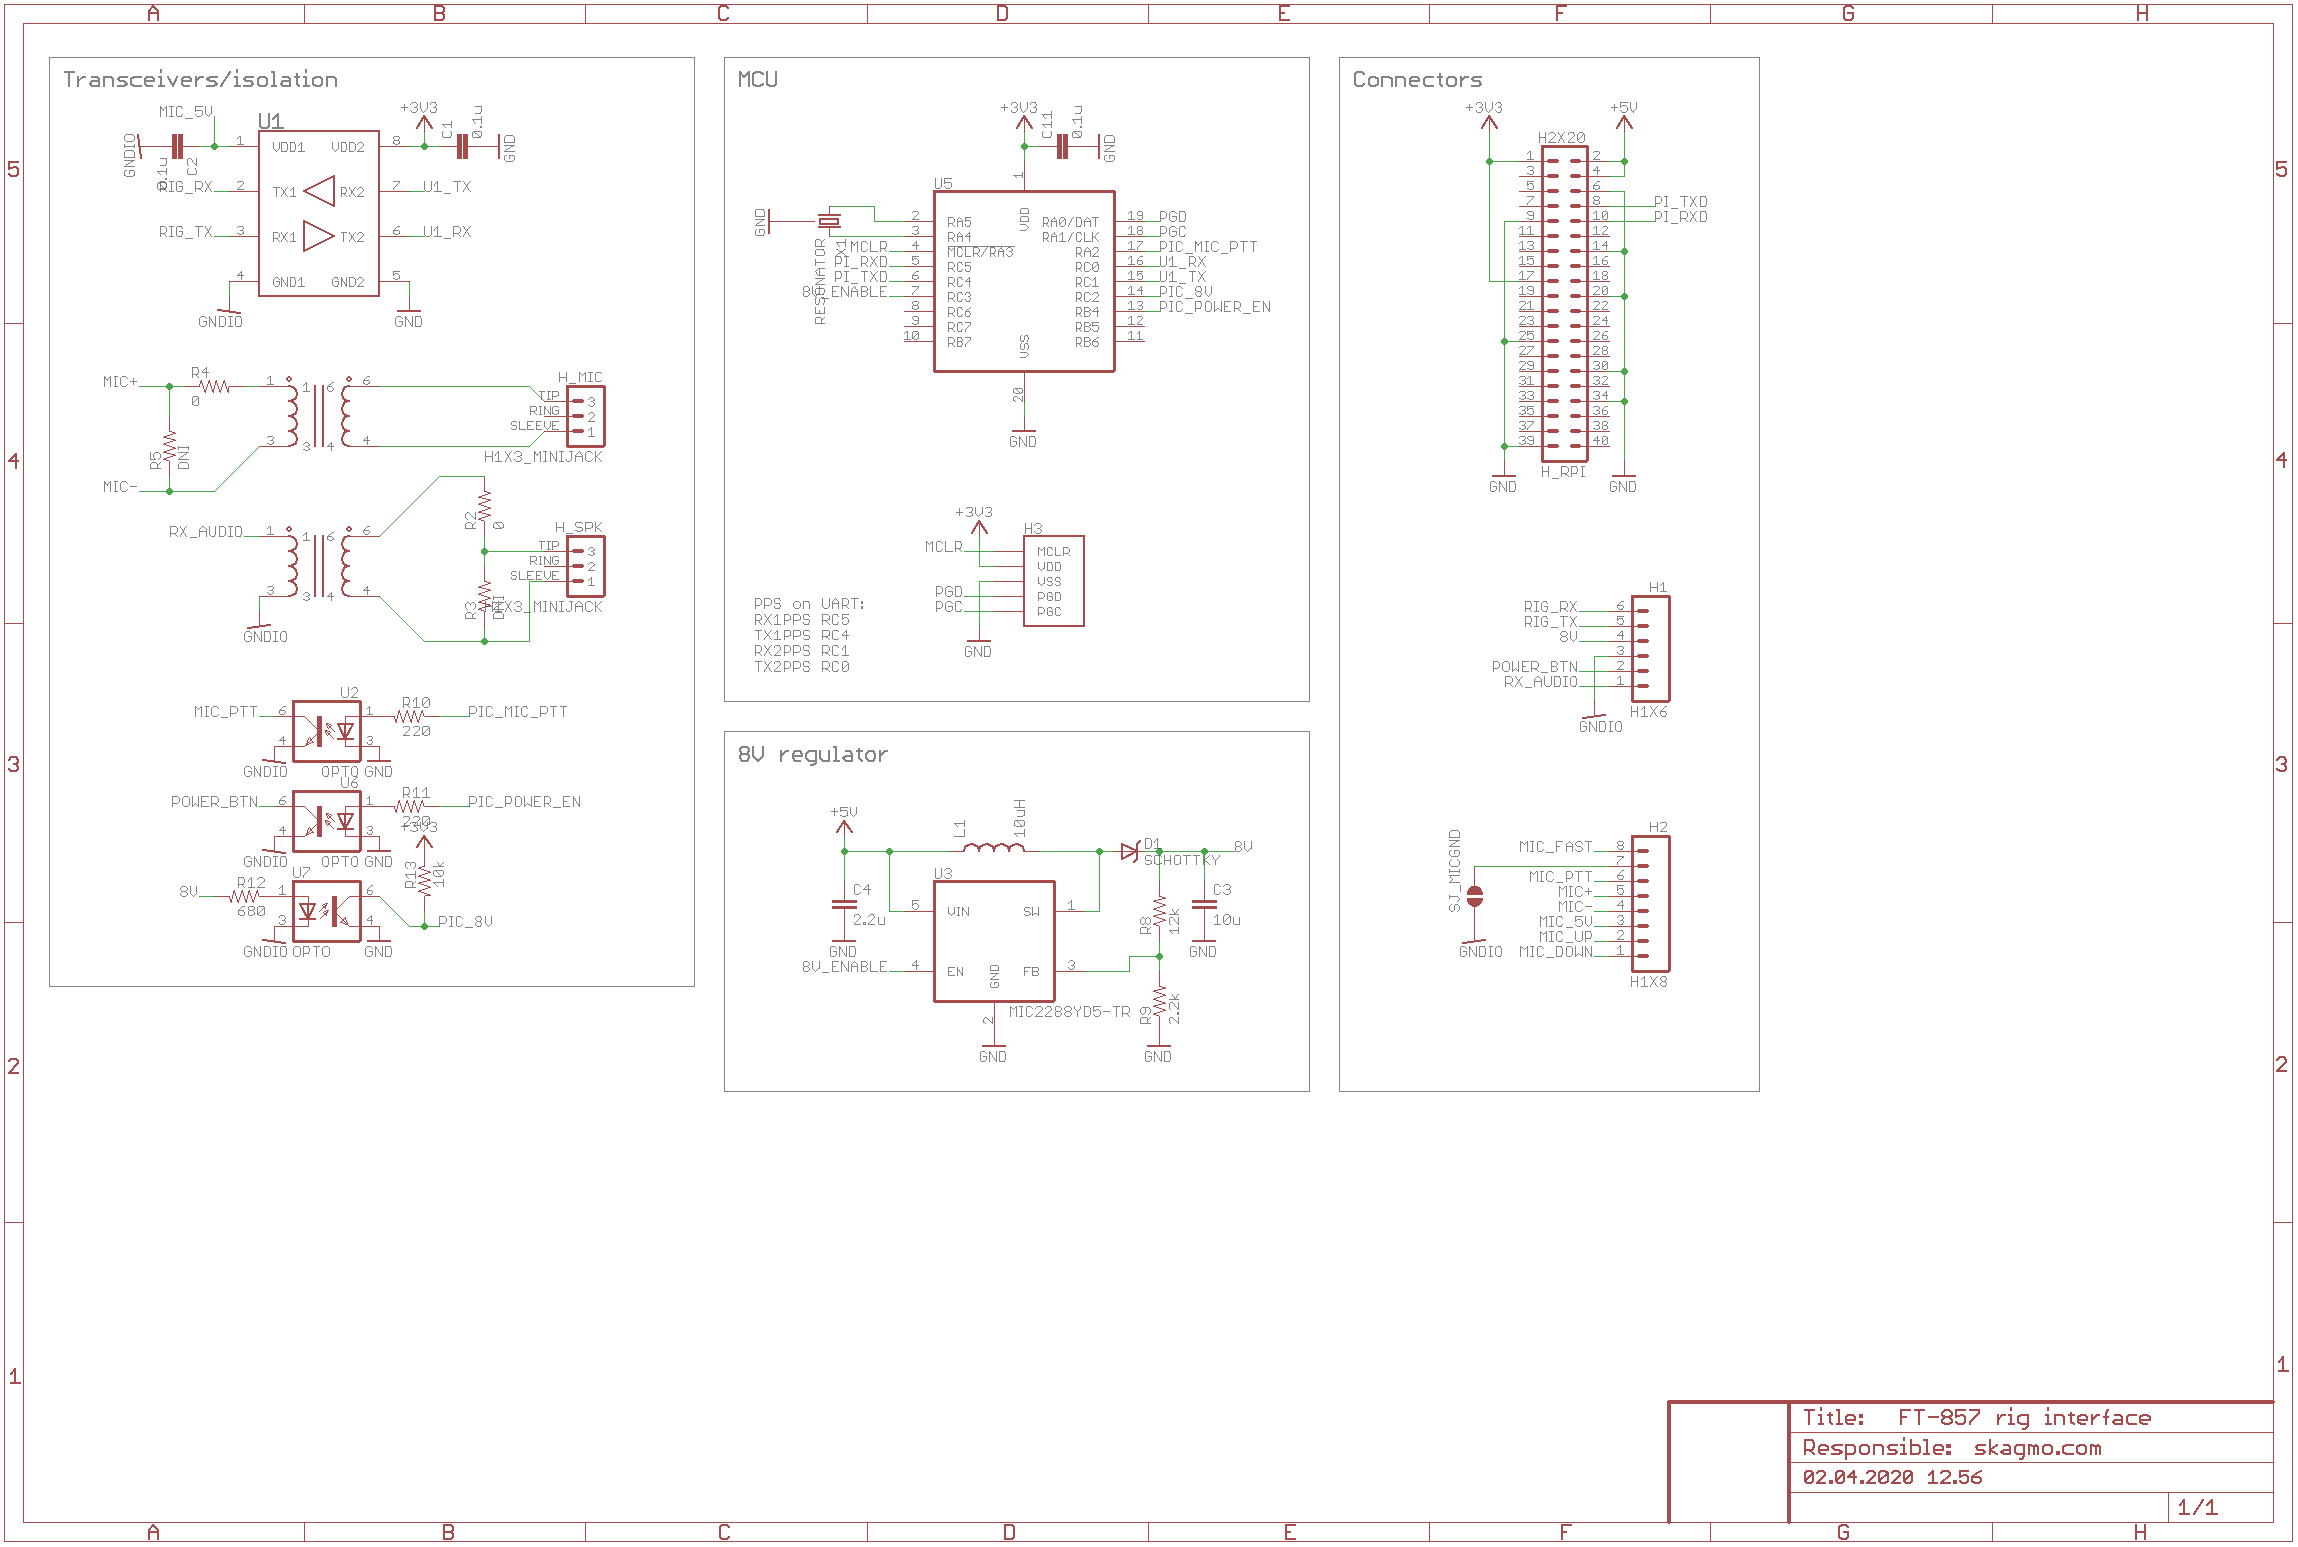
Attempt 3 - Microcontroller to emulate remote device
The third approach was to offload all the communication to a microcontroller. The ACKs were generated directly in UART interrupt routines in the MCU so the display/transceiver device would get the packet acked and sent out quickly, and then the complete packet without the ACKs was sent to another UART connected to a Raspberry Pi for forwarding over the internet. This worked great!
There is still a delay before the packet reach the other device, but this doesn't matter as long as it is not very noticeable for the operator. The important part is that the packets gets sent out in full speed on the UART interface, so the Yaesu side UART doesn't become a bottleneck.

Timeout logic:
- Send HEARTBEAT signal over host UART: If no other traffic has been sent for a while, send HEARTBEAT (not a Yaesu definition) to reset remote side communication timer.
- Any packet received from local device: Reset communication timer.
- Display sends KEEPALIVE: Just ack locally and reset communication timer.
- Base sends KEEPALIVE: Ack locally and forward KEEPALIVE to display.
- On communication timeout: Turn off 8V on display side and stop acking on base side.
- Yaesu side UART RX: No buffering, sent right to parser to generate ACKs ASAP and push to host side outgoing buffer.
- Yaesu side UART TX: One transaction pending at a time. Only attempts to send when not busy receiving from Yaesu device.
- Host TX: Medium sized buffer. Baud rate is higher than Yaesu side to ensure this is not a bottleneck.
- Host RX: Large buffer (2048 byte), can accumulate many packets from IP side, but only one packet is popped at a time as the Yaesu side link is ready.
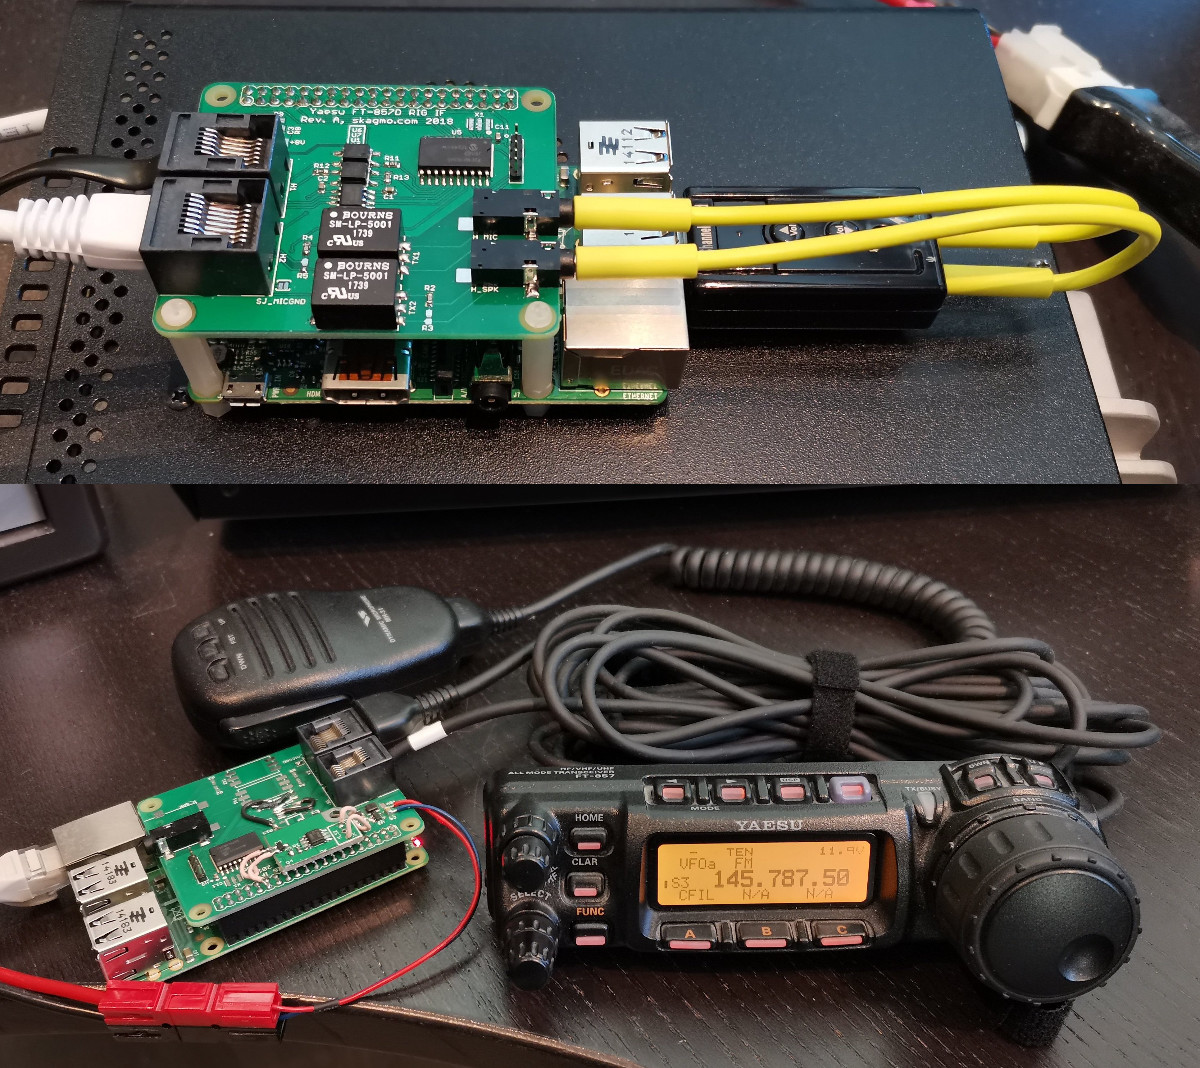
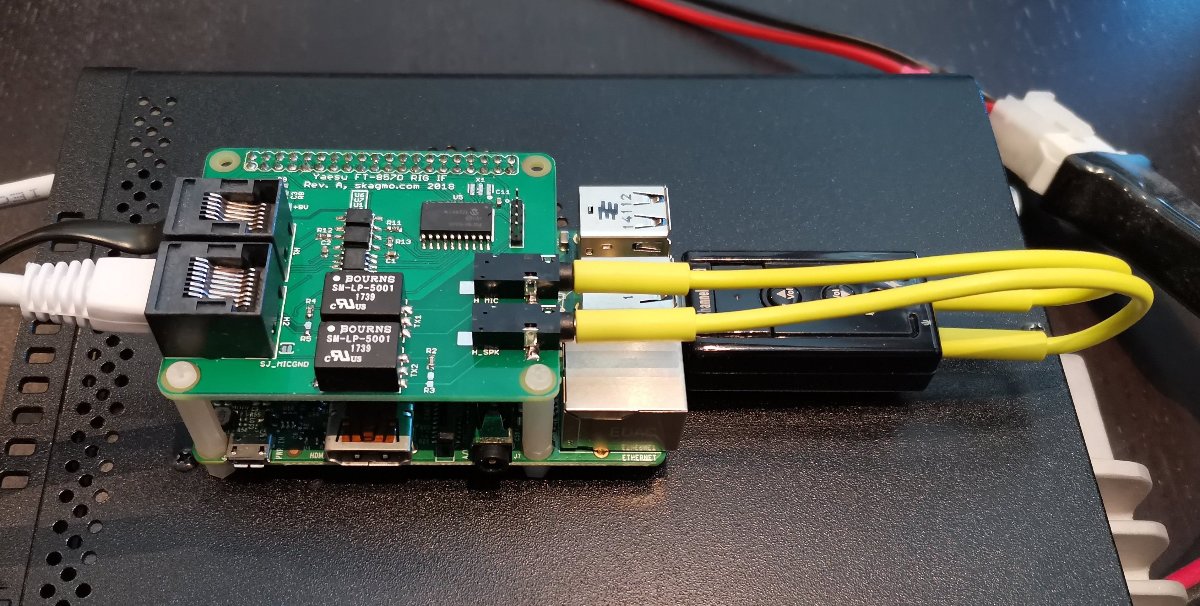
PCB
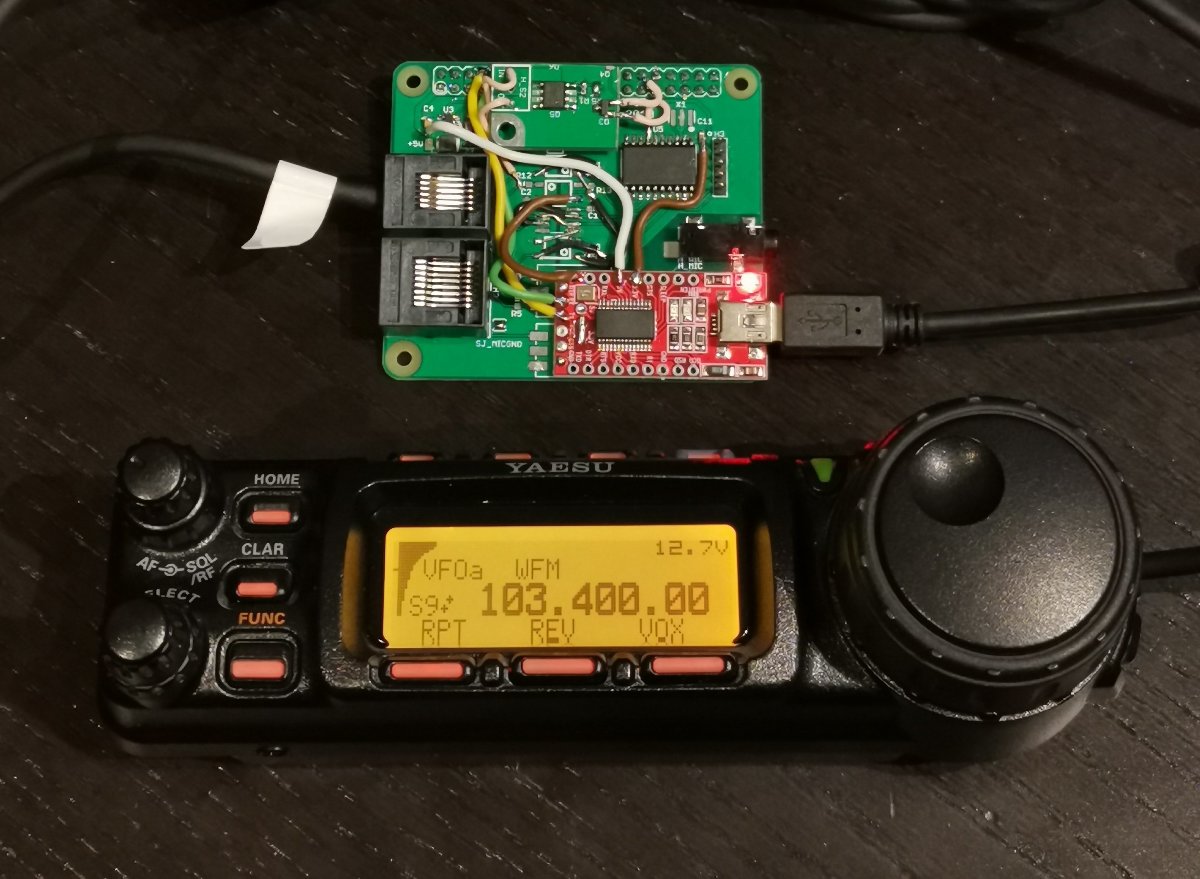
Two pretty different designs were needed in each end, but for now I used the same design and a lot of wire straps on the display side. I started off with the panel side PCB as a Raspberry Pi daughter board, but figured out it was better to skip the RPi on this side and have a USB interface I could plug straight into my desktop computer.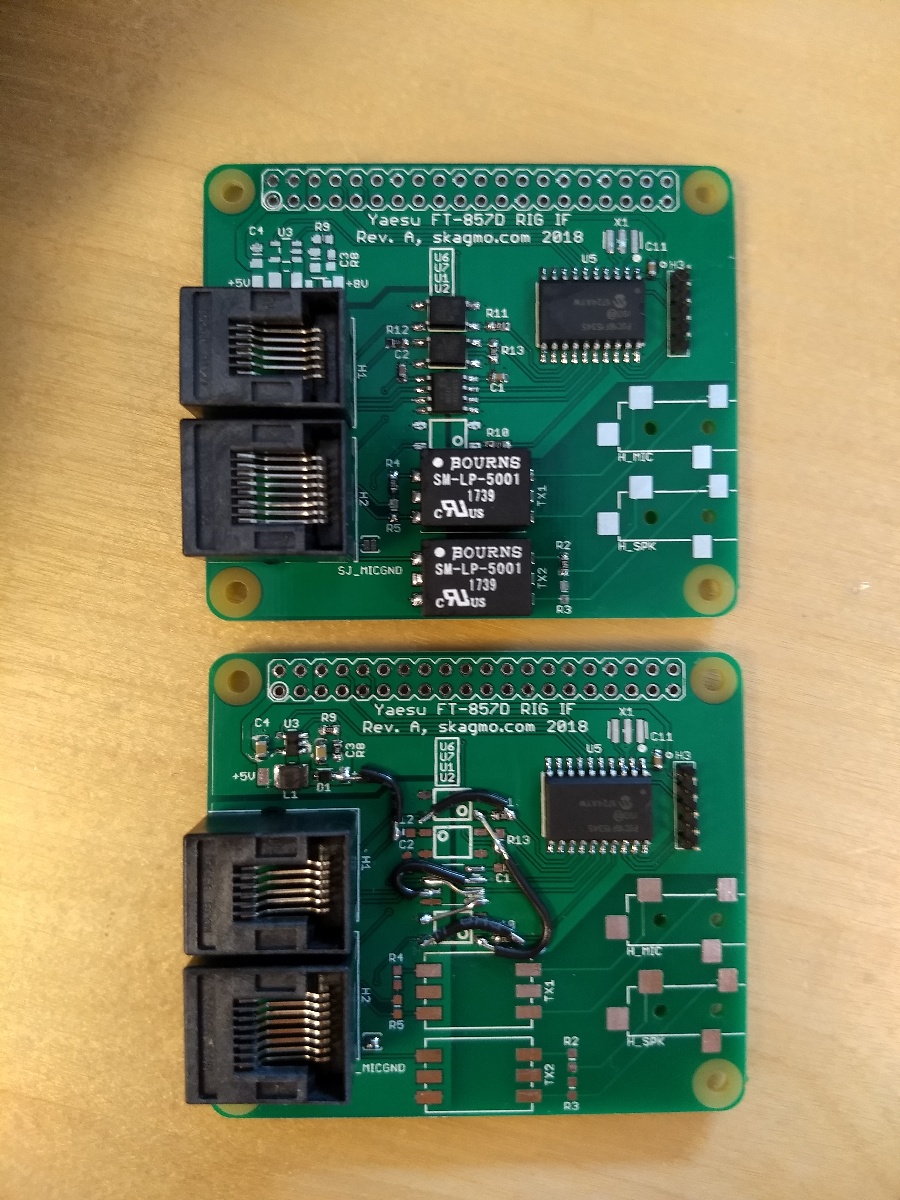


Transferring audio
I tested some headless audio streaming applications on a Raspberry Pi:- ffmpeg: Too low level. Too much work to get something working with low latency and streaming only on PTT.
- Twinkle: SIP is a proven protocol and works well, but with continous bidirectional audio streams and no PTT signalling it is probably not the way to go.
- MumbleRF: Mumble seems perfect for a radio application, with streaming only on activity/PTT. Would have loved to use a Qt/C++ application not far from the original Mumble application, but unfortunately it didn't build on either Debian Buster or Stretch, and I didn't bother diving into the code.
- Pymumble: Way too high CPU consumption (about 80% on RX only with an RPi B+) and stuttering sound.
- Talkiepi: Looks decent, but settings are hard coded and there is no support for GPIO triggering on incoming stream.
- Talkkonnect: Supports all the GPIO configurations I need. Stable audio. GPIO output on incoming stream, and GPIO input to start outgoing stream. I was happy after some modifications to reduce PTT delay etc.
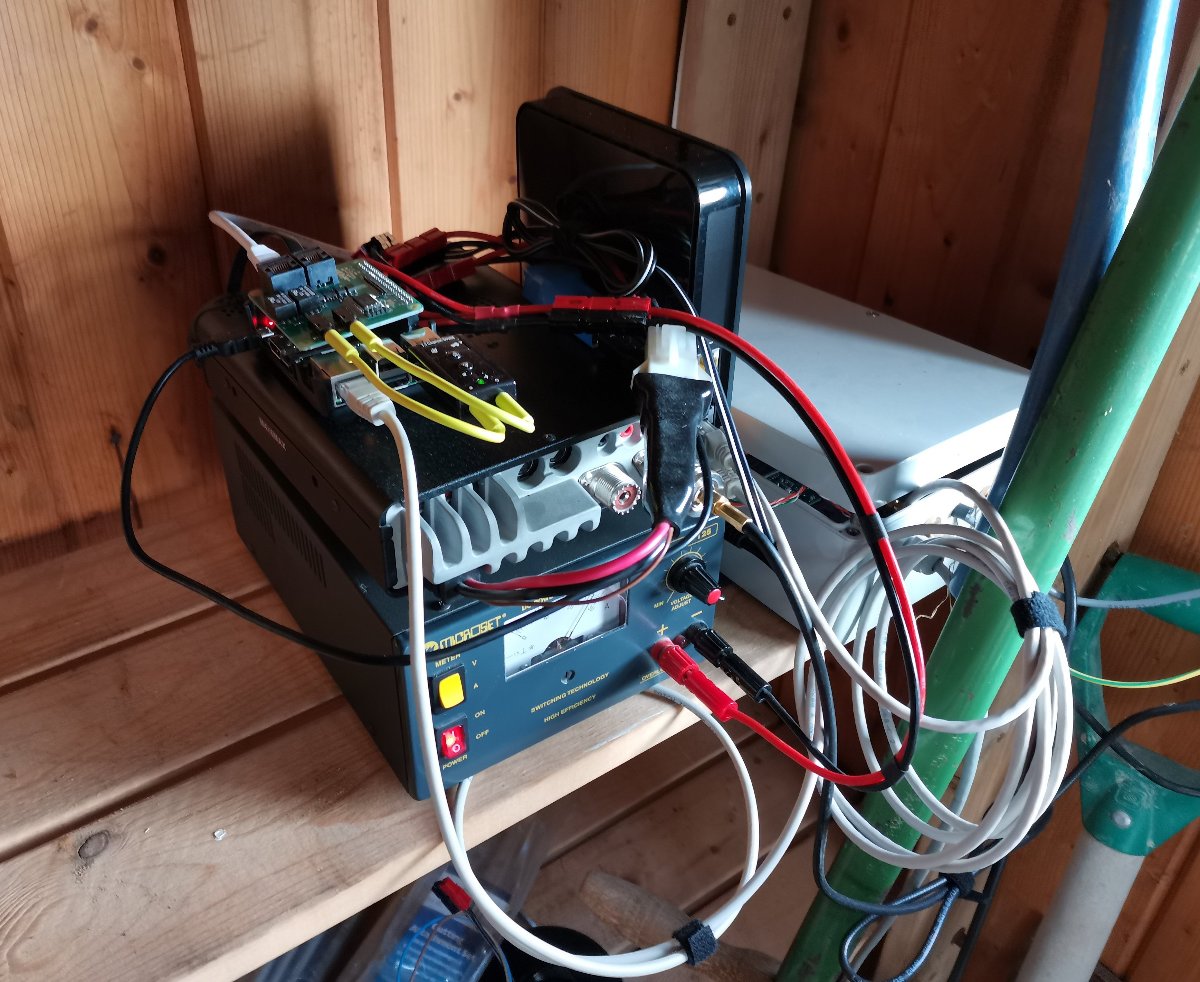
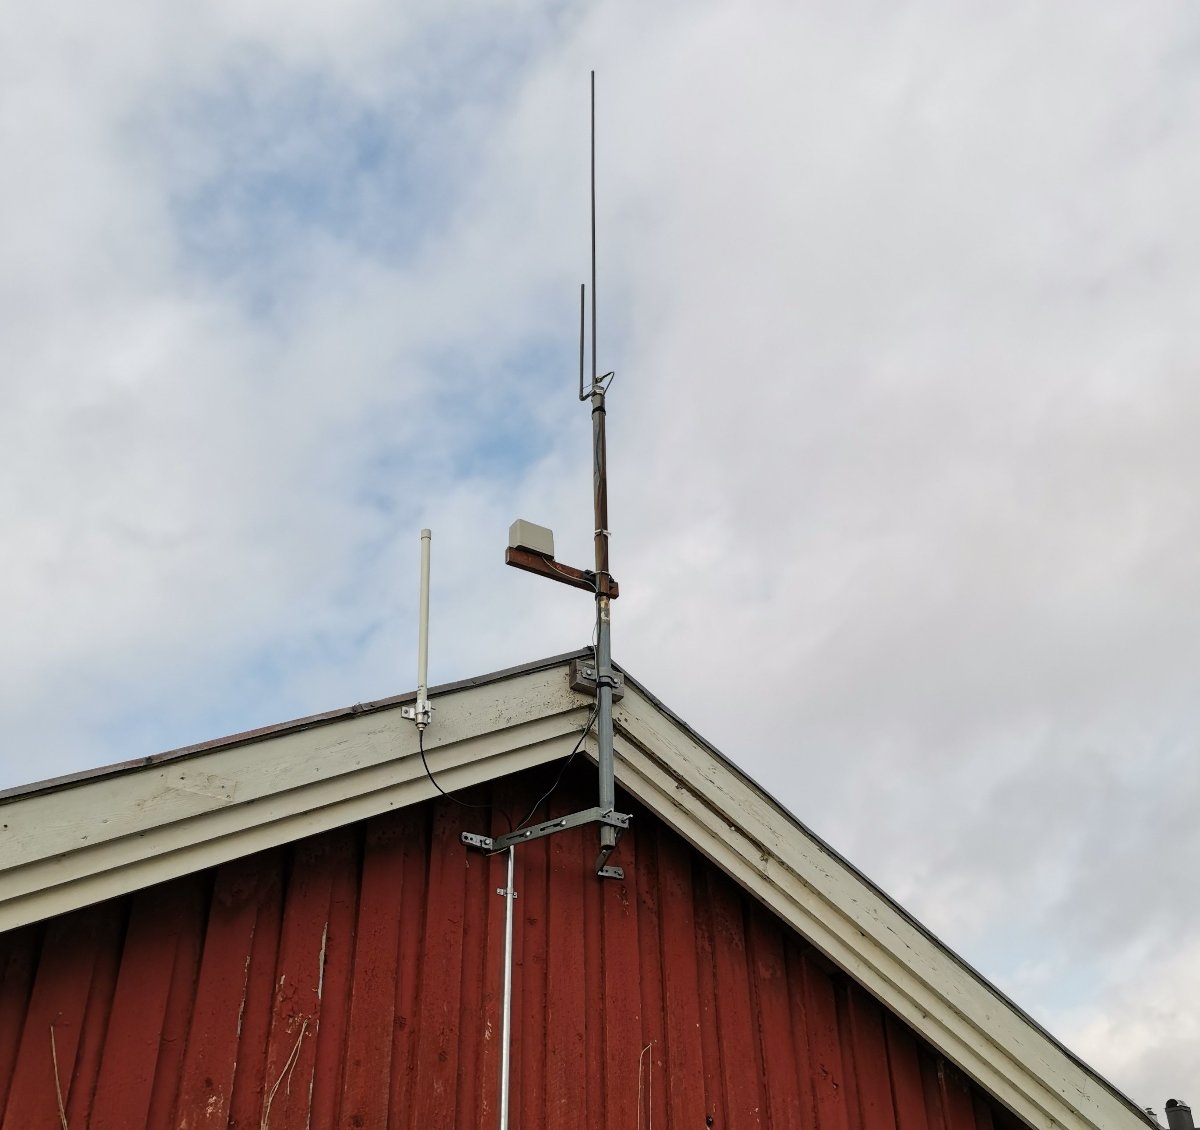
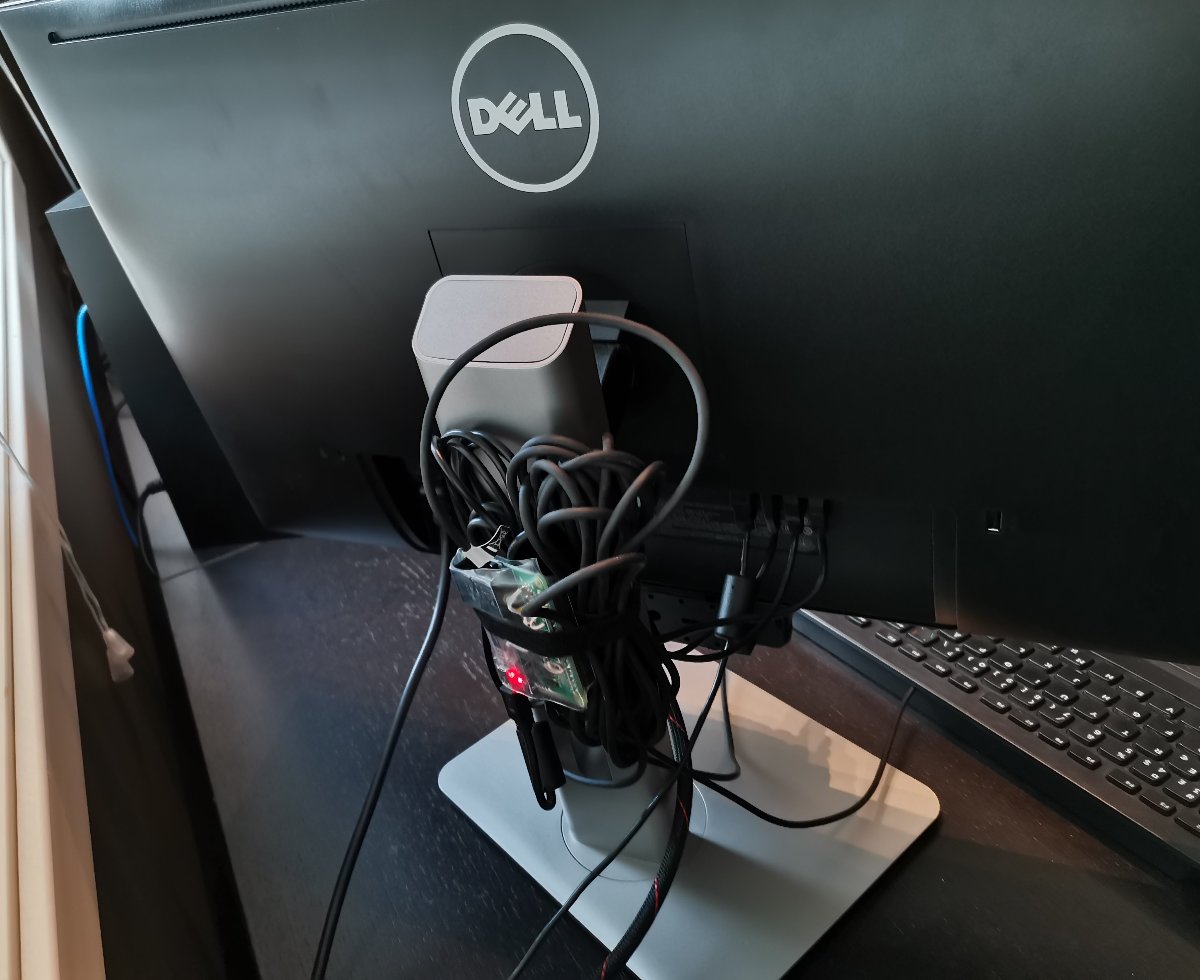
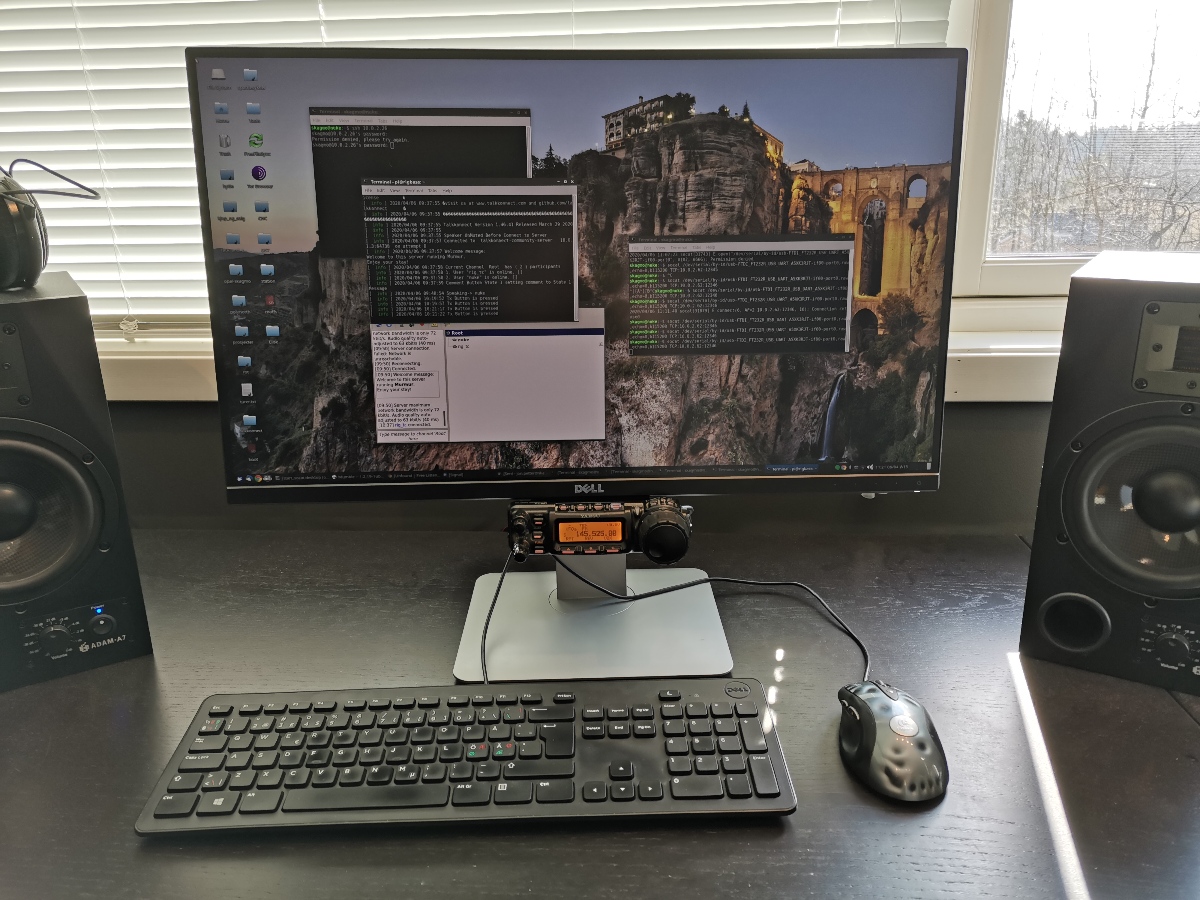
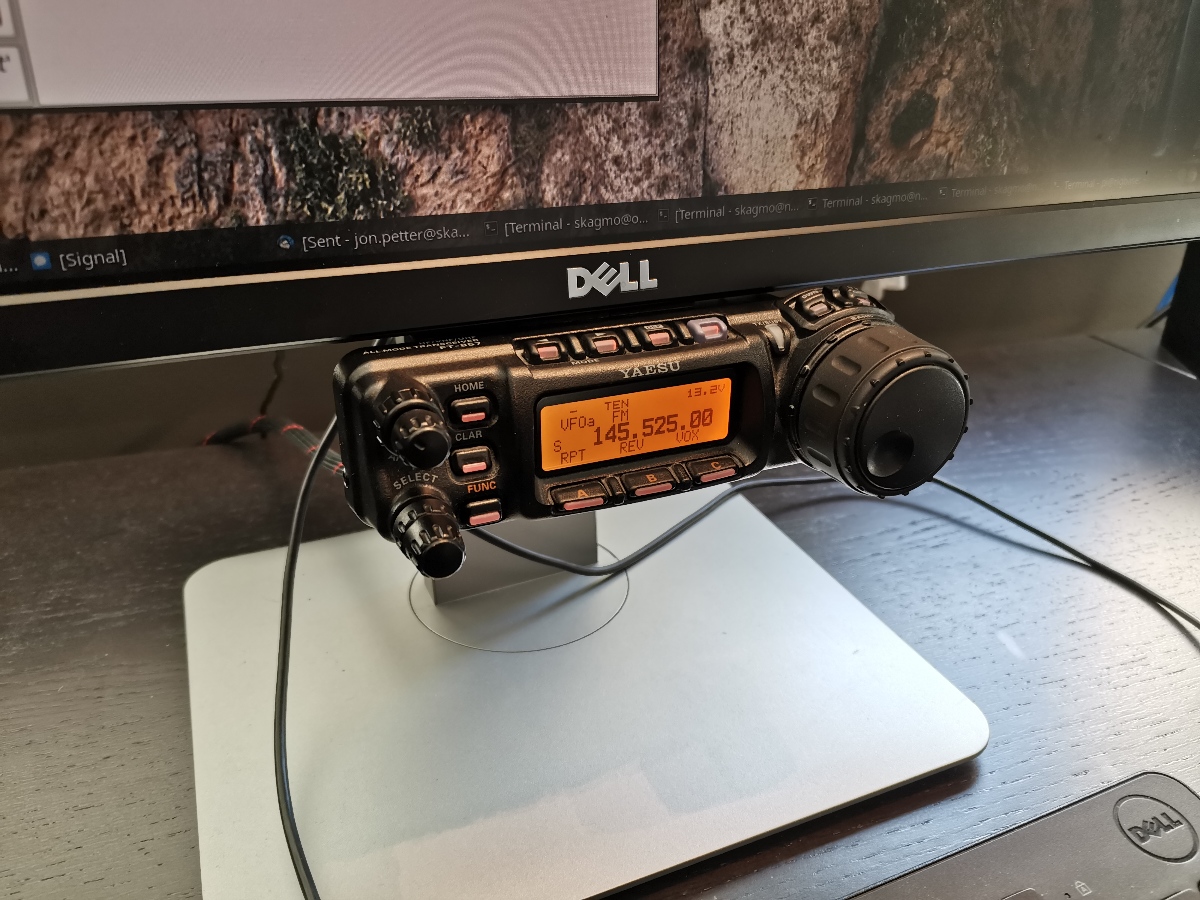
Working test setup
I put the radio gear in an old shed pretty close to my house for a first test. The display side electronics was simply strapped to my computer monitor and plugged into the USB hub in the monitor. Very easy and simple setup.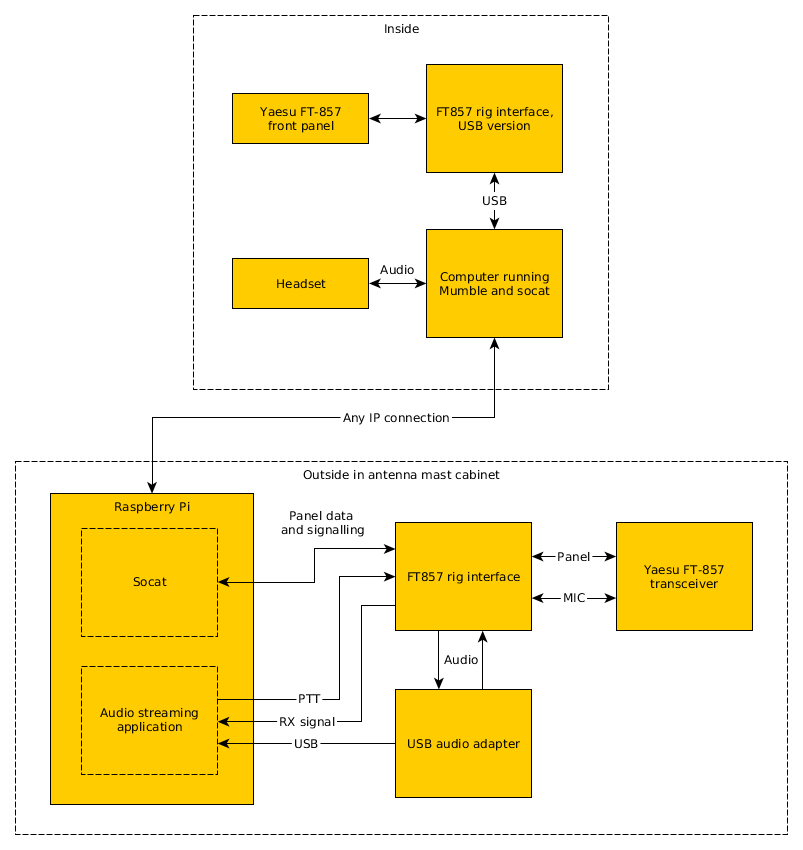
This video shows the display side being remotely operated. I'm using a keyboard shortcut as PTT trigger. This starts streaming audio to the transceiver and keys the transceiver. (As I'm tuned to a broadcast radio frequency the radio does not transmit.)