
PiHAT - Rasberry Pi Home Automation Transmitter
|
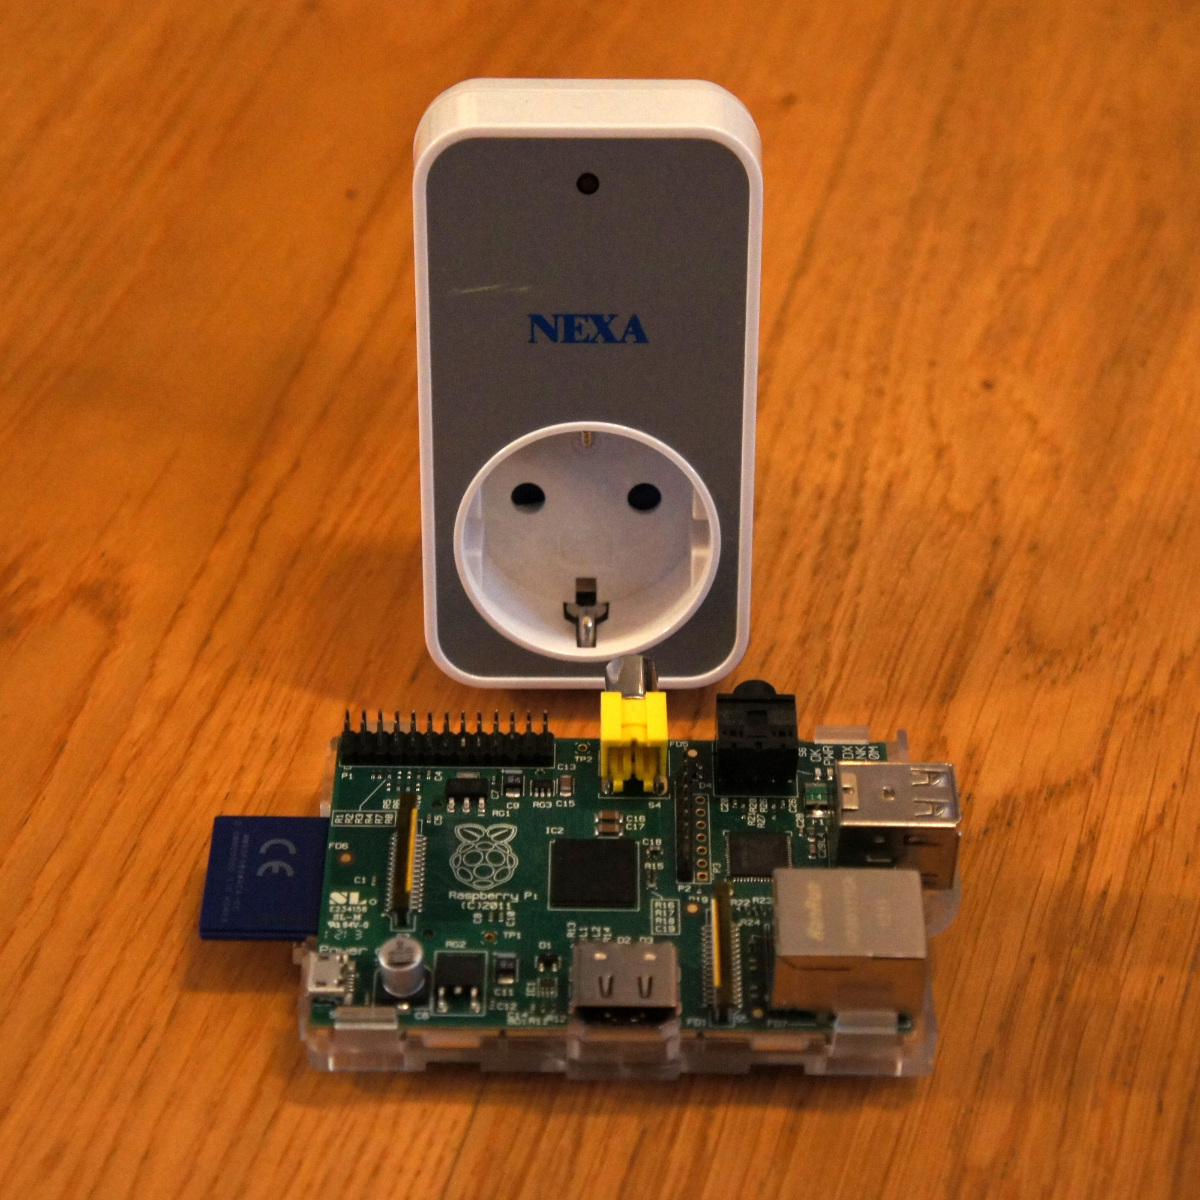
SummaryThis open source project lets you control wireless remote power switches (initially only Nexa-switches) from your Raspberry Pi without any additional transmitter hardware (only a filter)! |
Introduction
In the beginning of december, two guys discovered how to use the Raspberry Pi as an FM radio transmitter using a fractional frequency divider already in the Raspberry Pi SoC. Their project was called PiFm. The very first thing that came to my mind was using the same technique to make a 433.92 MHz amplitude shift keyed home automation transmitter much like the transmitting capability of the MultiTRX. A few problems occured during the project, but the program is now fully functional and can control Nexa power switches.Generating the RF-signal
Section 6.3 in the datasheet for the Broadcom SoC in the Raspberry Pi states that the maximum frequency for the clock generator is ~125 MHz, but it can easily be used up to around 200 MHz with reduced signal quality in a digital perspective. Still, this is not high enough, as we want a signal at 433.92 MHz.The clock generator in the Raspberry Pi generates a square signal. This is normally considered bad in an RF-application, as a square signal is built up of a fundamental frequency signal with an unlimited amount of odd harmonics. In this project, the square signal was the answer rather than a problem. By programming the clock generator to operate at 144.64 MHz, a third harmonic almost as strong as the fundamental frequency was generated at 433.92 MHz.
A problem, however, is that the fundamental frequency is in the middle of the amateur radio 2-meter band, and the other odd harmonics are very strong too. The solution to this problem was to make a band pass filter at 433.92 MHz.
Testing with LC-filters proved that this doesn't provide the necessary attenuation at 144.64 MHz and the fifth harmonic, so a SAW-filter should be used. A cheap 433.92 MHz SAW-filter can be bought here. This provides about 60 dB attenuation at the frequencies we want to filter out, and the insertion loss is about 2 dB. Build instructions are as follows:
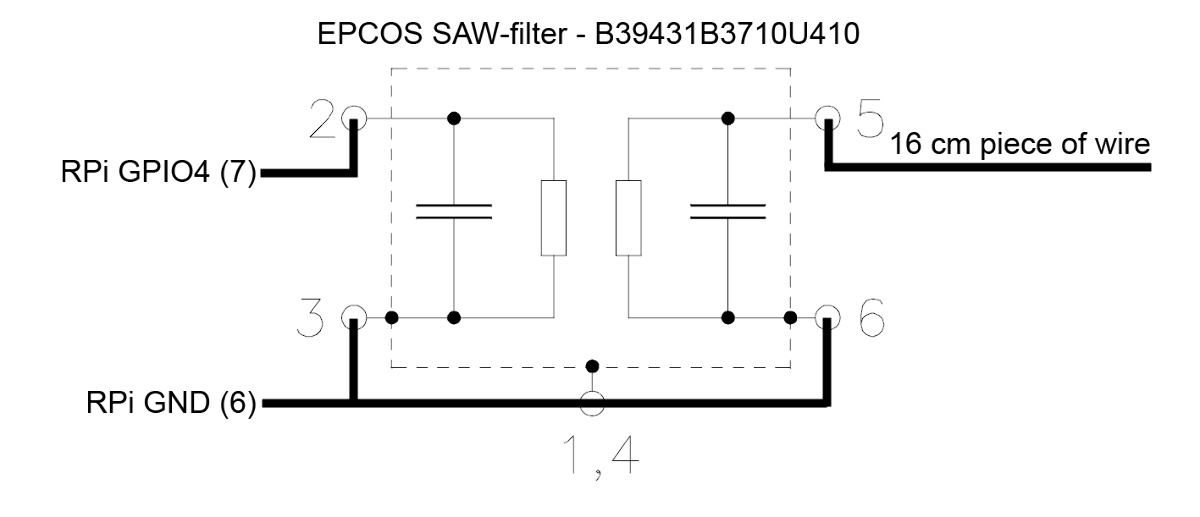
The desired signal at 433.92 MHz is actually very good, as the clock generator has very little phase noise compared to typical cheap ISM-band transmitters.
A quick calculation estimates the RF-power of the 433.92 MHz sine to be V^2 / R = ( 1.2 V / (3*2*sqrt(2)) )^2 / 50 ohms =~ 0.4 mW.
Getting started
Please note that without any additional filter, this program will transmit signals in restricted frequency bands.I take no responsibility for the problems you might be causing yourself or others by using this software. Output power has not been measured yet, and it might be illegal to use in your country even with a filter.
The RF-signal can be tapped at GPIO pin 4:

To use the software, do as follows on you RPi:
- wget http://www.skagmo.com/content/projects/22_pihat/pihat_0.1b.zip
- unzip pihat_0.1b.zip
- cd pihat
- chmod +x pihat
- Put your Nexa receiver in pairing mode
- Transmit a long signal at the desired ID and channel: ./pihat --repeats=50 --id=1 --channel=0 --state=1
- After a successful pairing operation, transmit eg. an off-signal: ./pihat --id=1 --channel=0 --state=0
Further development
Naturally, more protocols should be added - feel free to extend the functionality and drop me a mail.On a wider scope, the clock generators in the Raspberry Pi can be used for a lot more, so I encourage especially amateur radio operators to try this for FSK-modes. I recently tested generation of RTTY-signals at the 40-meter amateur radio band, and the signal quality is surprisingly good when a band pass filter is implemented. The frequency resolution increases significantly at lower frequencies, and the frequency register can be updated very fast, so there are almost no technical limitations for low-speed amateur radio modes.