Mount everything in Eurorack

|
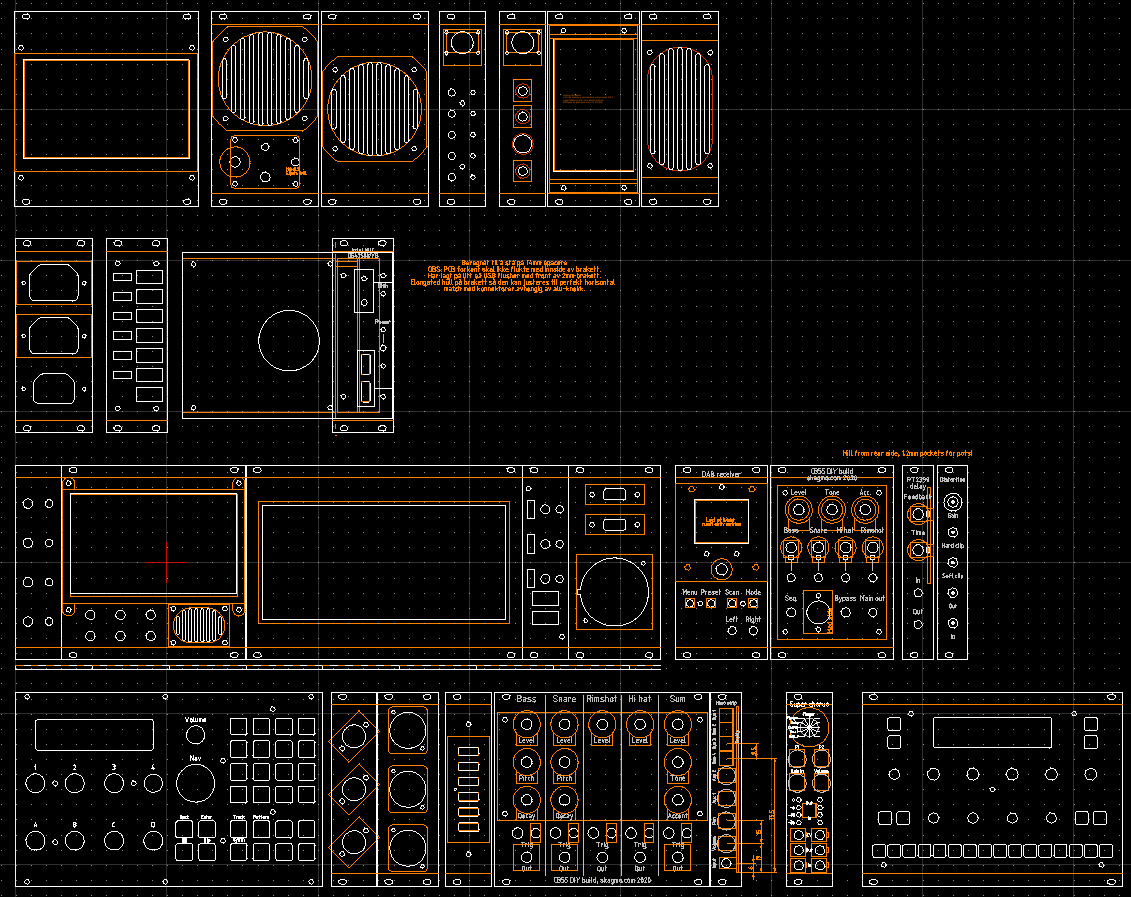
SummaryThe Eurorack modular synth standard divides a 19" rack into smaller units. Inspired by this I have mechanically redesigned everything I had floating around on my desk so it could be rack mounted and let my CNC router eat through aluminium sheets all day and night. This post is meant to give you some ideas on how you can mount everything in Eurorack. |
Introduction
You have probably heard of the 19" rack standard. It's a great way of vertically stacking equipment with standarized width and a variable height defined as a multiple of rack units, U (44.5 mm / 1.75" tall). However, each unit is pretty large, always occupying the entire width of the rack. This is where subracks come in. A 19" subrack is a 19" rack module, typically 3U high, which divides the 19" space horizontally into another standardized unit, called HP (5.08mm / 0.2" wide).The 19" subrack is most known from the Eurocard standard, where a ~160x100 mm PCB slides on rails into a 3U subrack, optionally with a front panel. With Eurocard, the PCB and rails holds most of the weight, not the front panel. In recent years, the Eurorack modular synthesizer standard has grown in popularity among synth enthusiasts. In this less strict standard, the modules are typically much more shallow, and the entire weight of the modules are held by the front panel. (There are a lot of other electical and mechanical differences between Eurocard and Eurorack not listed here.)
Mechanically, I've based my modules off the Eurorack standard, as my modules are mostly shallow and doesn't need the support offered by the extra rails in Eurocard.
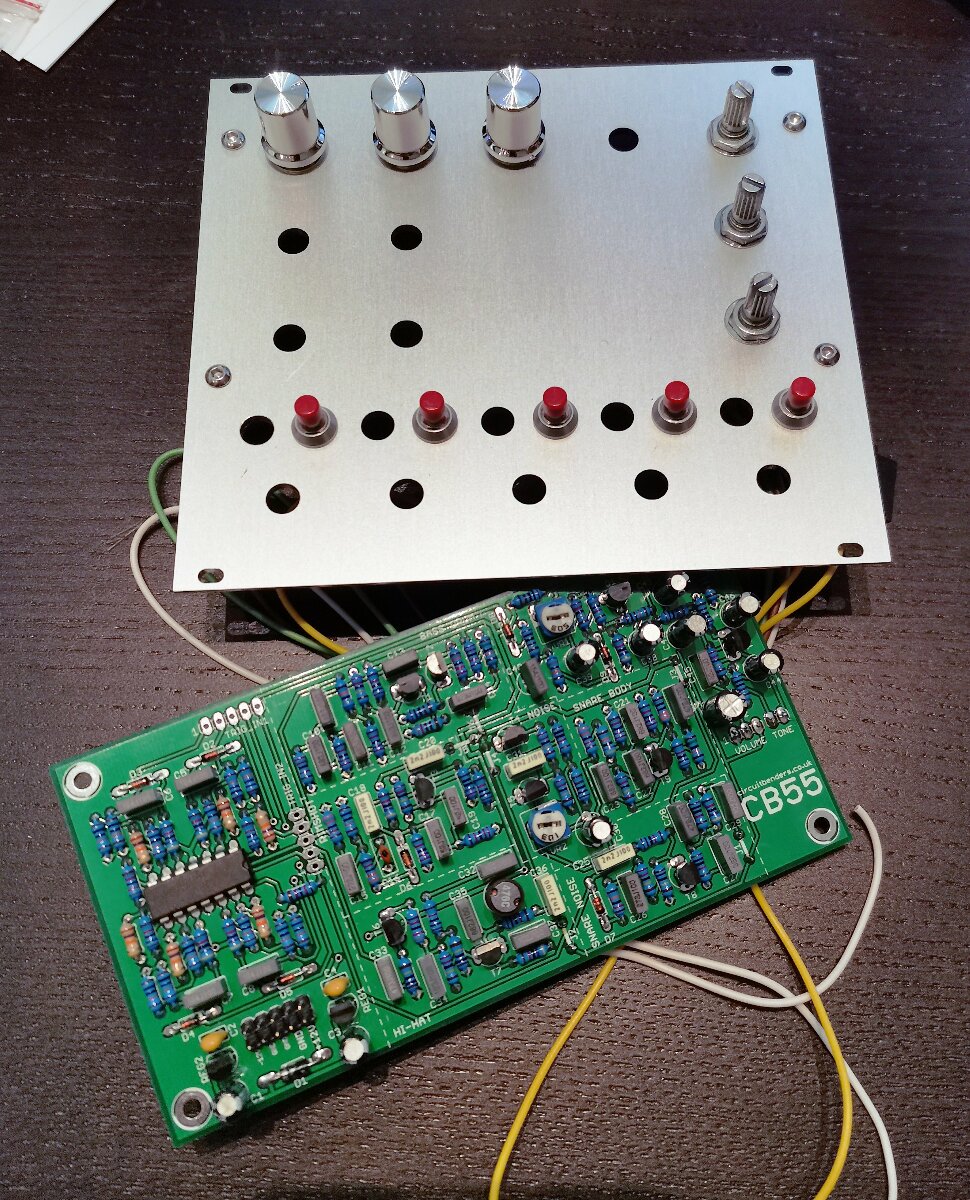
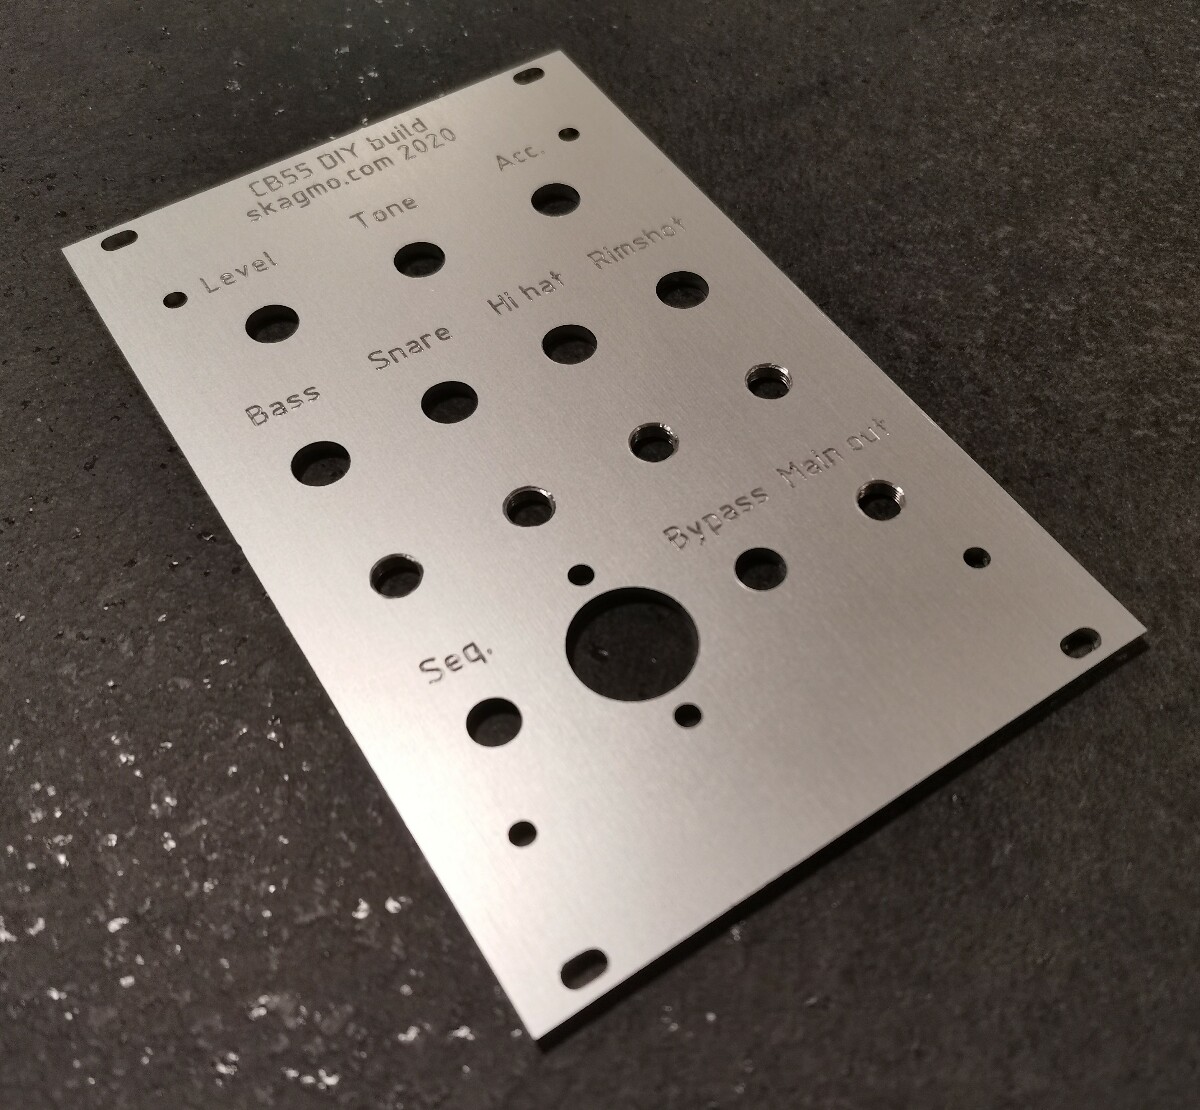
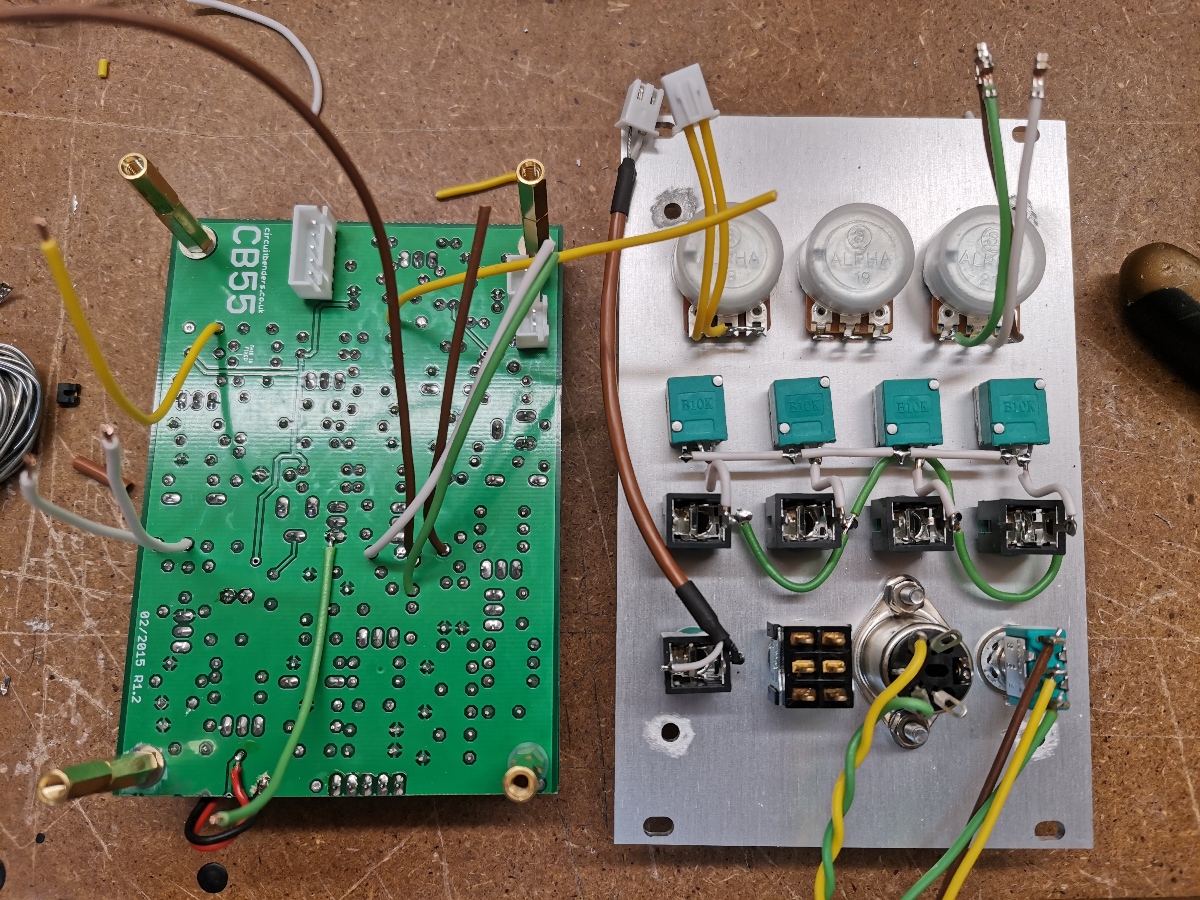
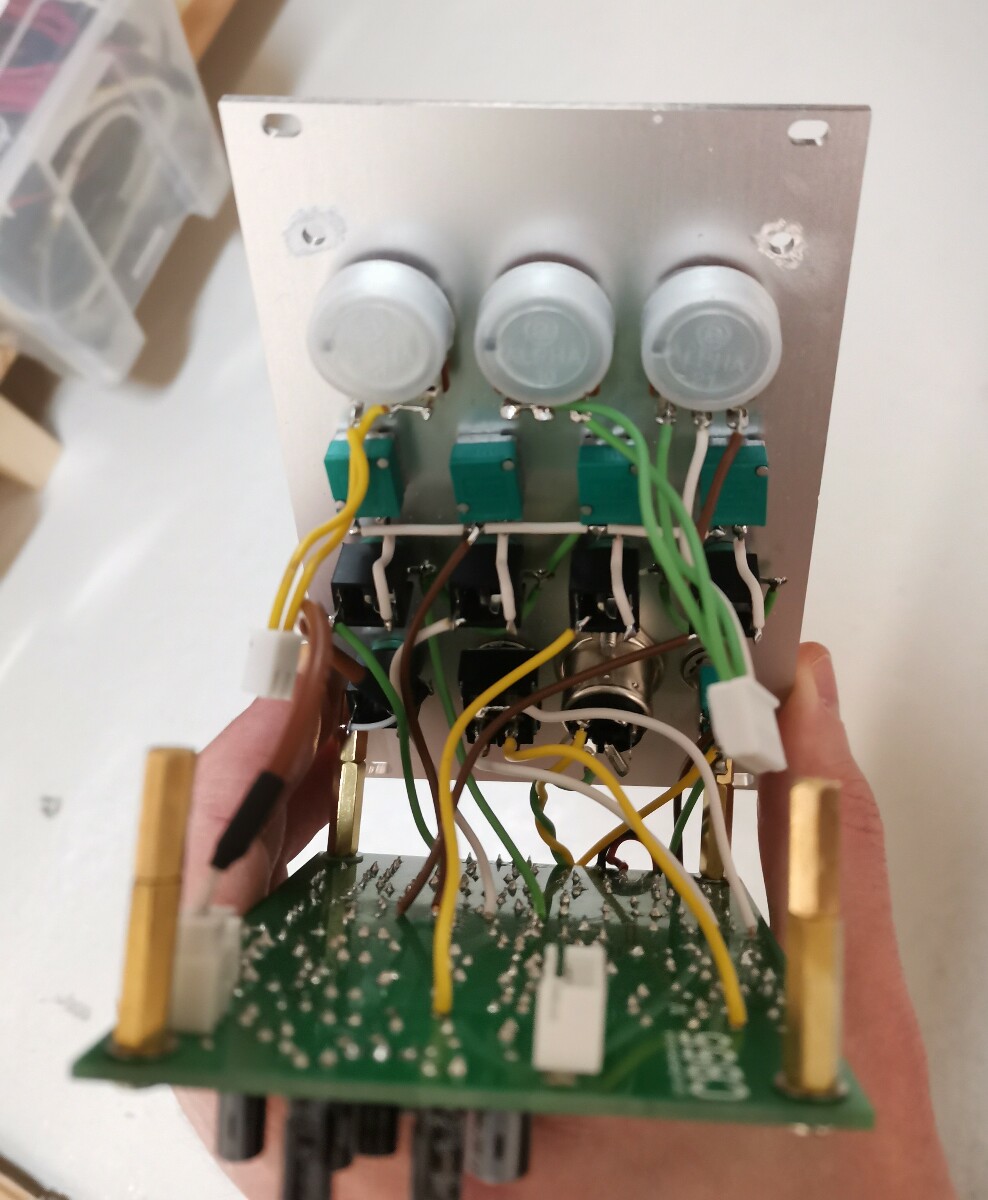
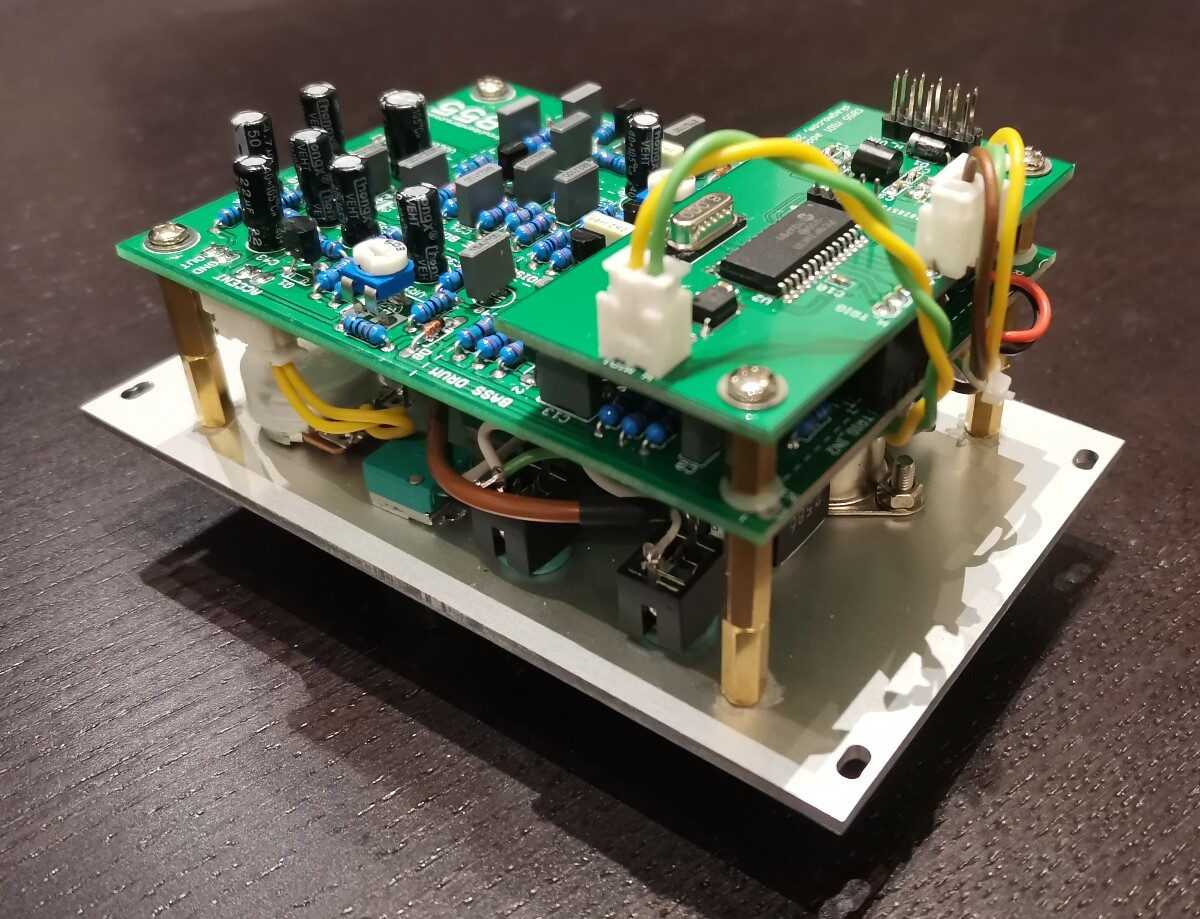
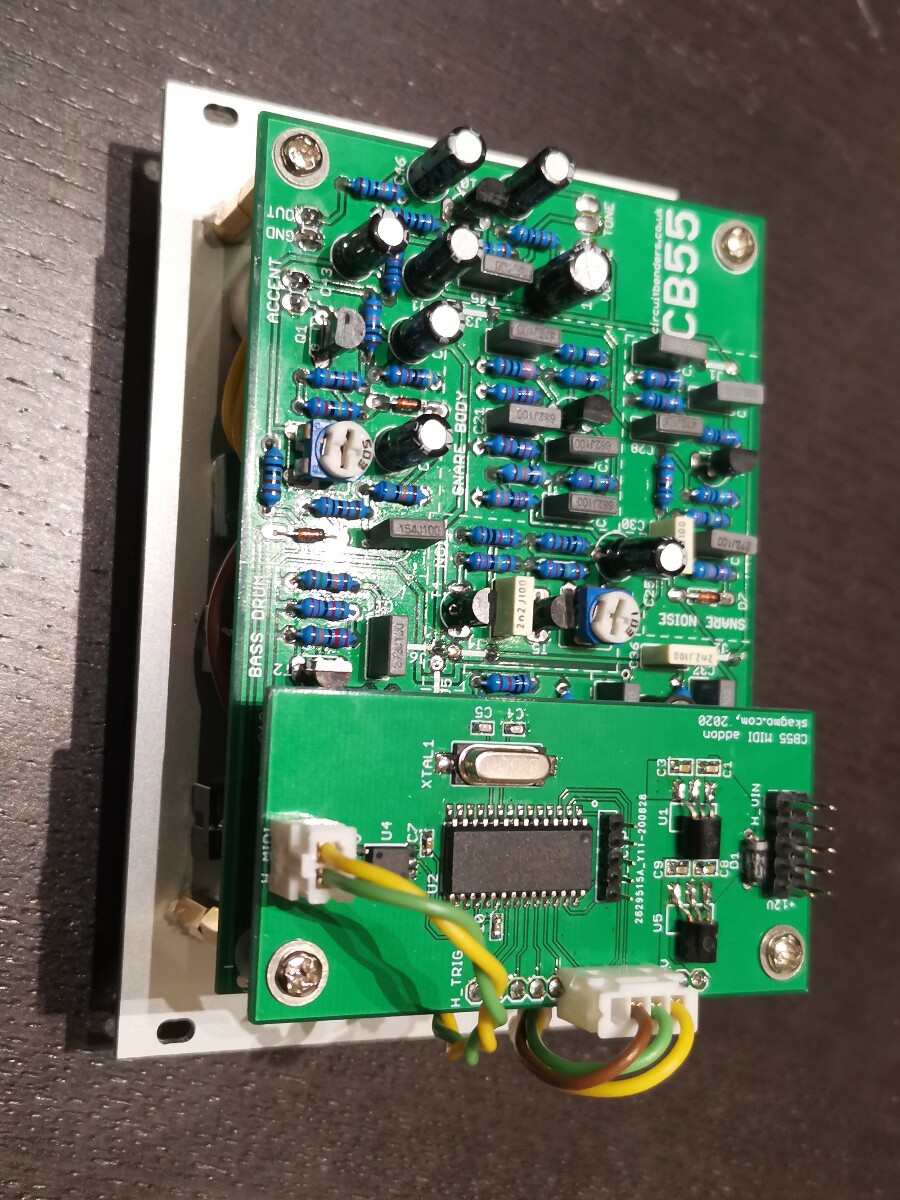
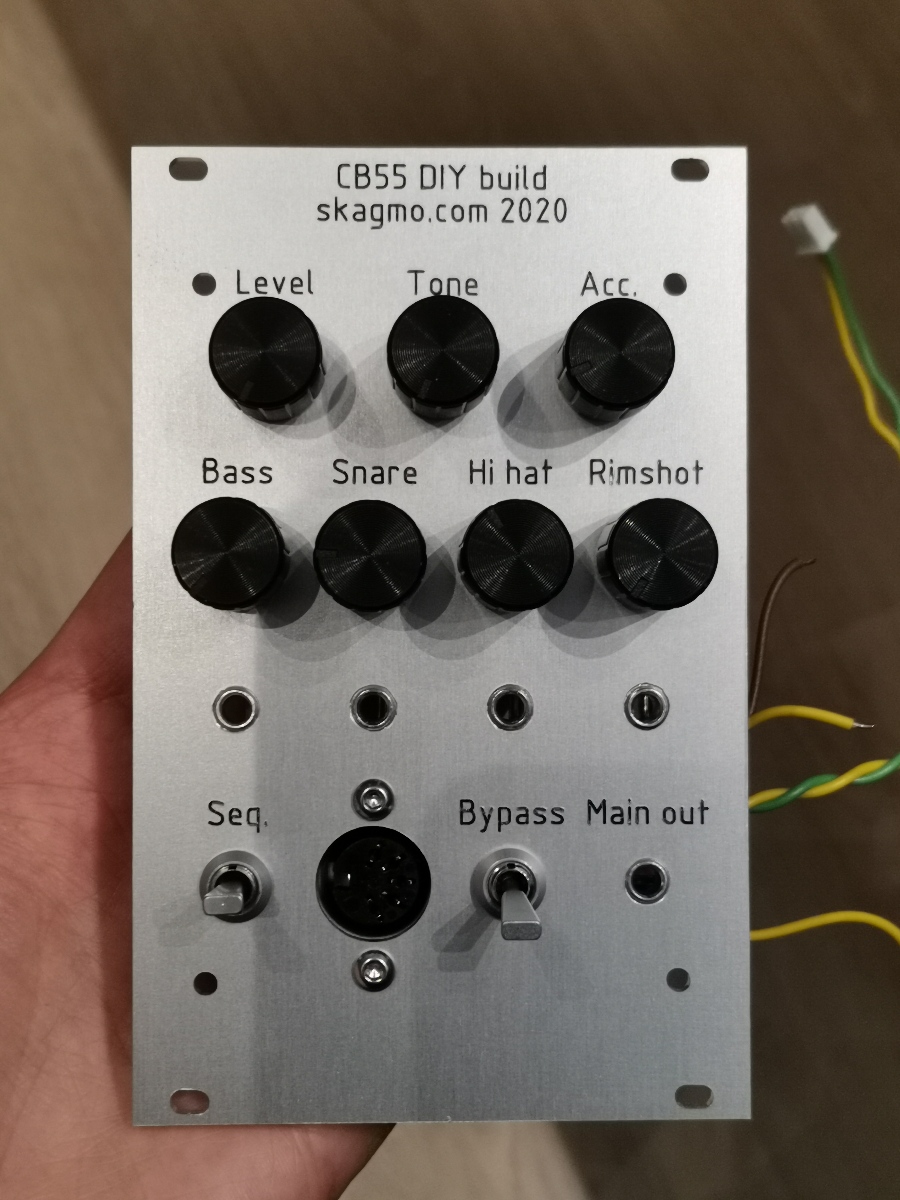
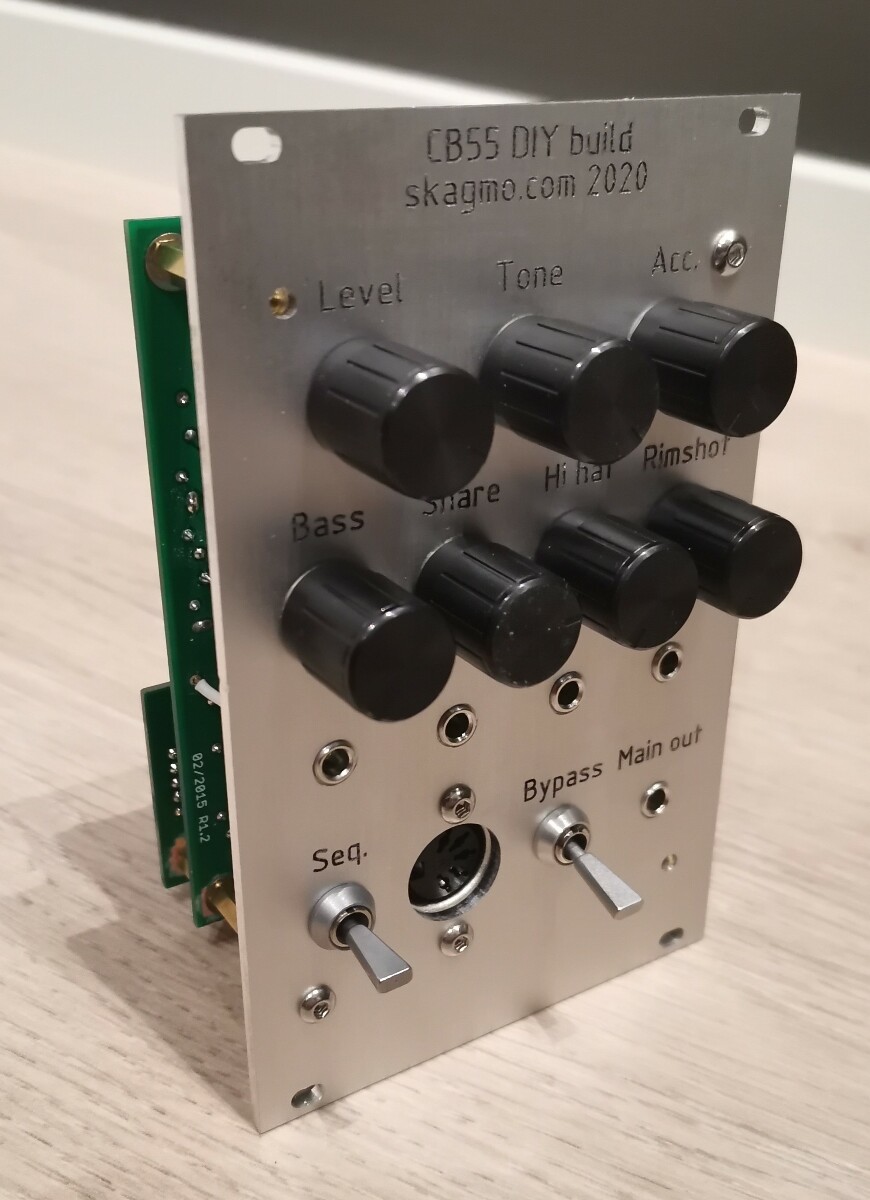
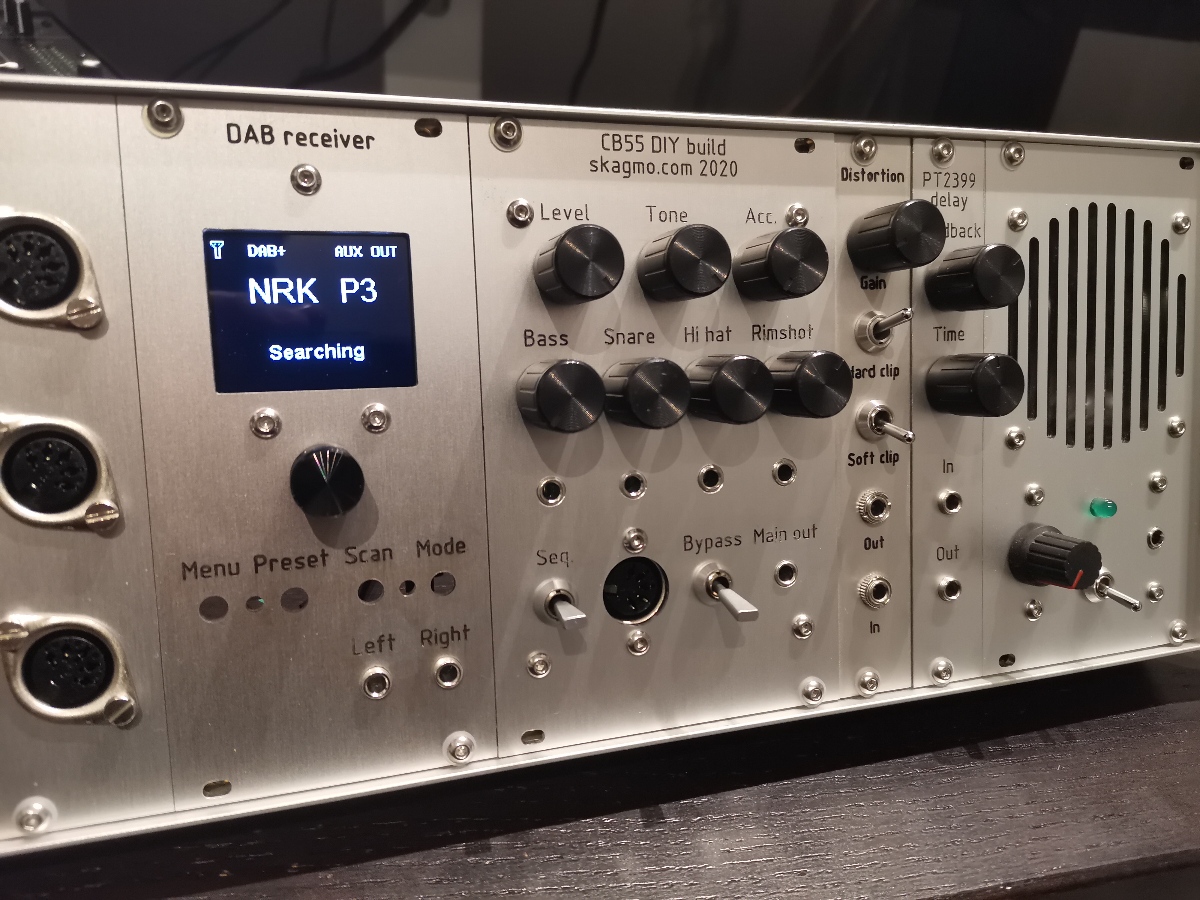
CB55 analog drum machine (16 HP)
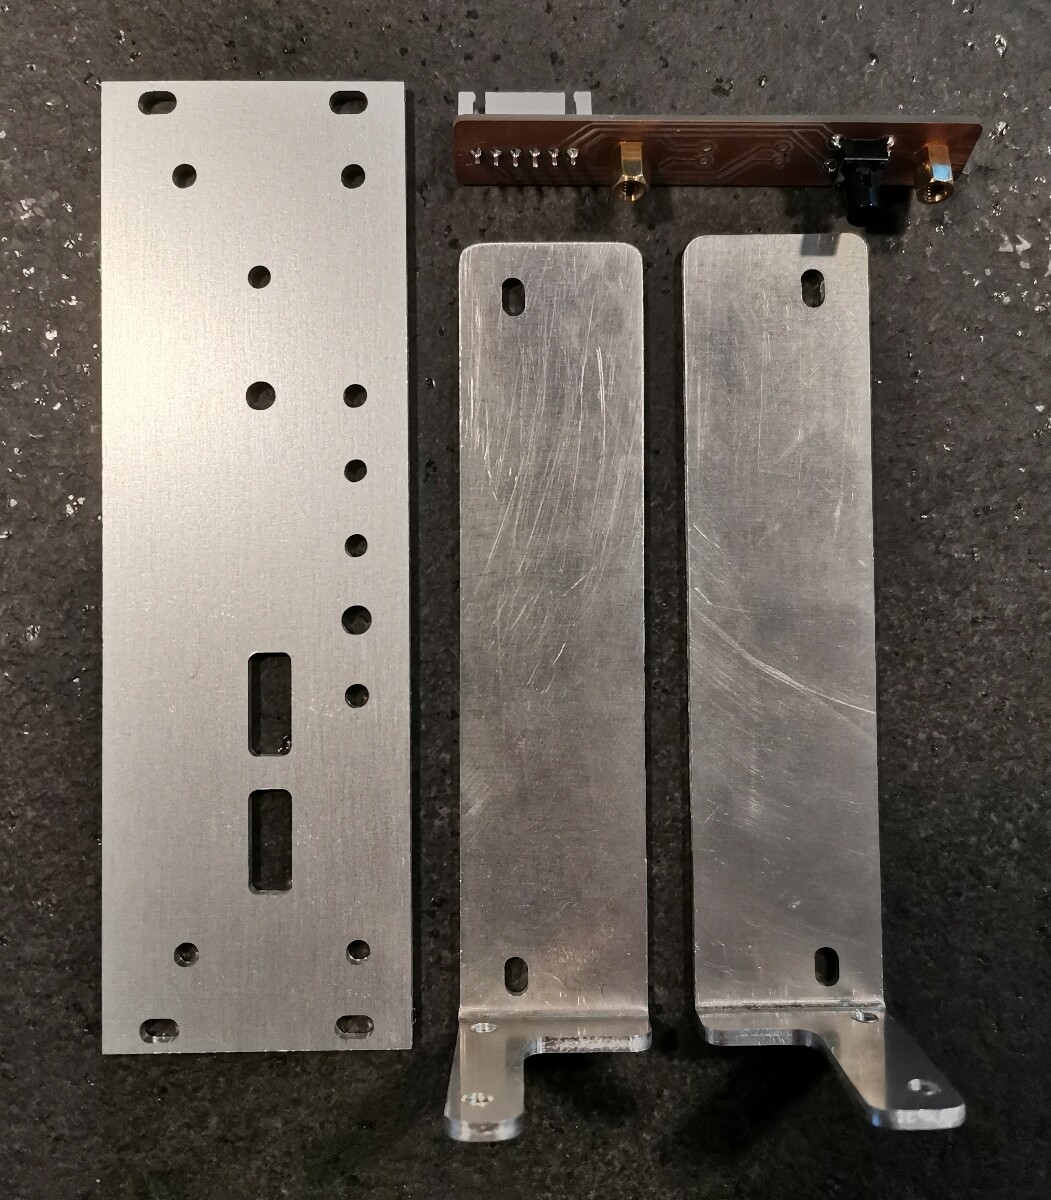
This one is popular to mount in Eurorack. I started off trying to make a 28 HP module, but i didn't see the needs for all the modifications/pots I planned, and I thought the module was too large, so I started over and made a narrow (16 HP) MIDI enabled module.- Based on the Circuitbenders CB55 analog drum machine PCB
- Cut off the entire trigger conditioning circuit and drilled new mounting holes to allow the PCB to be placed vertically behind a Eurorack panel.
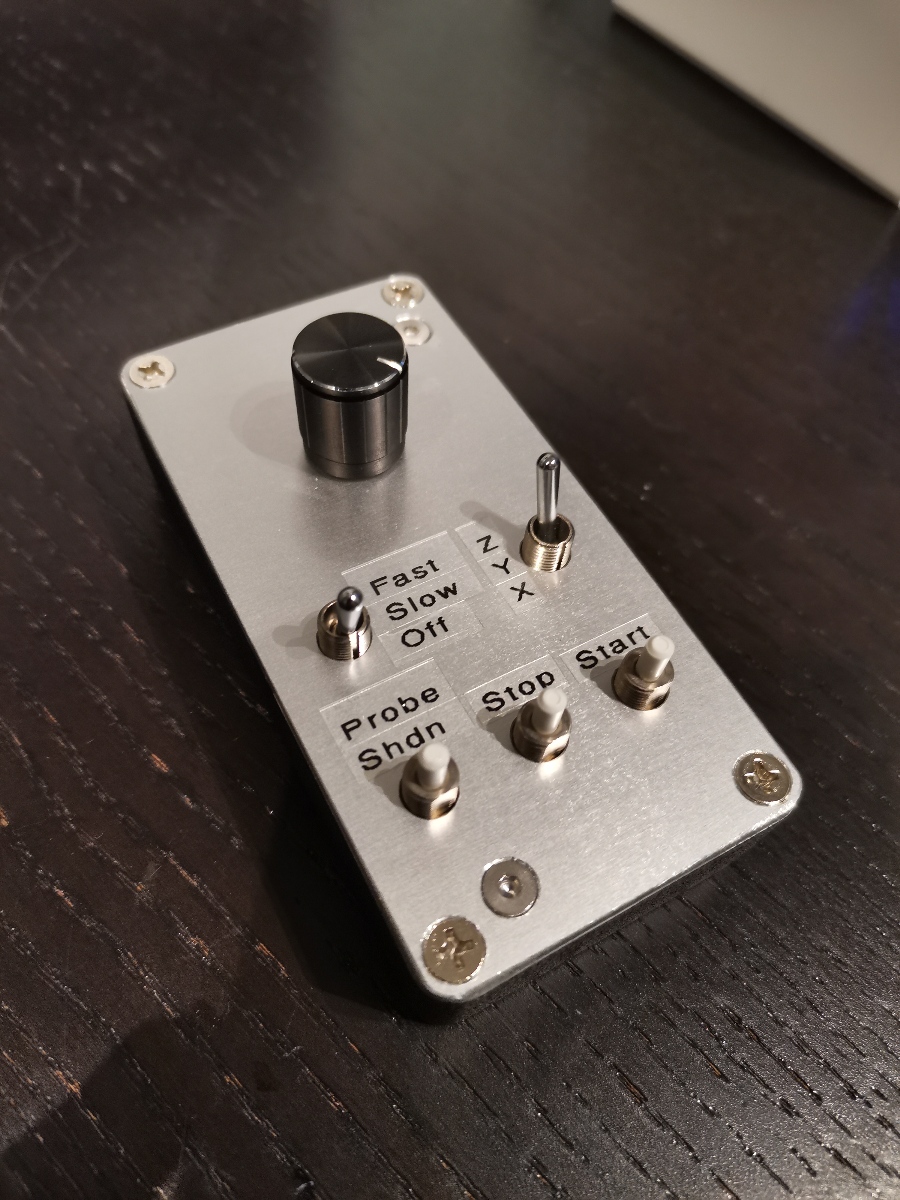
- Designed a MIDI and sequencer addon with a PIC18, with a switch on the front panel to start/select predefined sequences, and a DIN-5 for MIDI in. This PCB also has the voltage regulators and power connector, as that was chopped off together with the trigger conditioning circuit.
- In addition to the standard volume, tone and accent pots, there are individual volume pots and jack outputs for each of the voices.
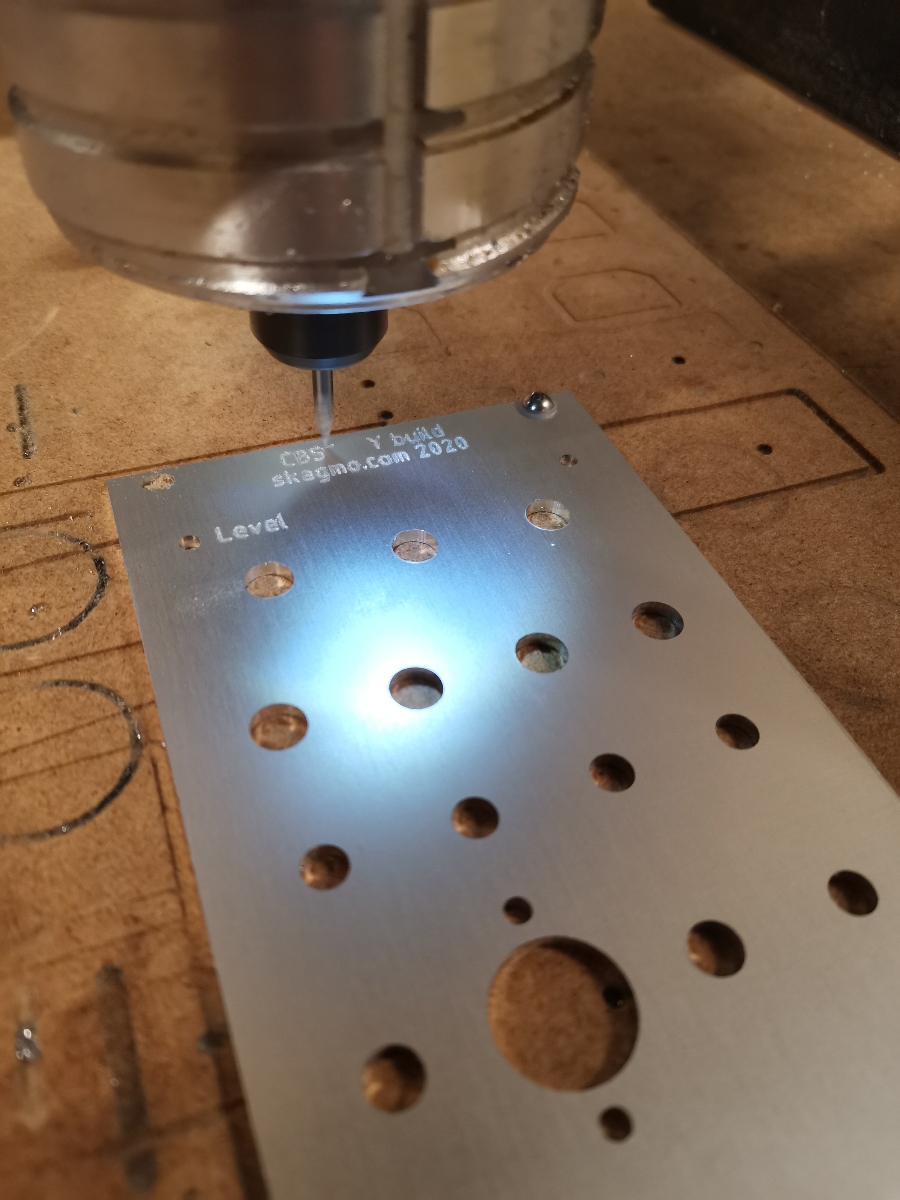
- Panel was milled from the rear side because I needed to machine some pockets for some protuding tabs on the potmeters, and then flipped over to do the engraving.

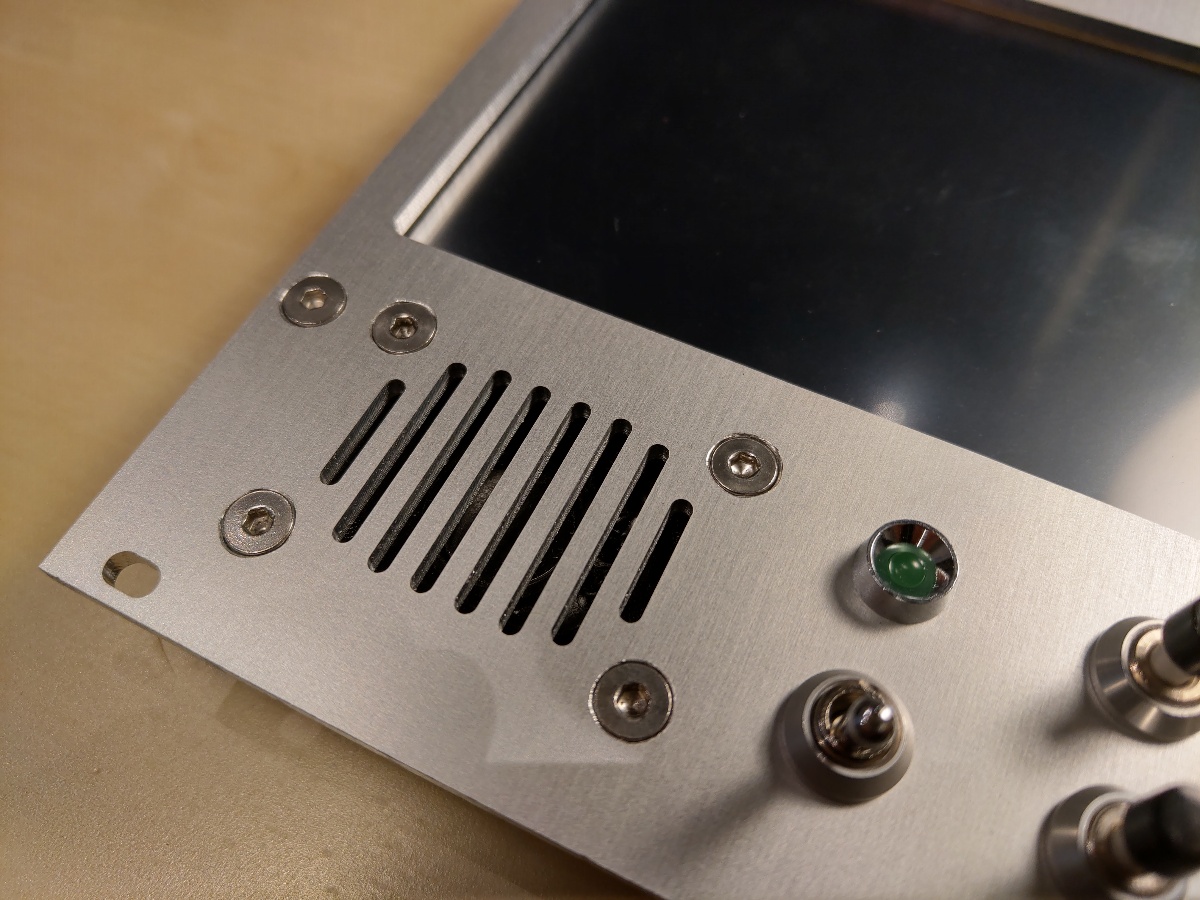
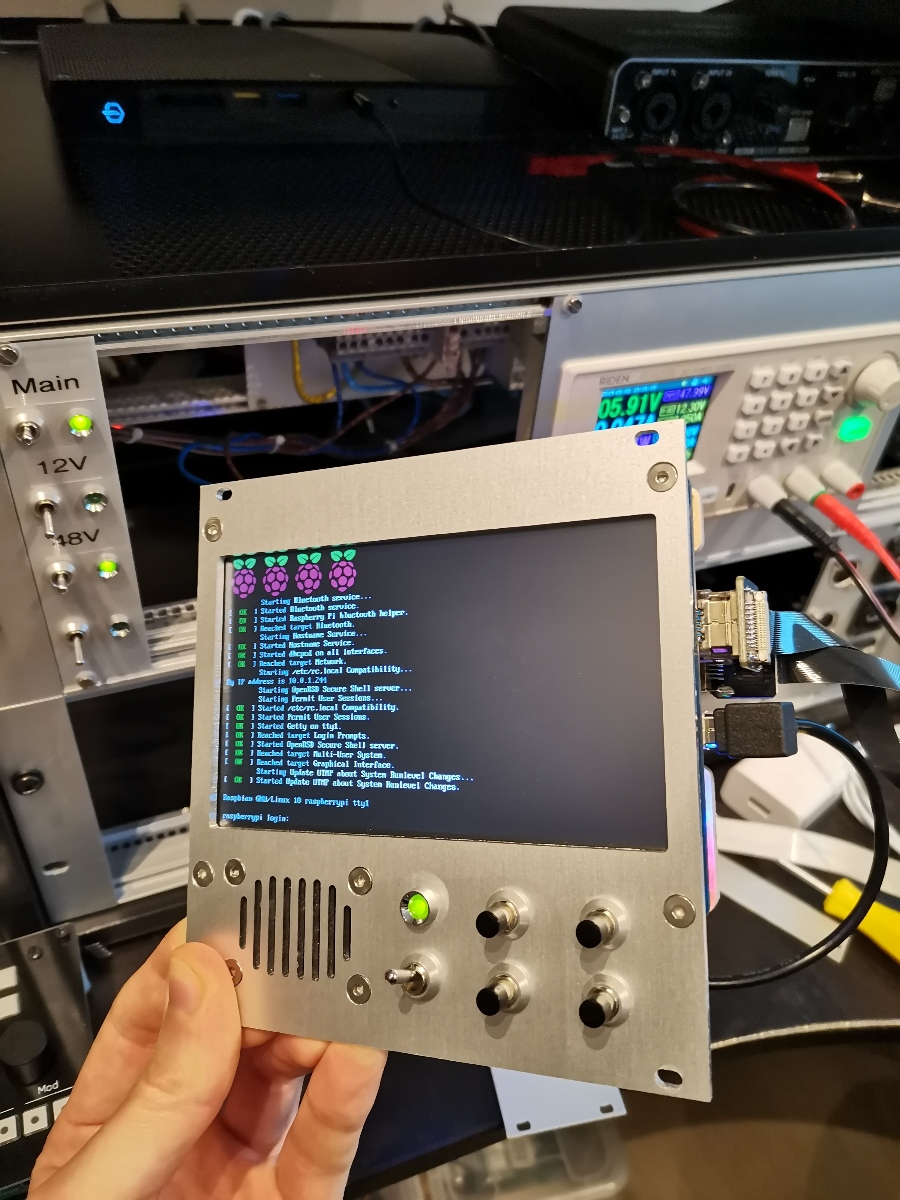
Raspberry Pi terminal
I use this to play video streams from surveillance cameras and live TV/streaming.- Raspberry Pi 3B+
- 5 inch HDMI IPS touch screen
- Speaker and HAT with I2S amplifier
- Four buttons to launch video streams etc.
- UPS with supercaps that always provides graceful shutdown
- 5V power supply


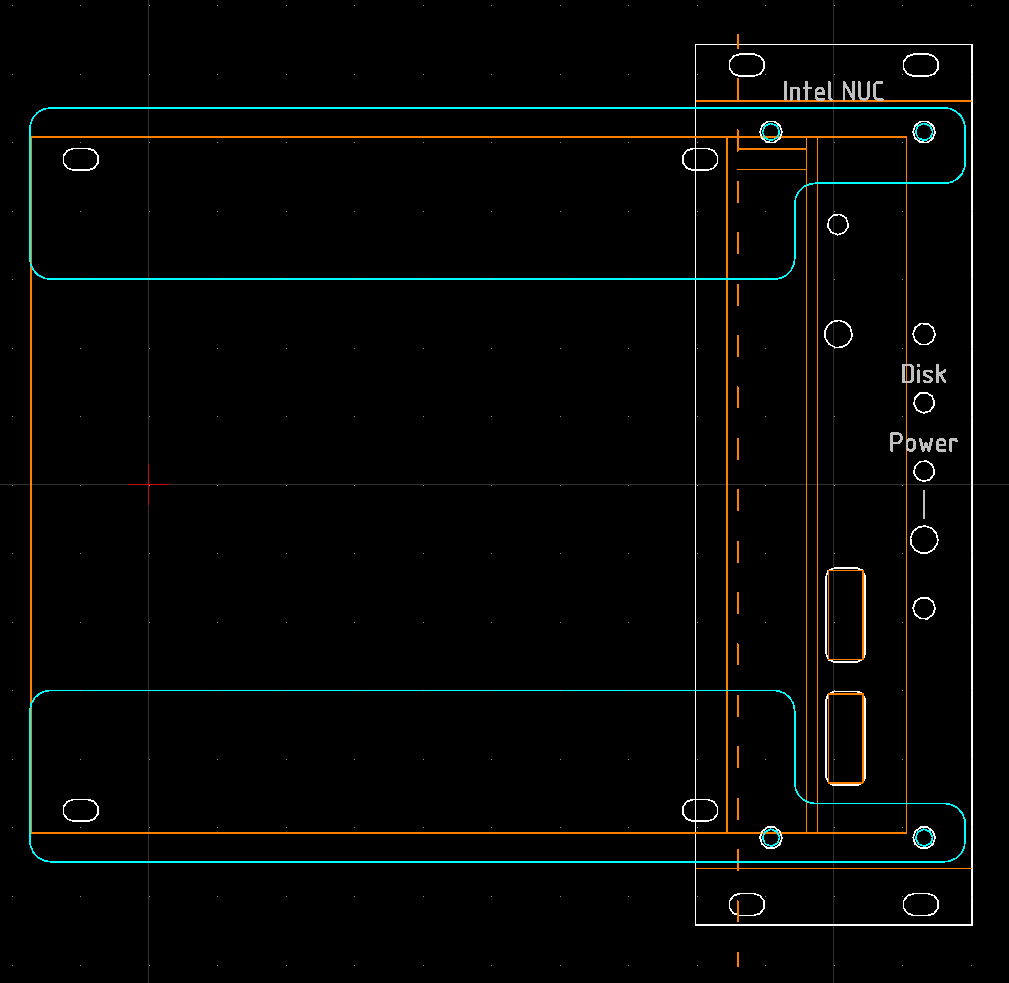
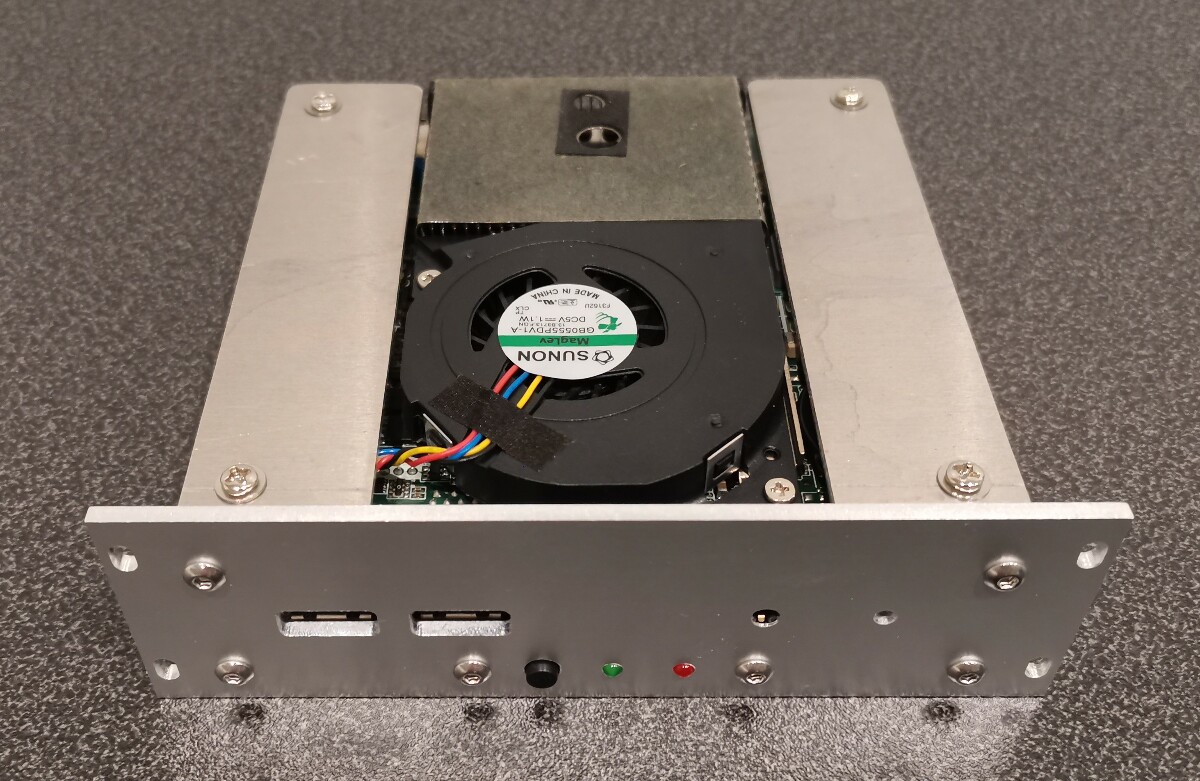
Intel NUC
Did you know the Intel NUC small form factor PC is perfect for eurorack mounting? The PCB stacked vertically fits nicely within the eurorack rails with some margin.


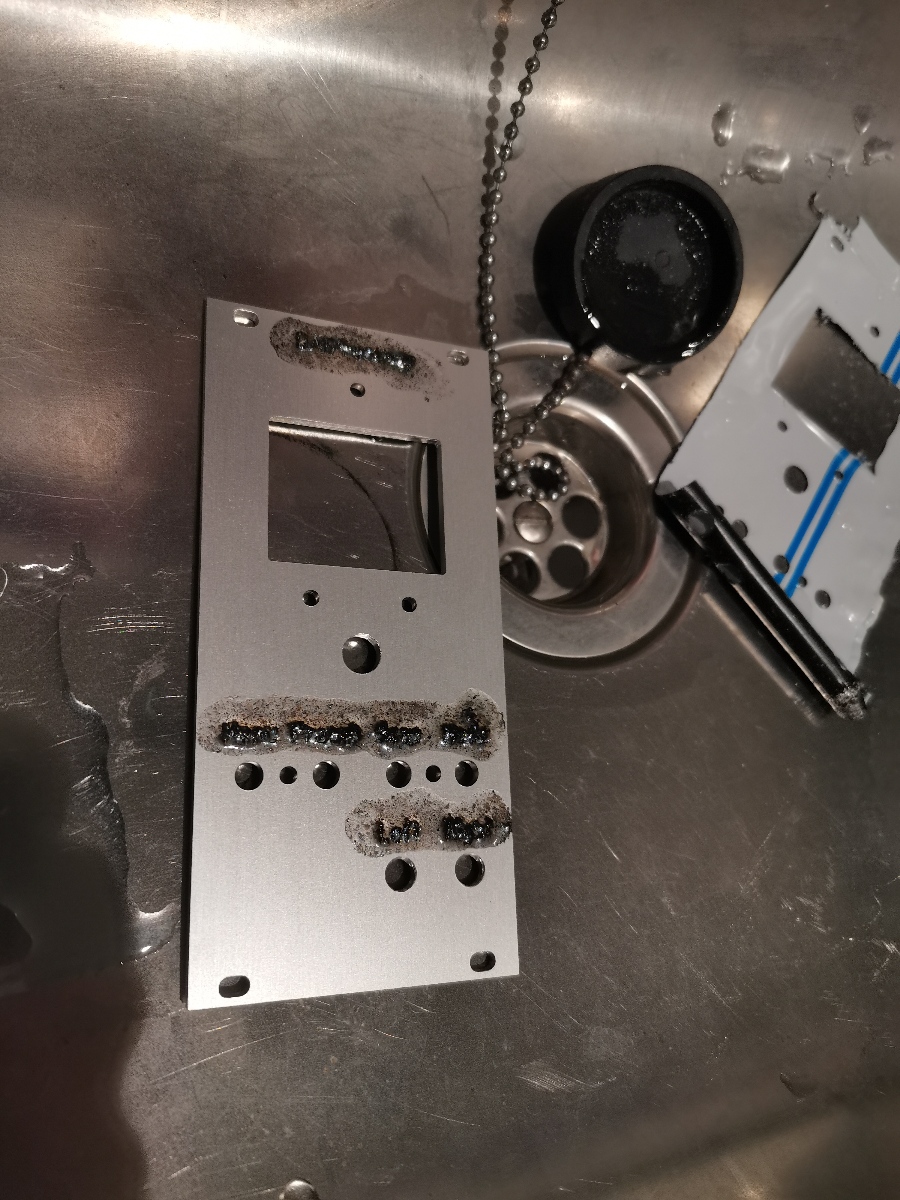
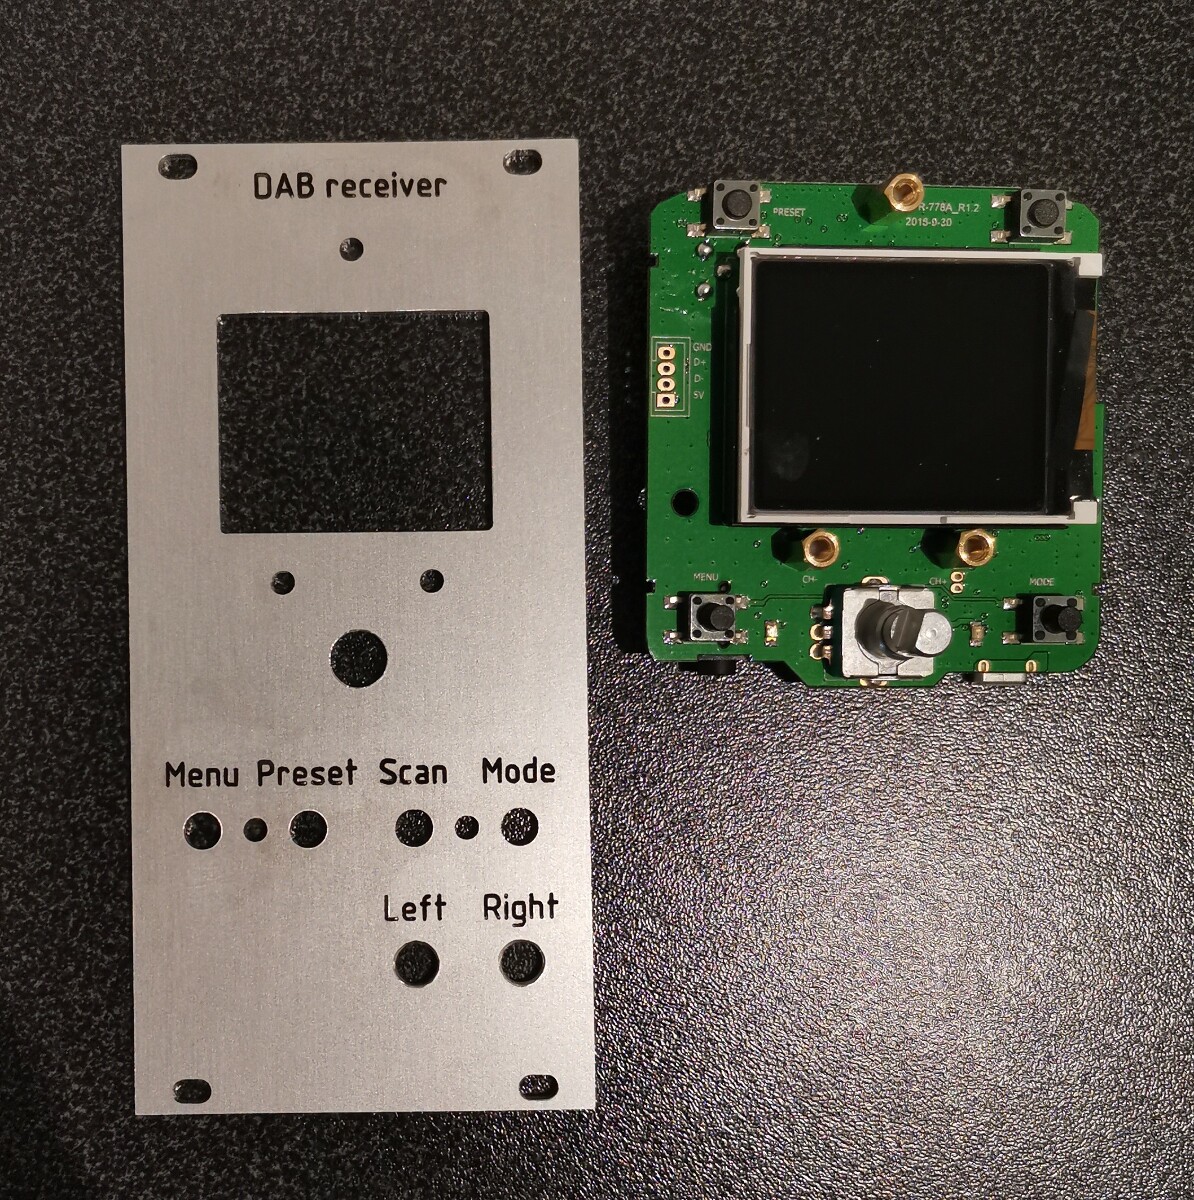
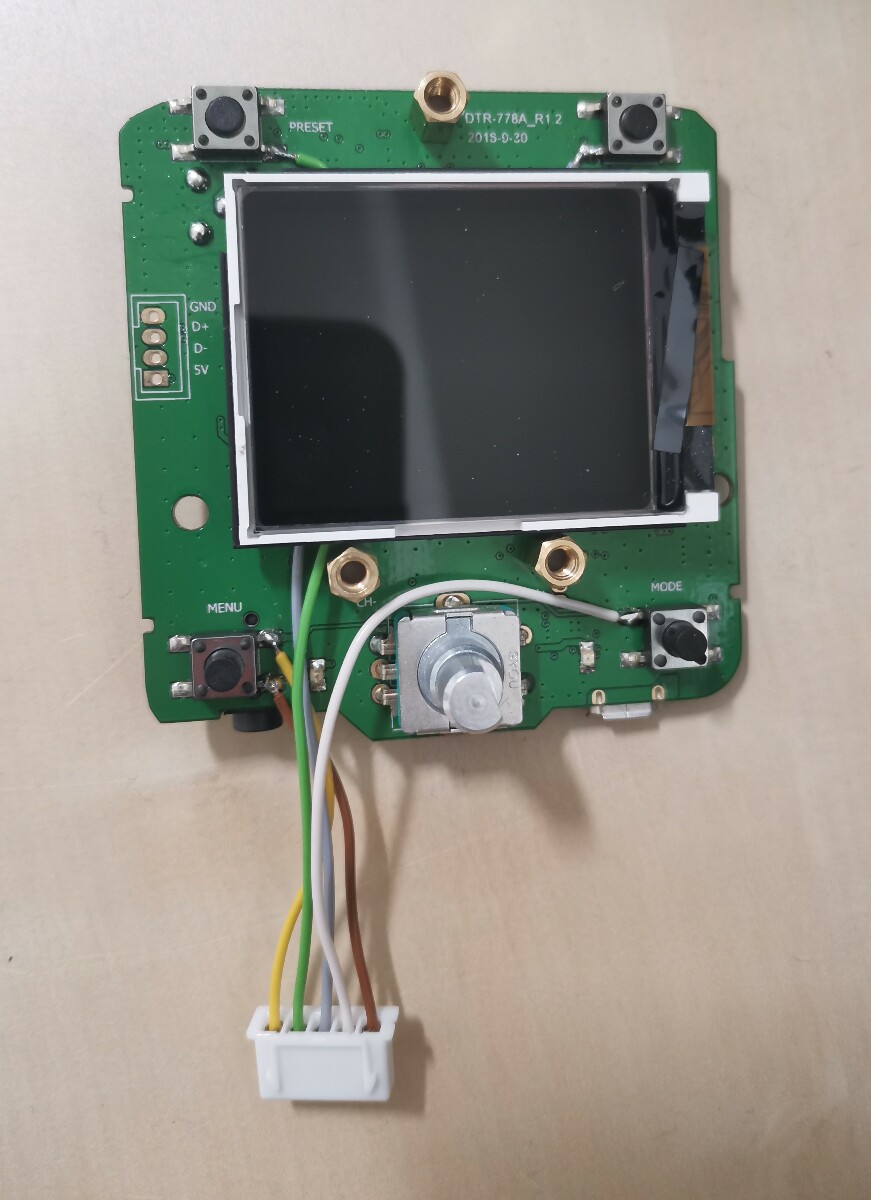
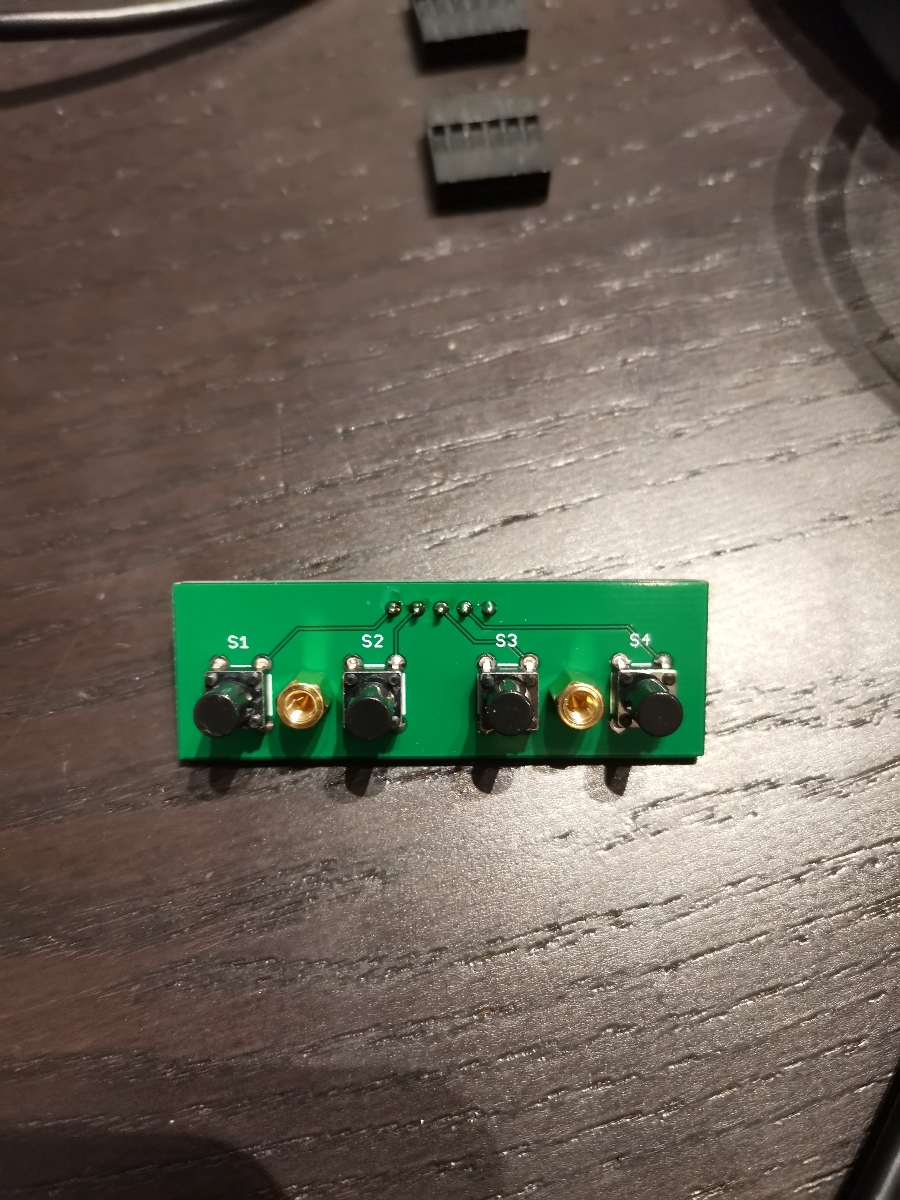
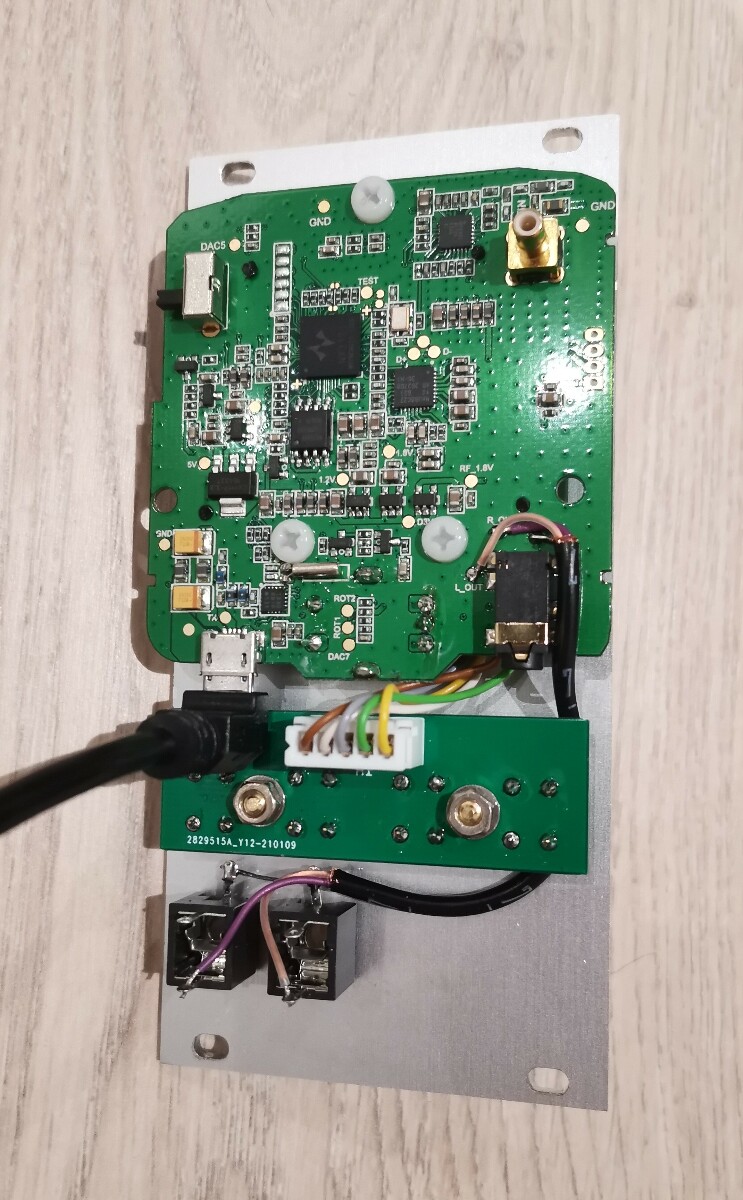
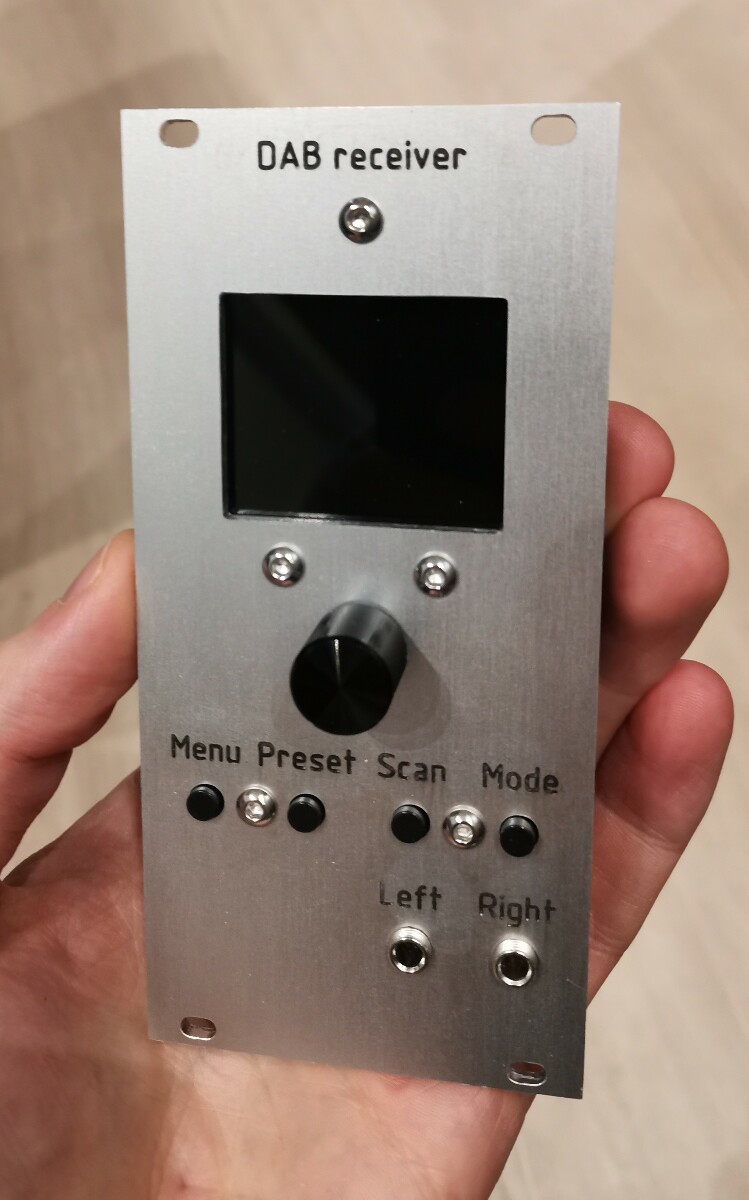
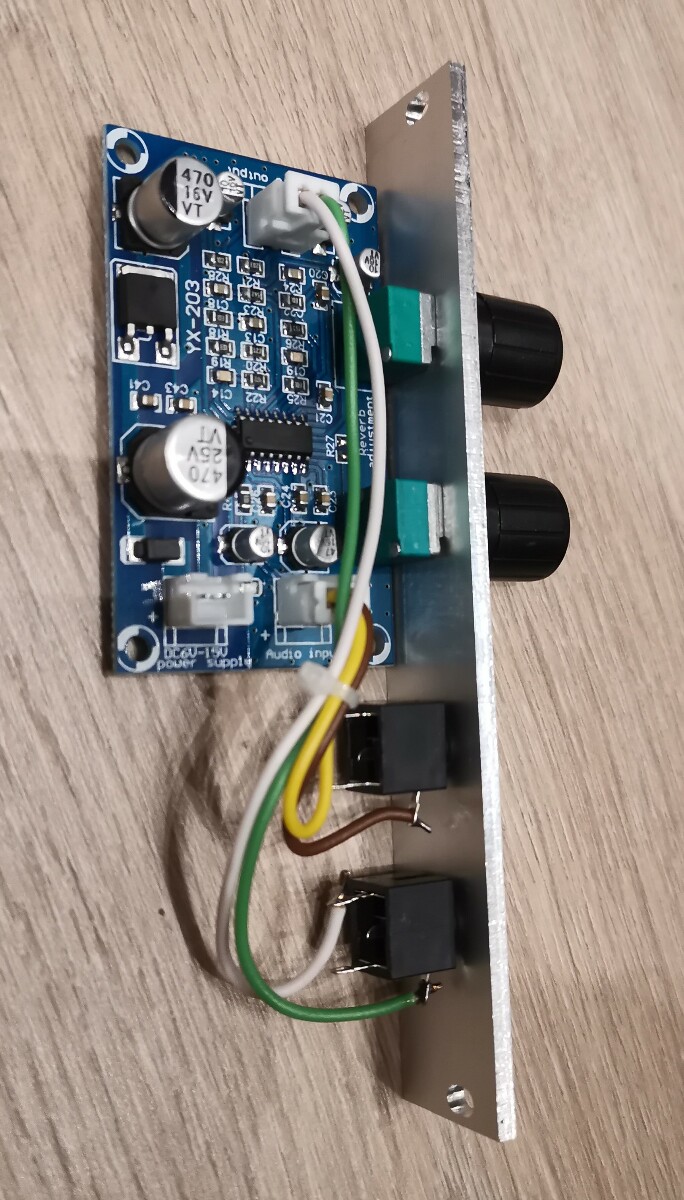
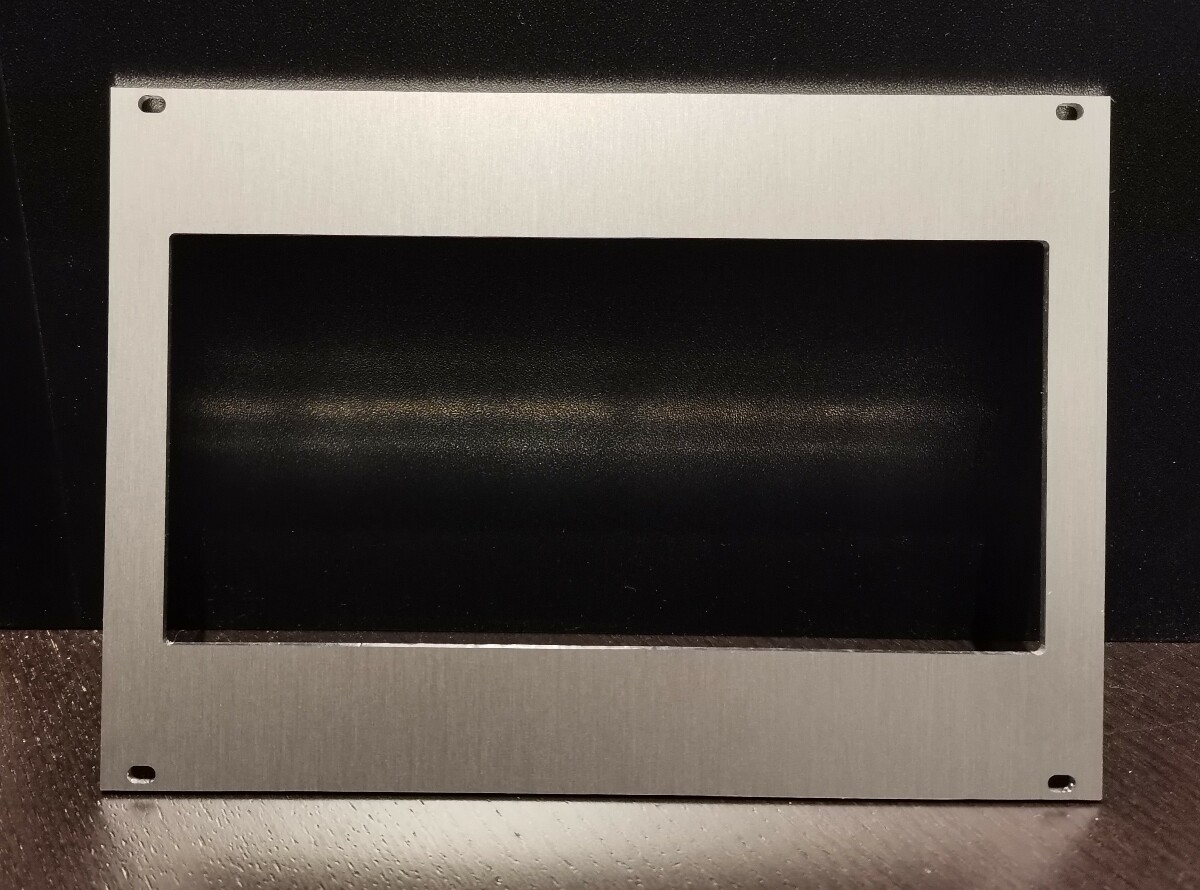
Tiny Audio C6 DAB radio adapter
I made a little PCB to move the buttons to make it more practical in use and used Aluoxyd to blacken the engraving.


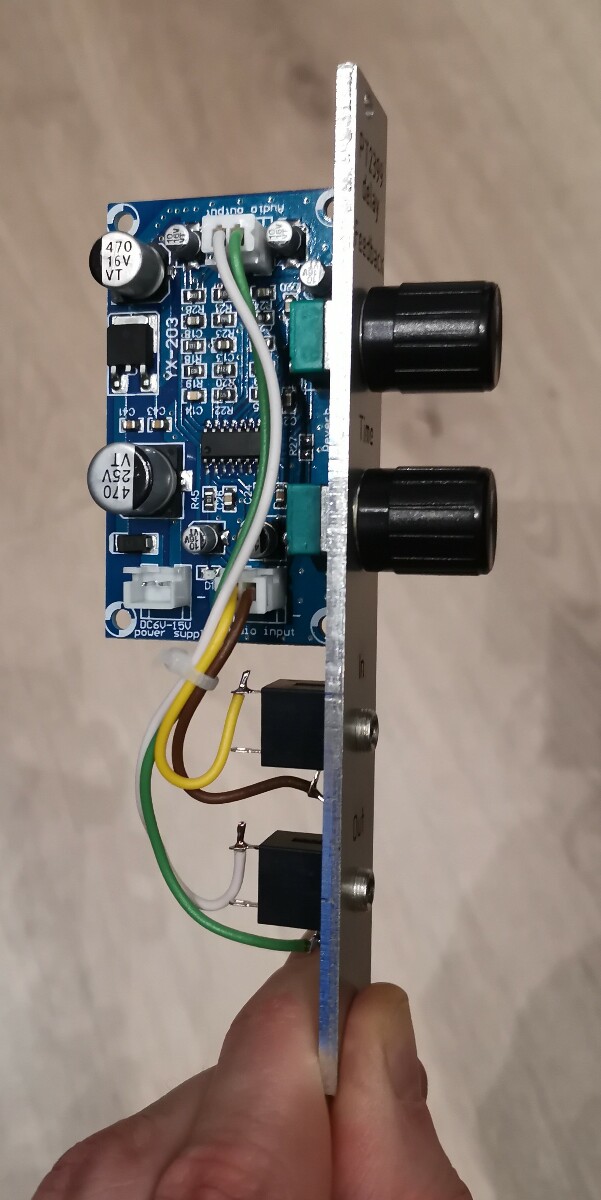
PT2399 based delay
PCB mounted perpendicular onto a front panel, held by the potmeters. Threaded holes for 3.5mm jacks.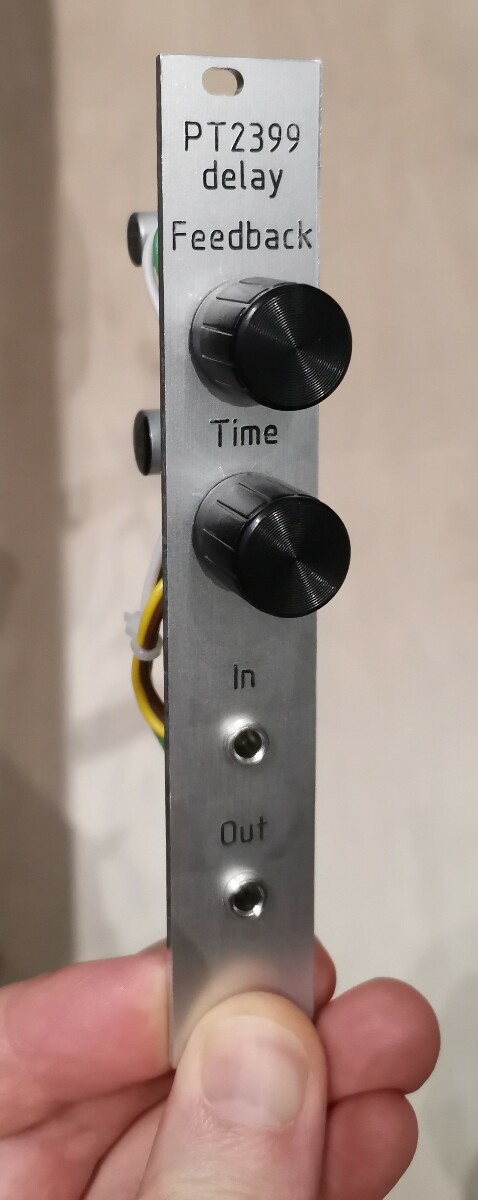
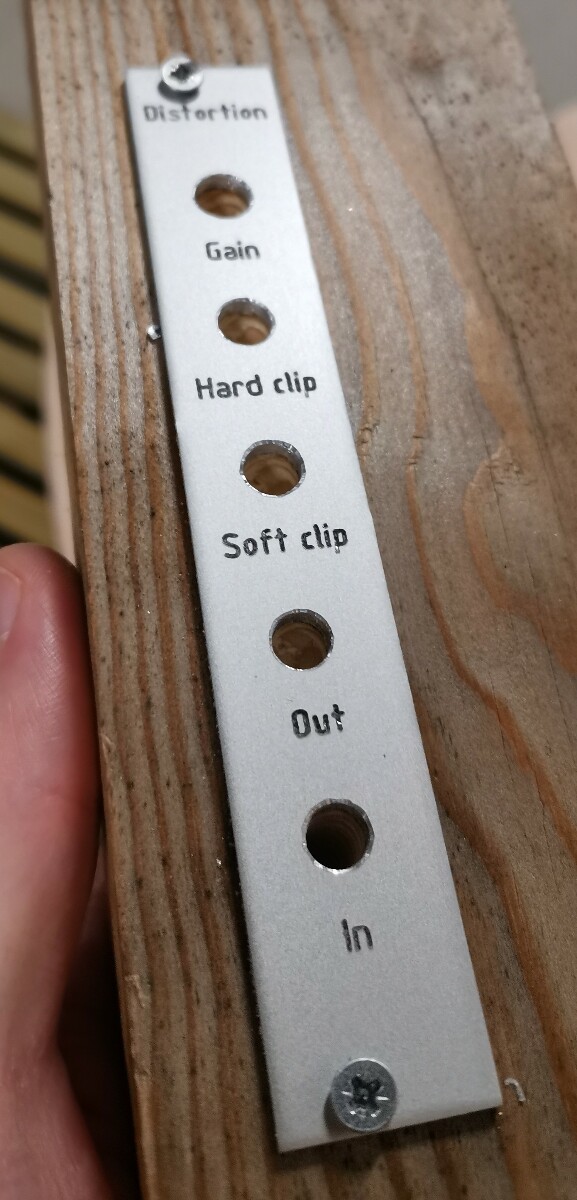
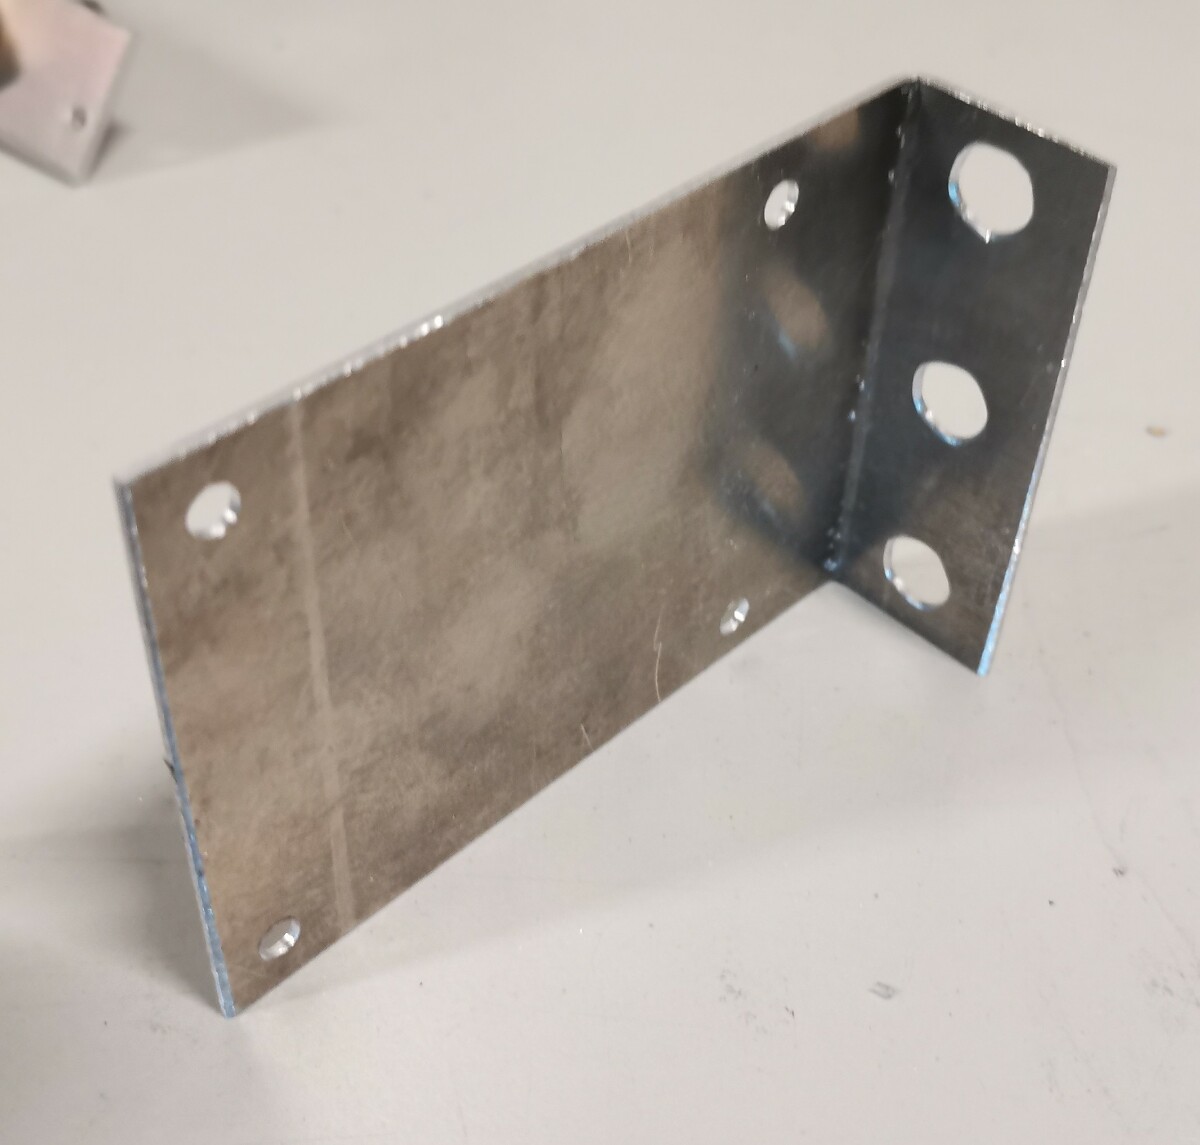
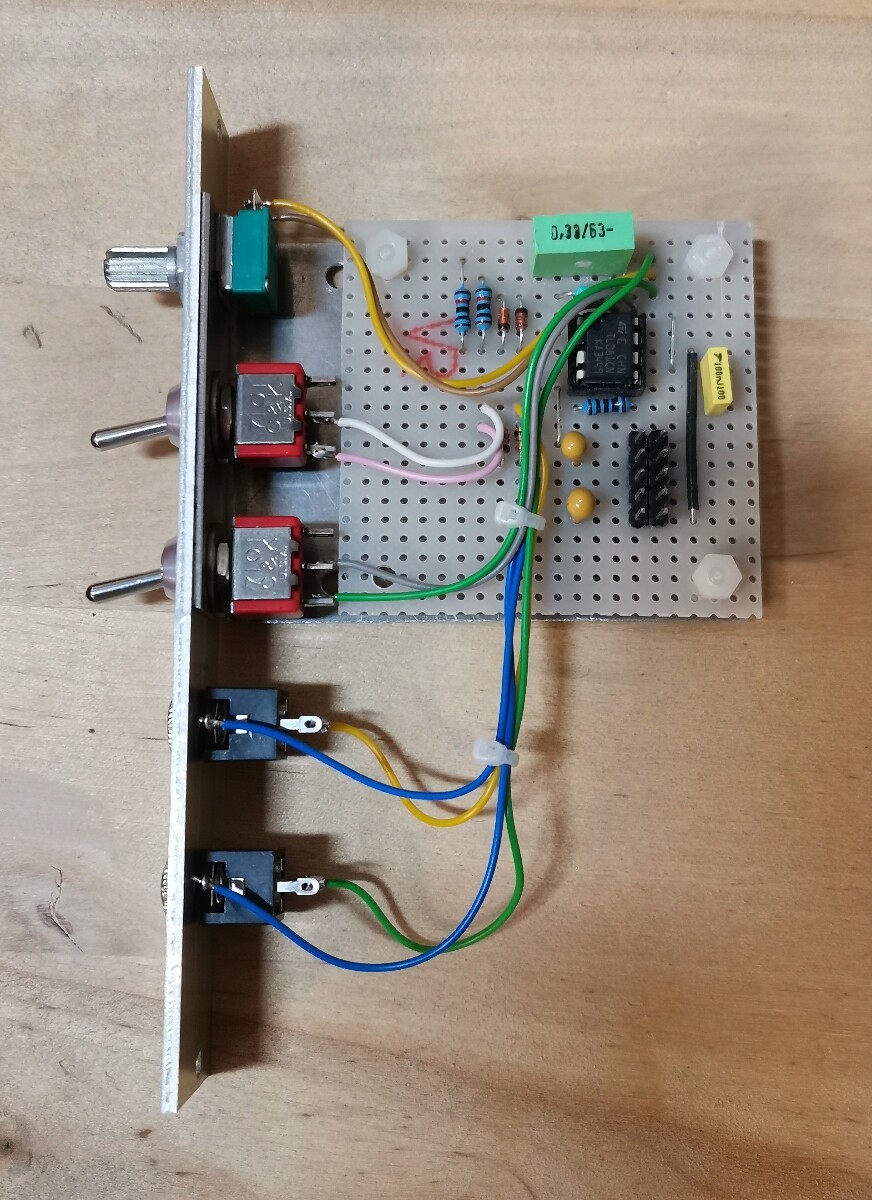
Simple distortion
- Simple DIY OP-amp circuit with diodes for clipping in the feedback loop or on the output.
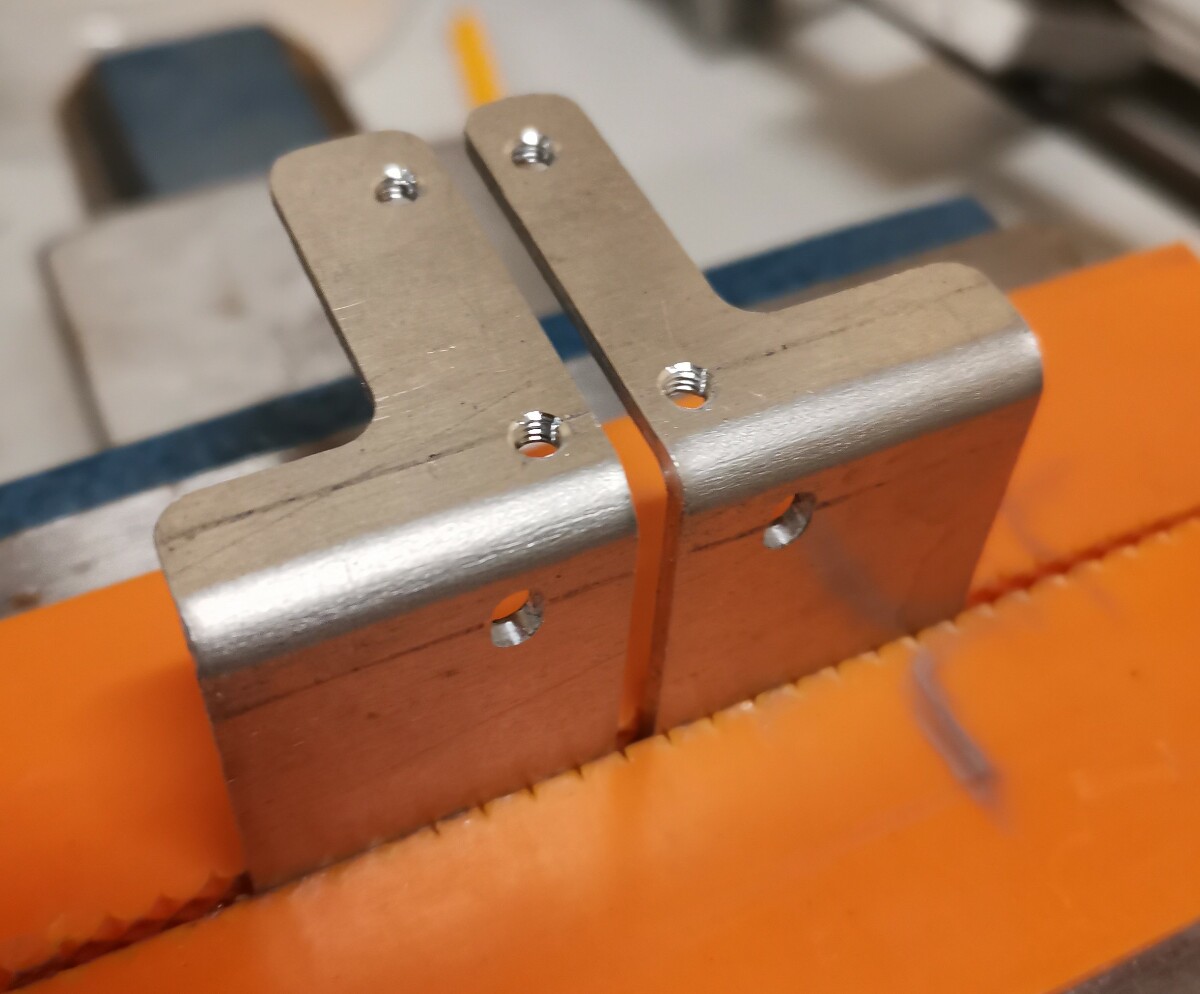
- 1 mm aluminium bracket to hold the PCB perpendicular to the front panel.
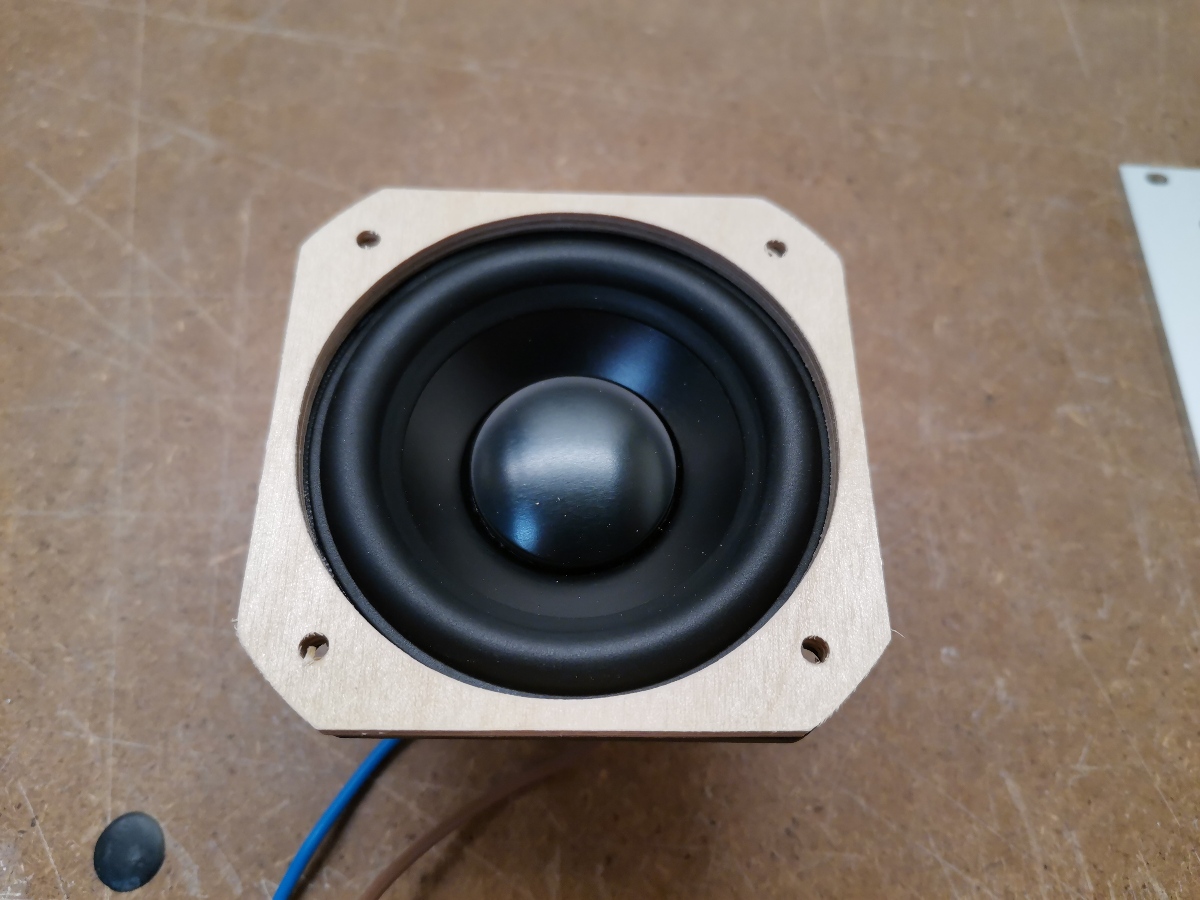
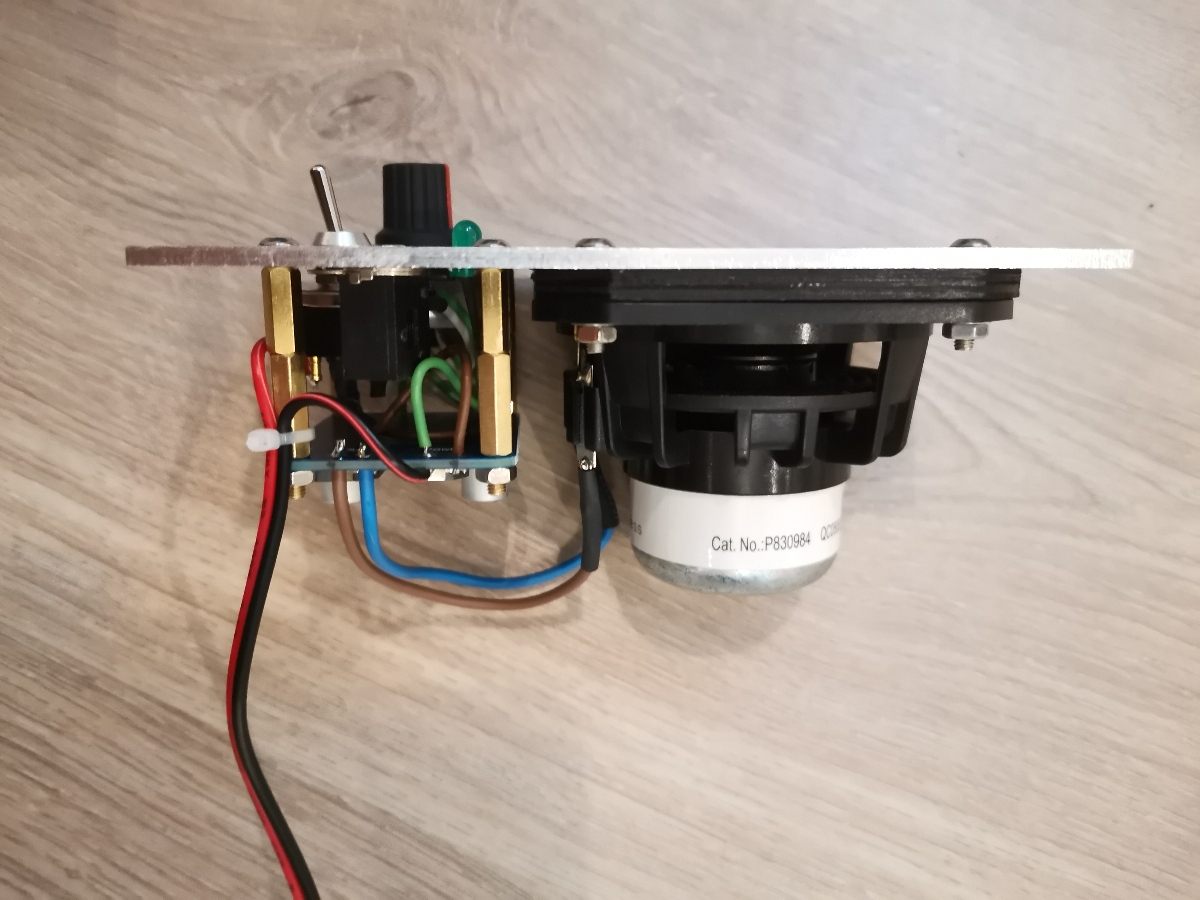
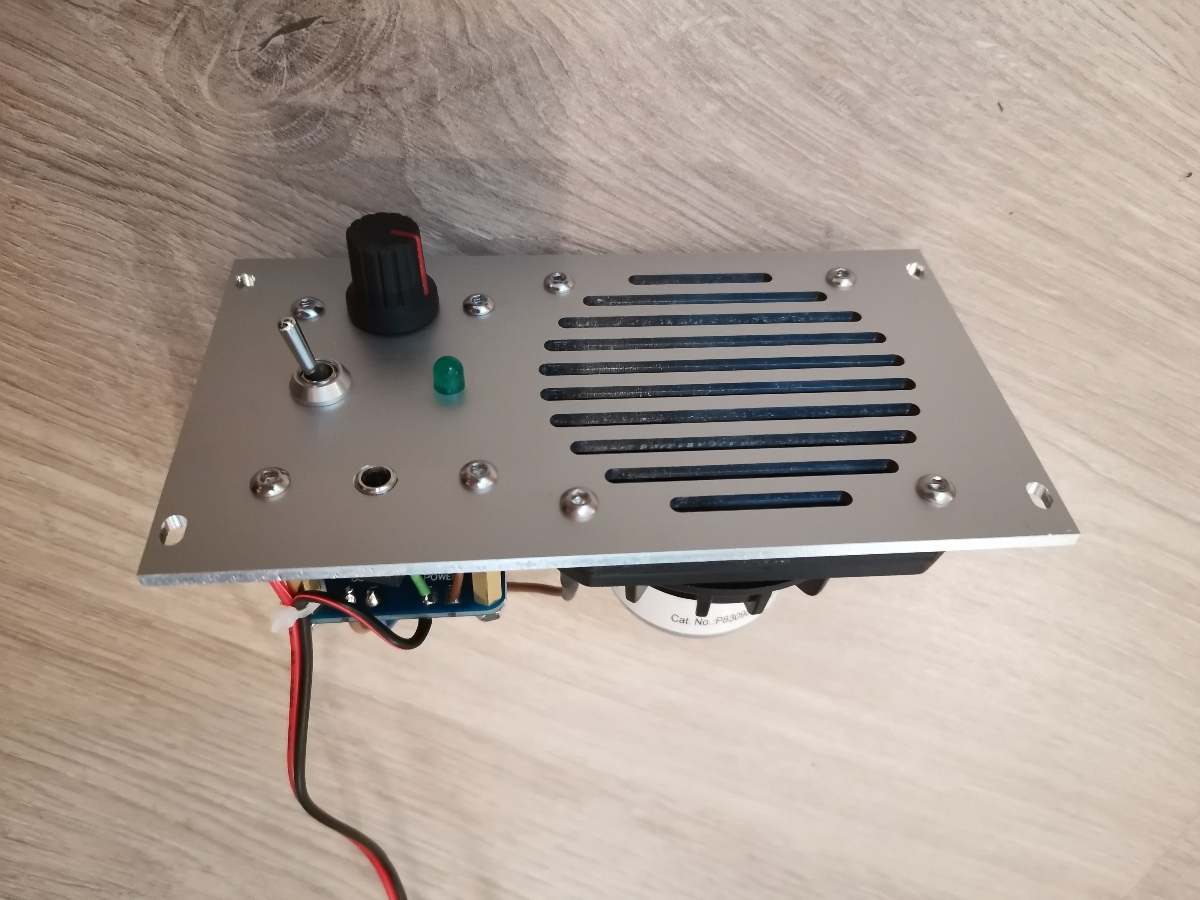
Active speaker
I had to make a little plywood spacer to ensure the speaker membrane could travel fully without interfering with the speaker grill. The speaker is not enclosed, but when put in a fully populated eurorack the frequency response goes quite deep and it sounds really OK.- Peerless PLS-P830984 2.5 inch speaker
- TPA3118 amplifier module


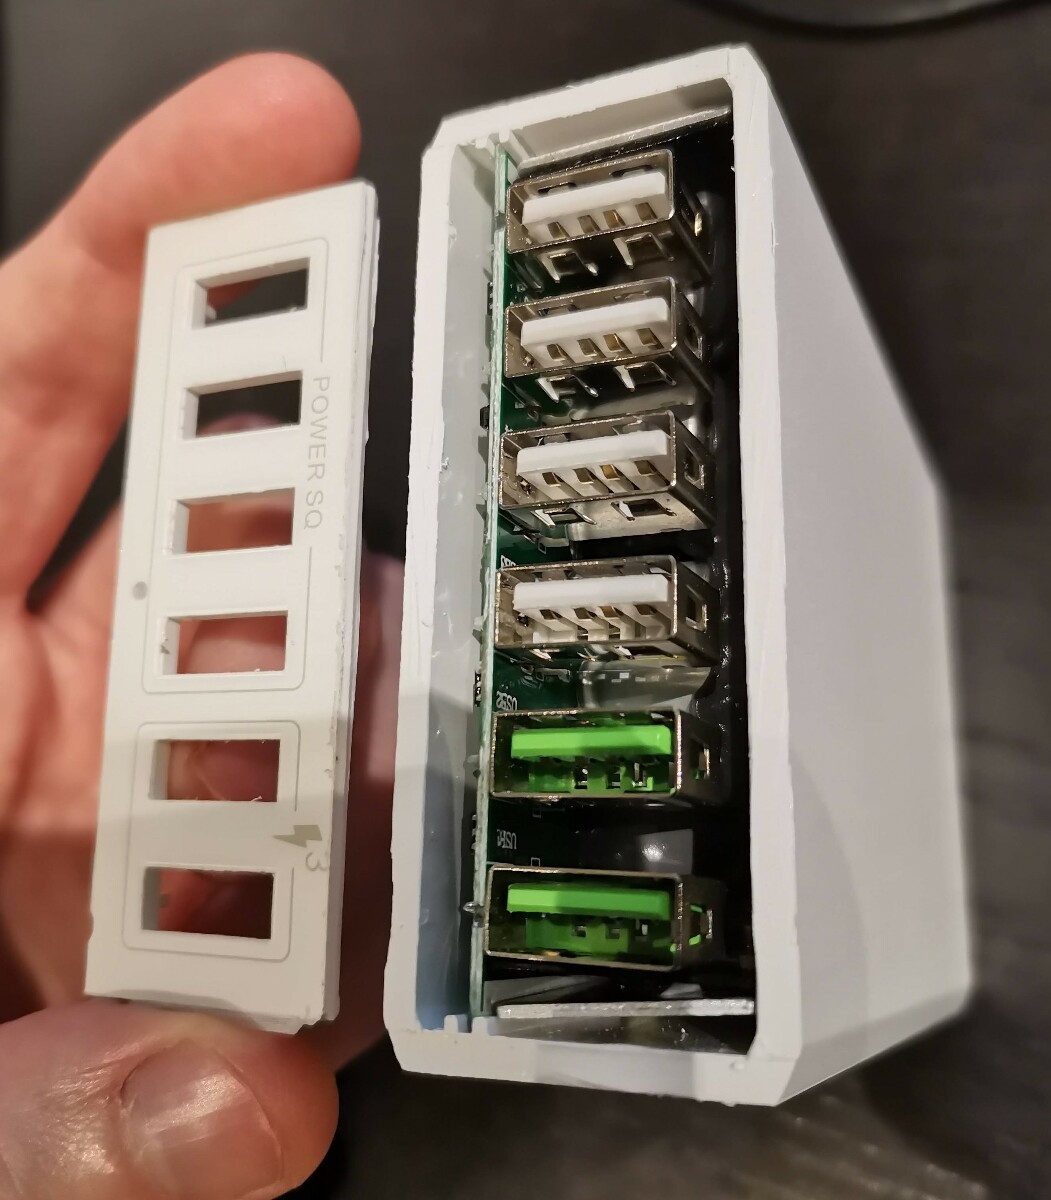
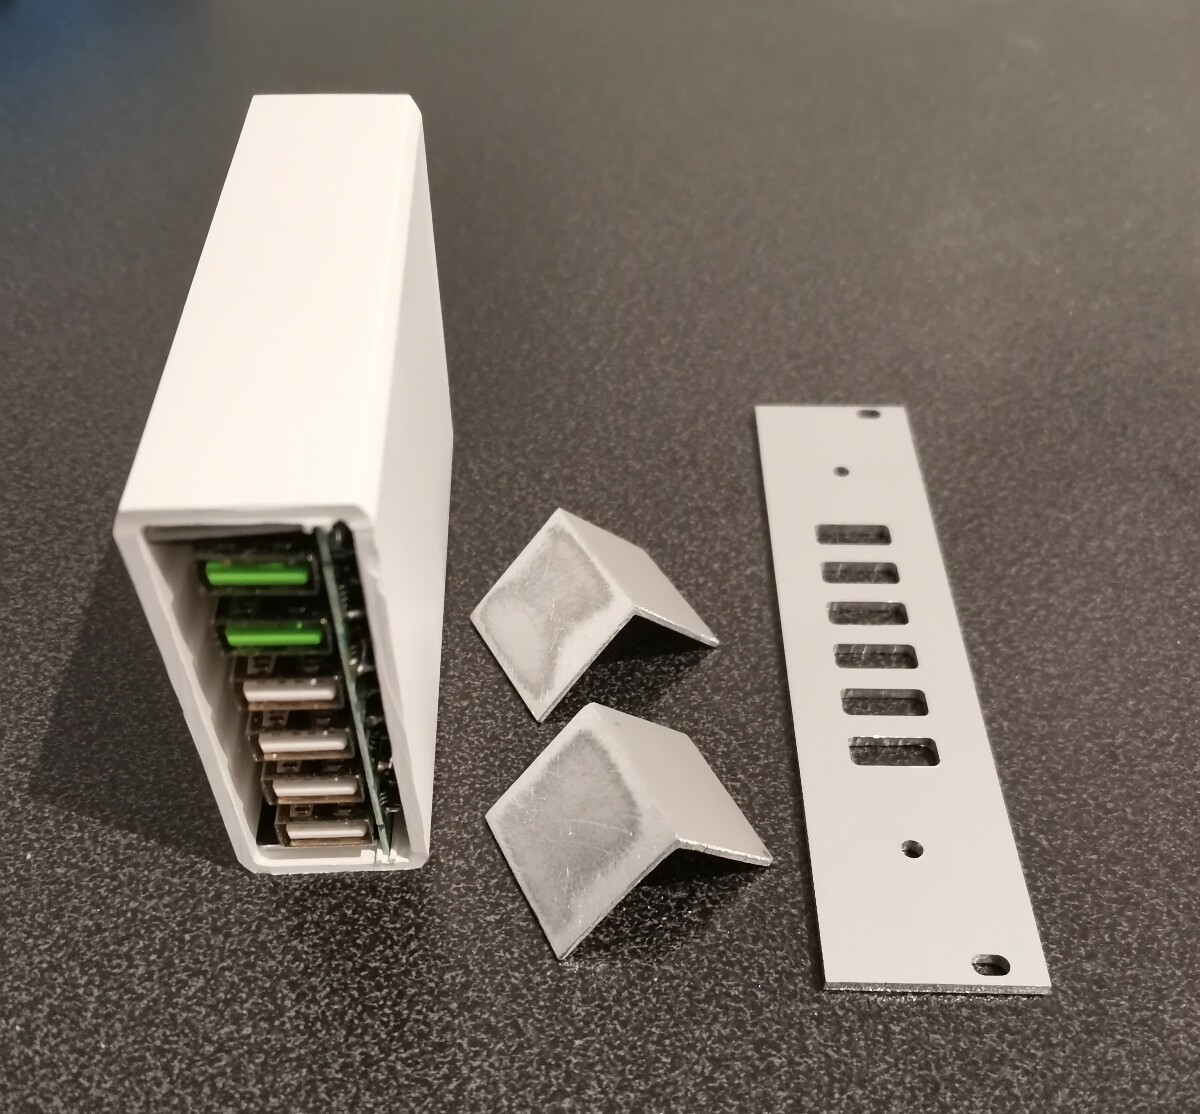
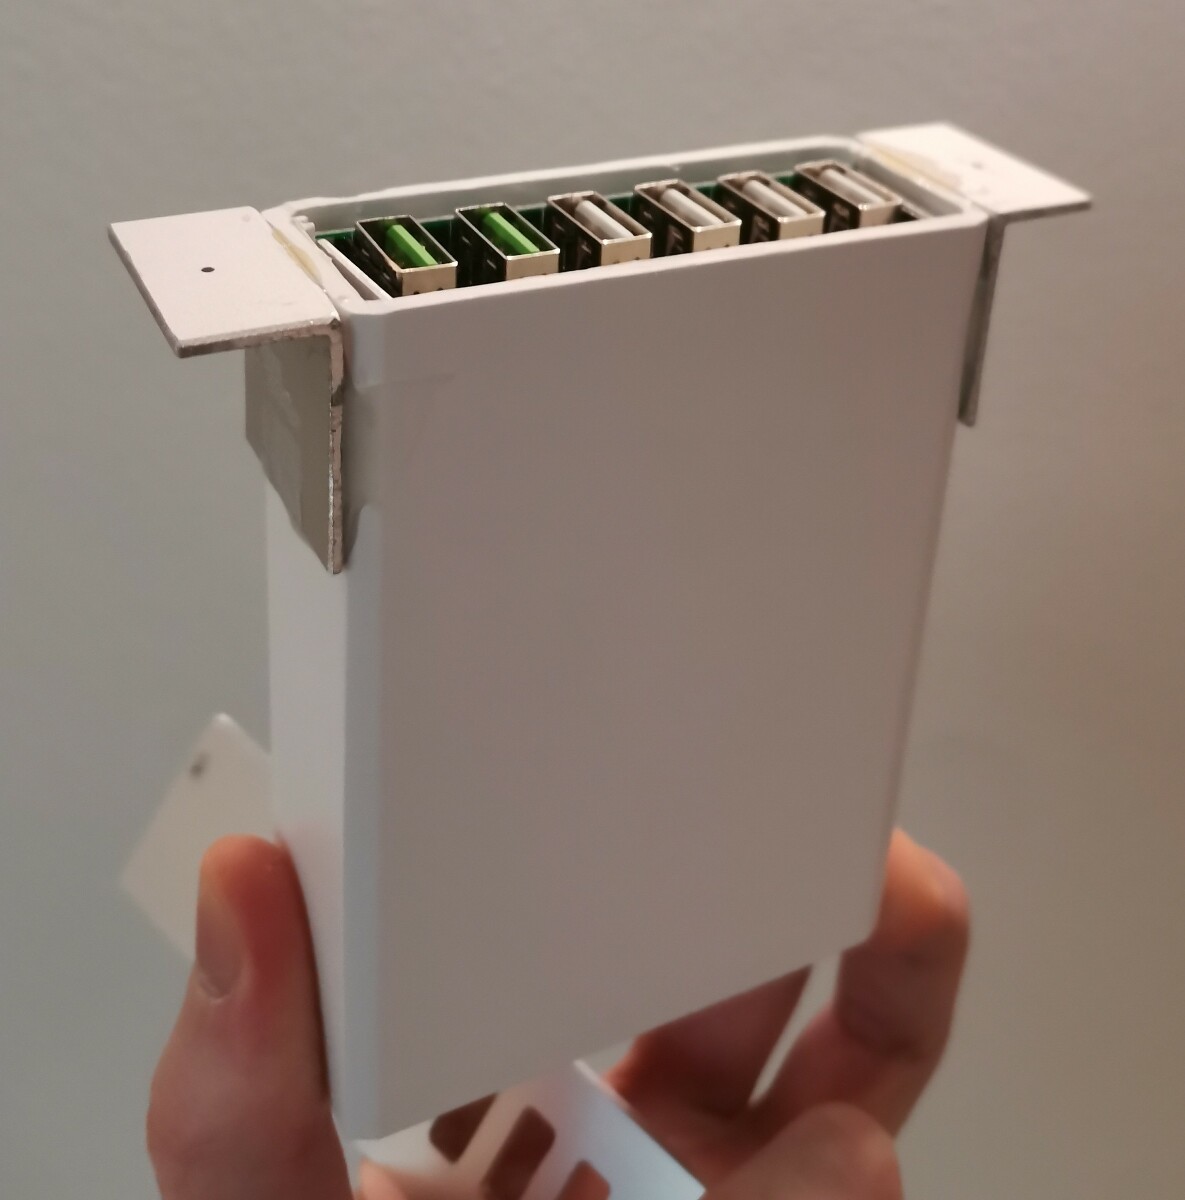
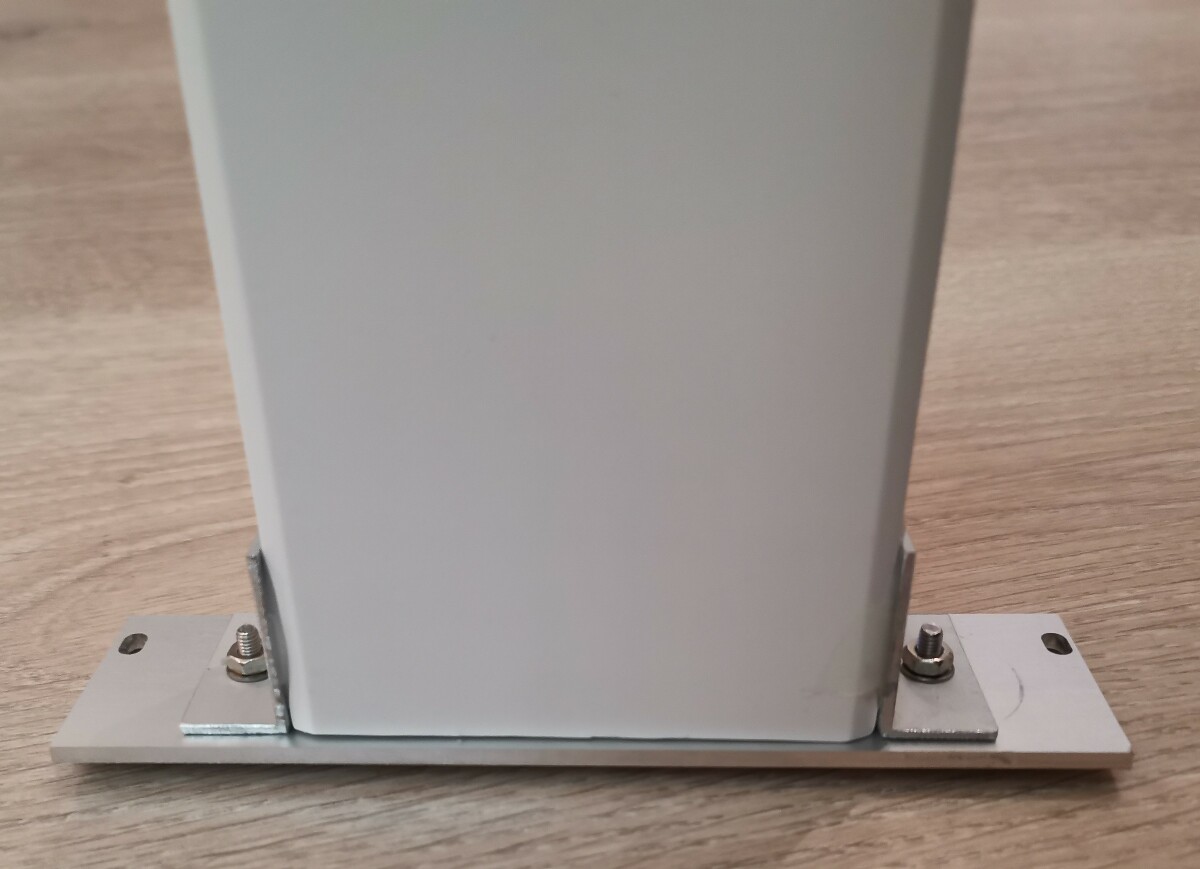
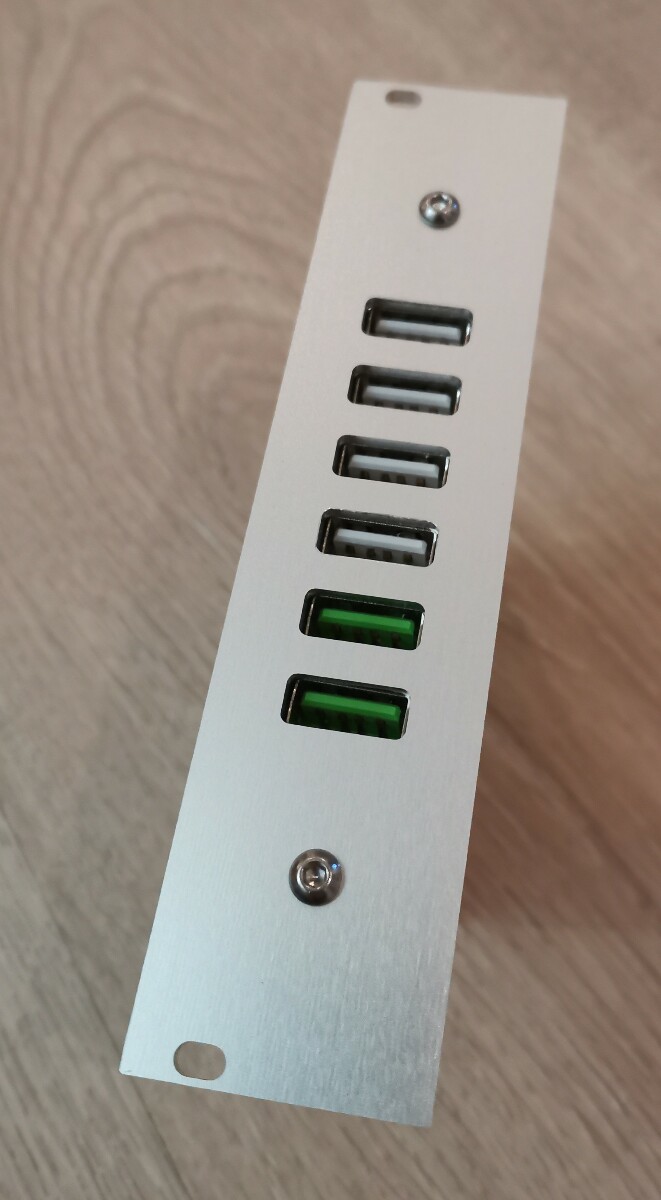
USB power supply
I used a table saw to cut just deep enough to remove the front of the plastic enclosure, then glued some aluminium brackets using epoxy. This is probably the module I use the most, to charge my phone etc. Parts: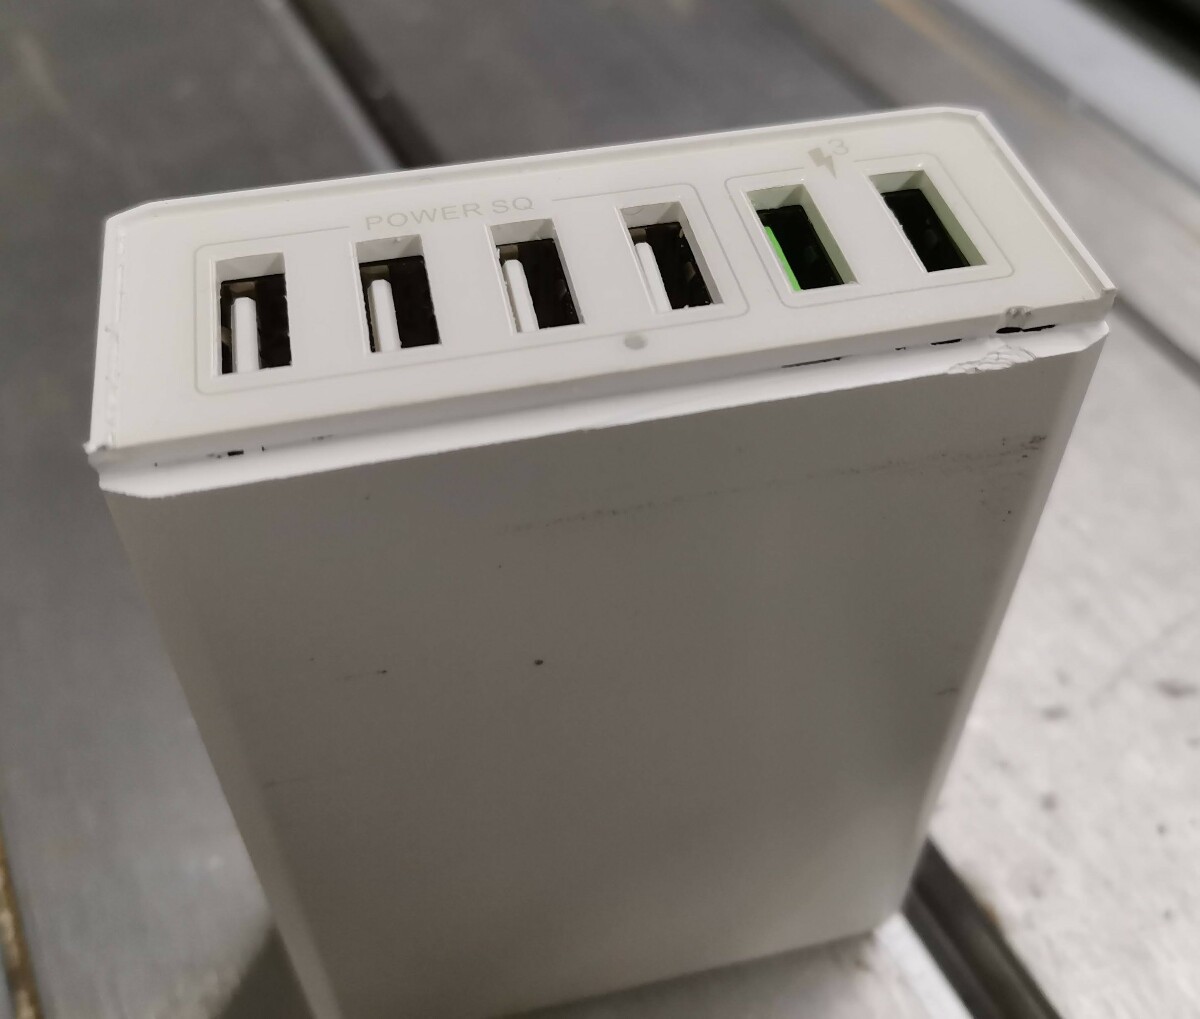
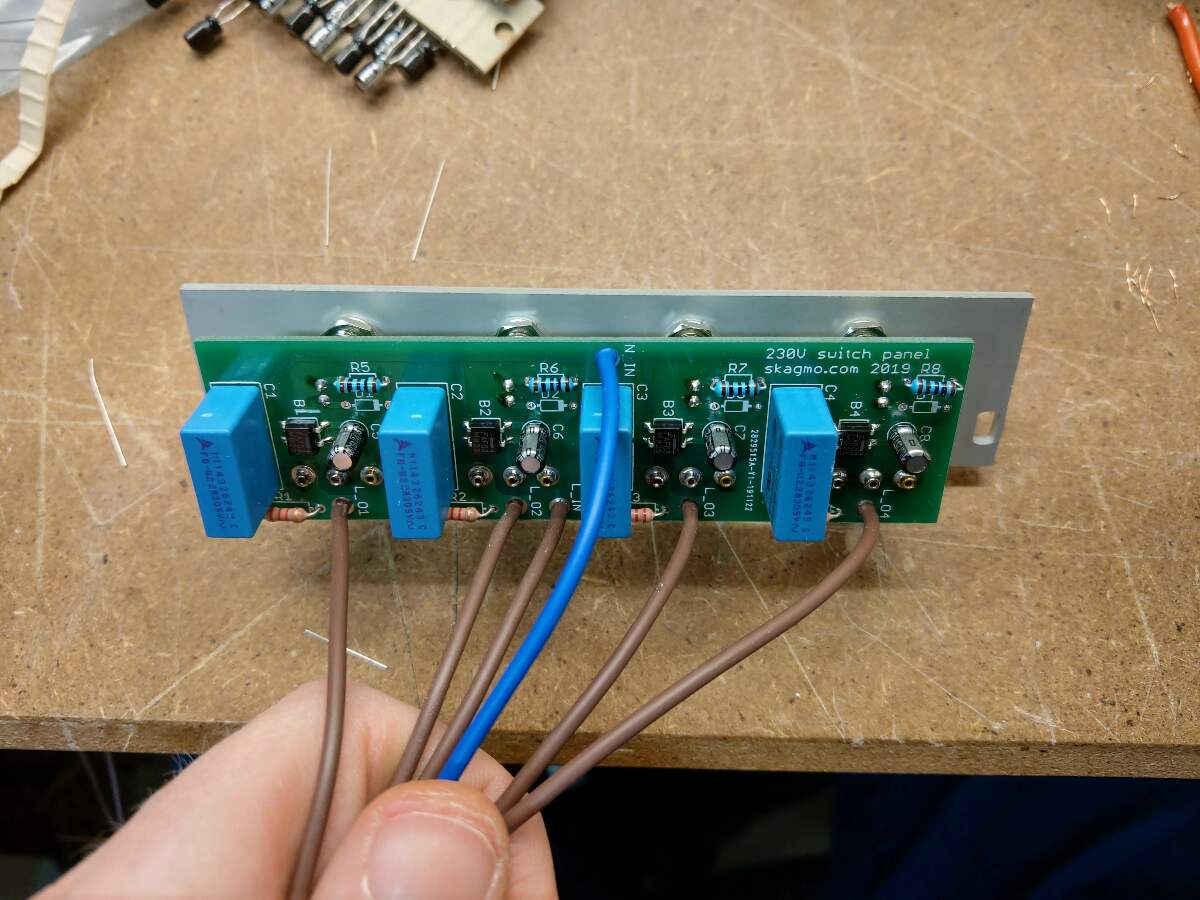
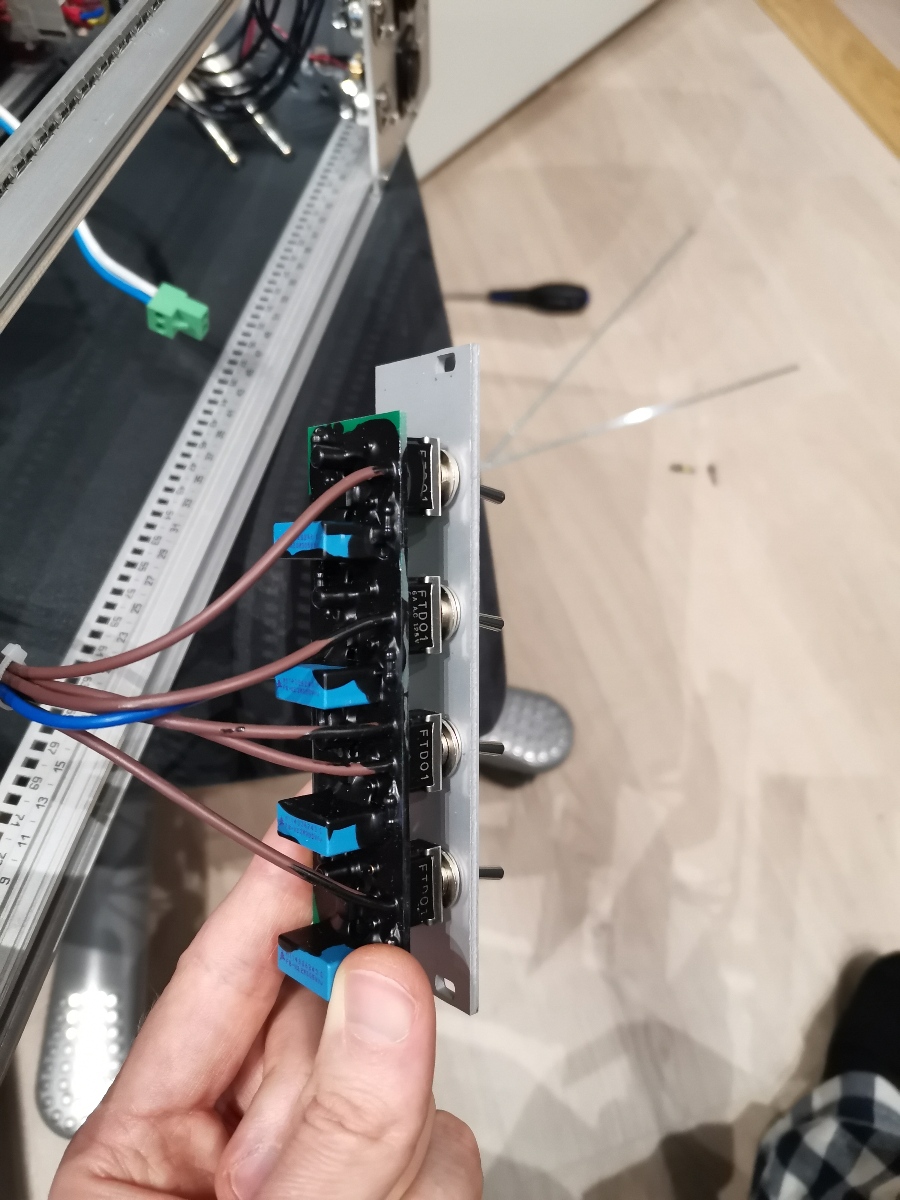
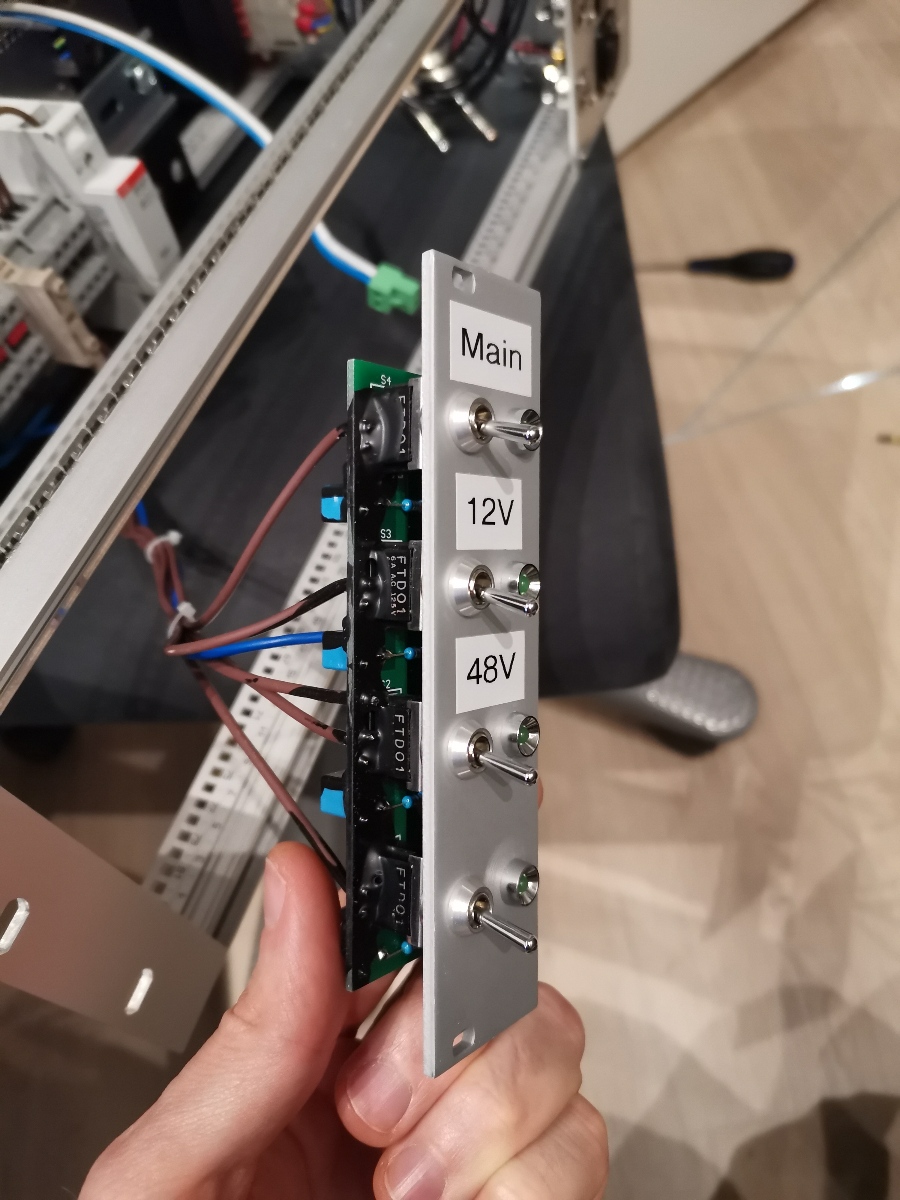
Power switch PCB
I needed to control power to the entire rack from some switches and have visual feedback with LEDs, and made a panel with super simple power supplies to power the LEDs from 230 V. I put on a few coatings of plasti dip to provide an extra layer of isolation due to the mains voltage.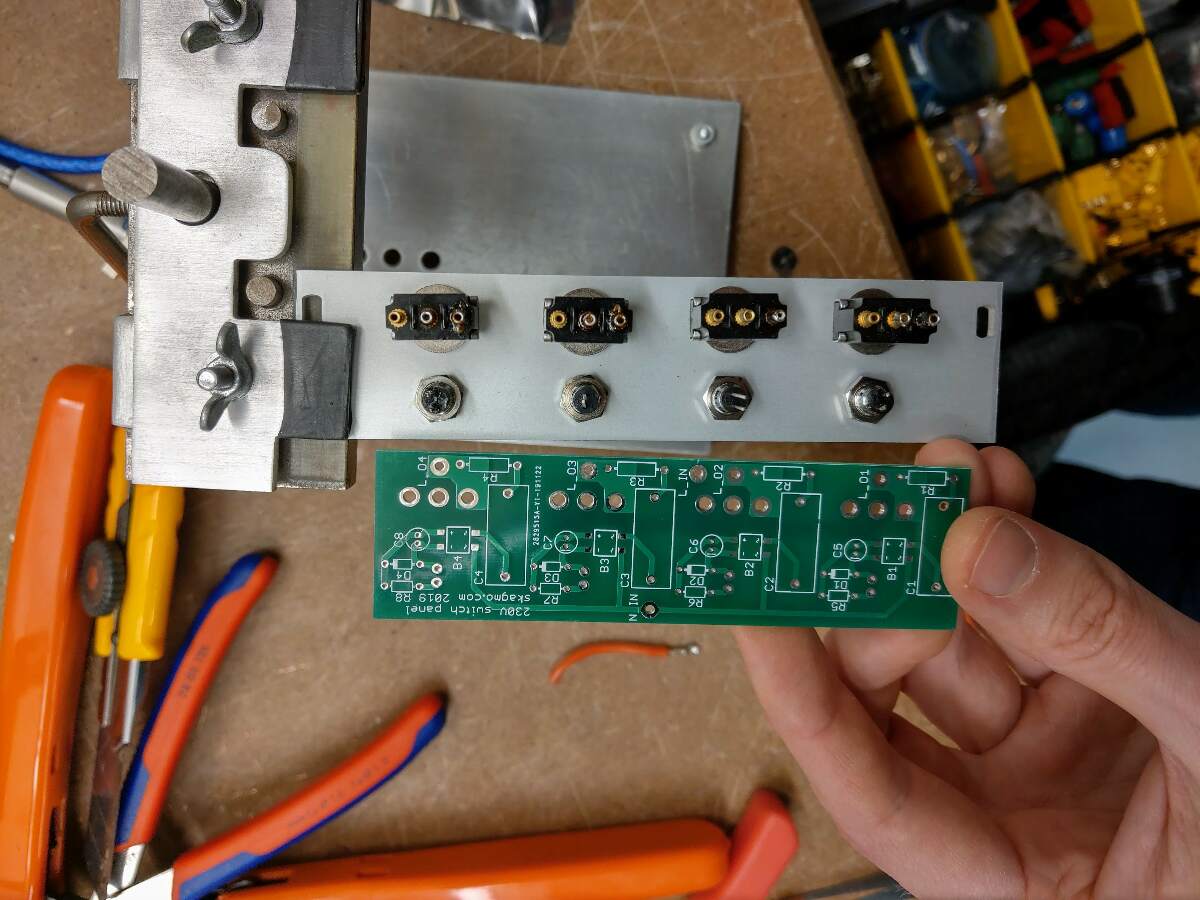
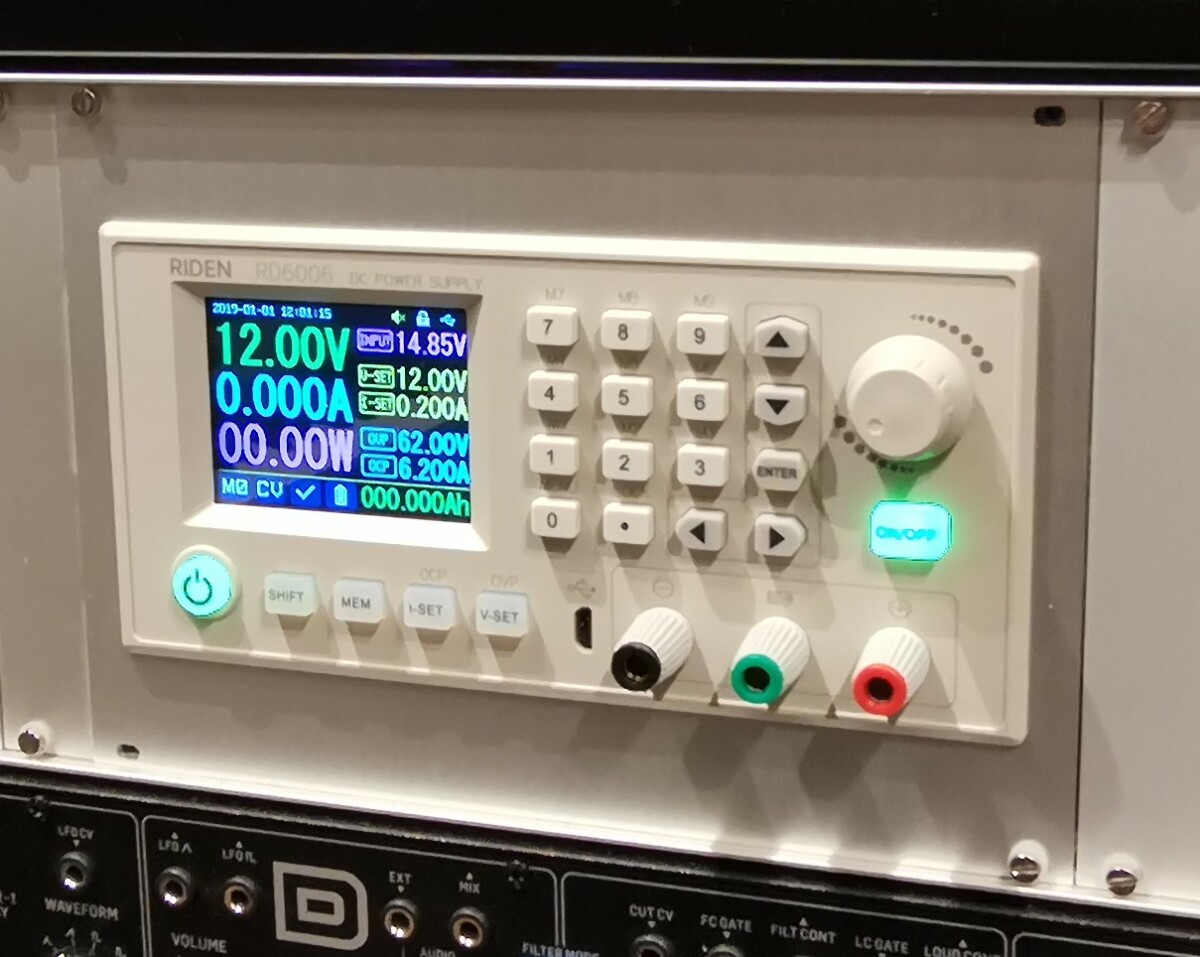
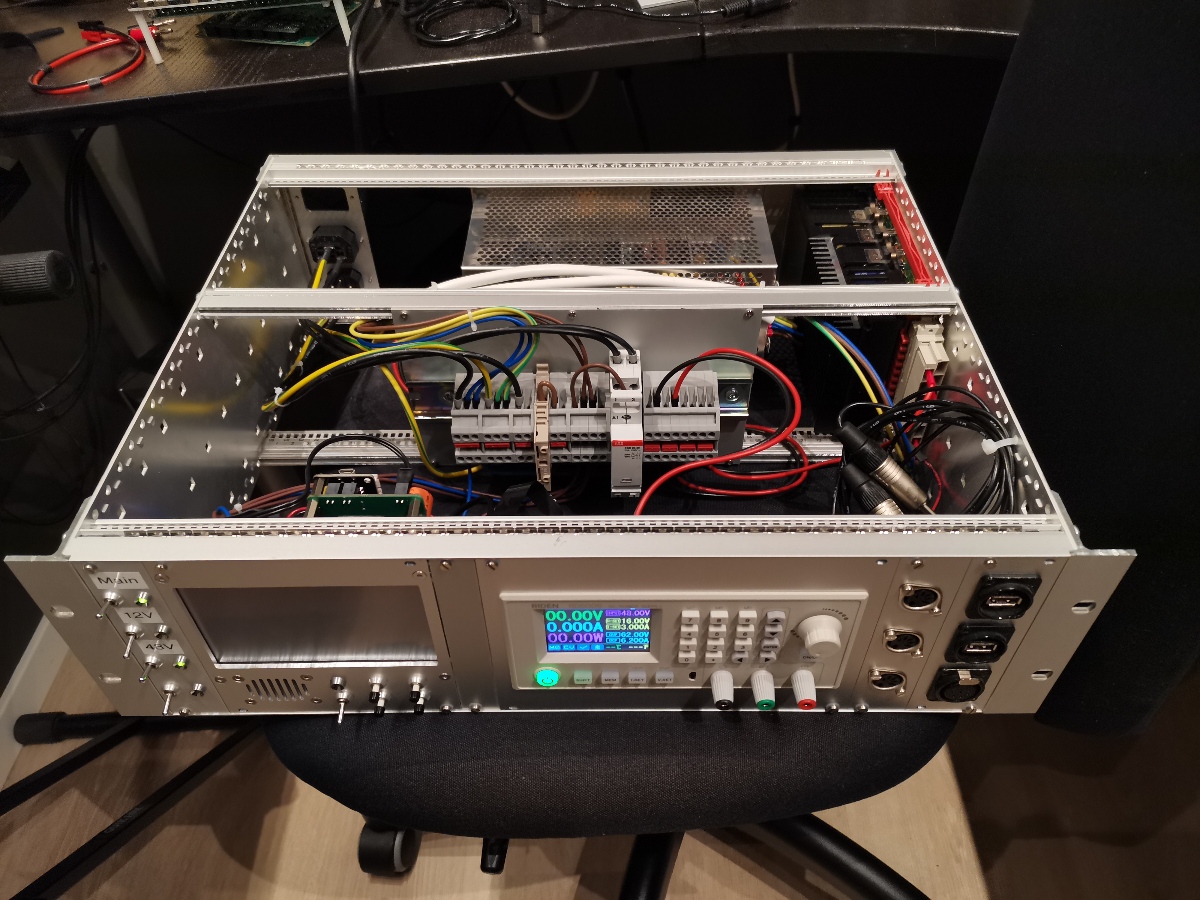
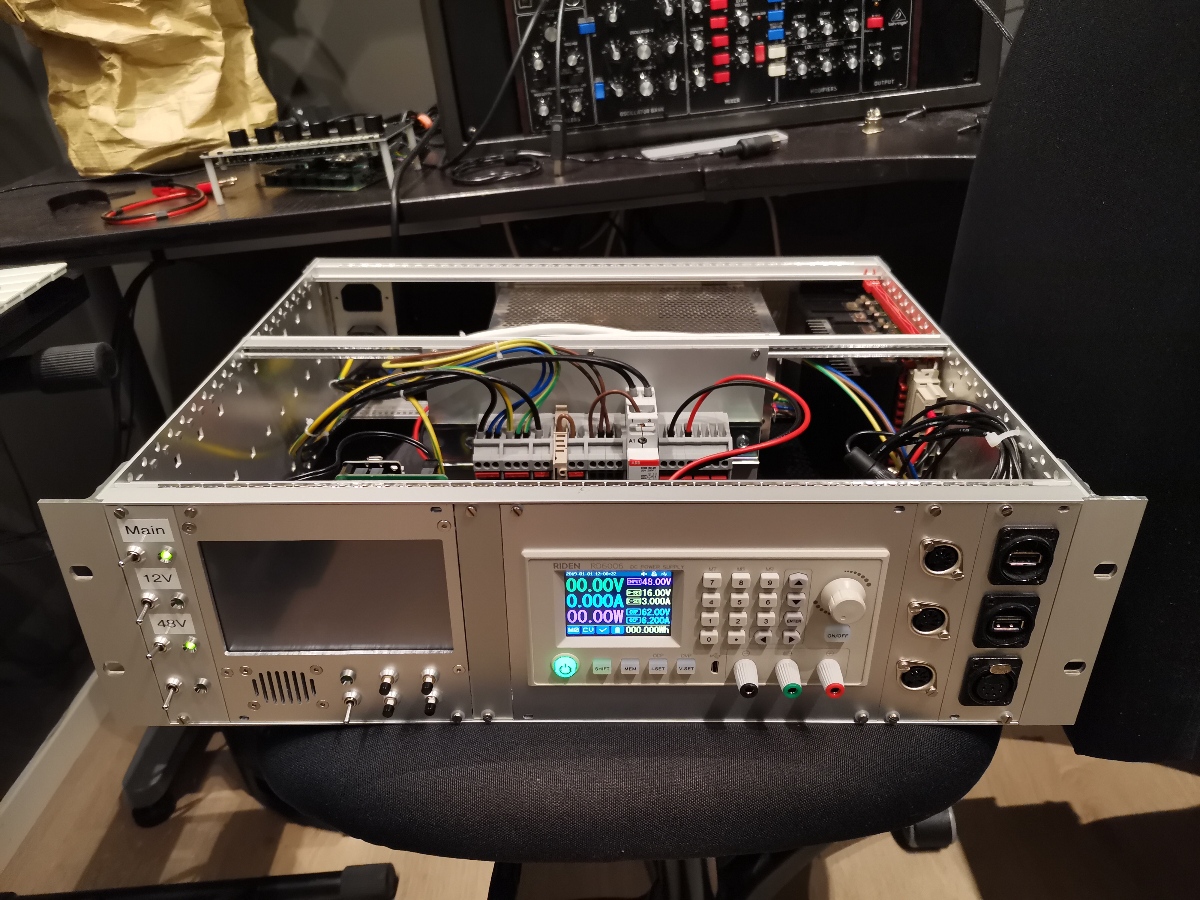
Lab power supply, RD6006
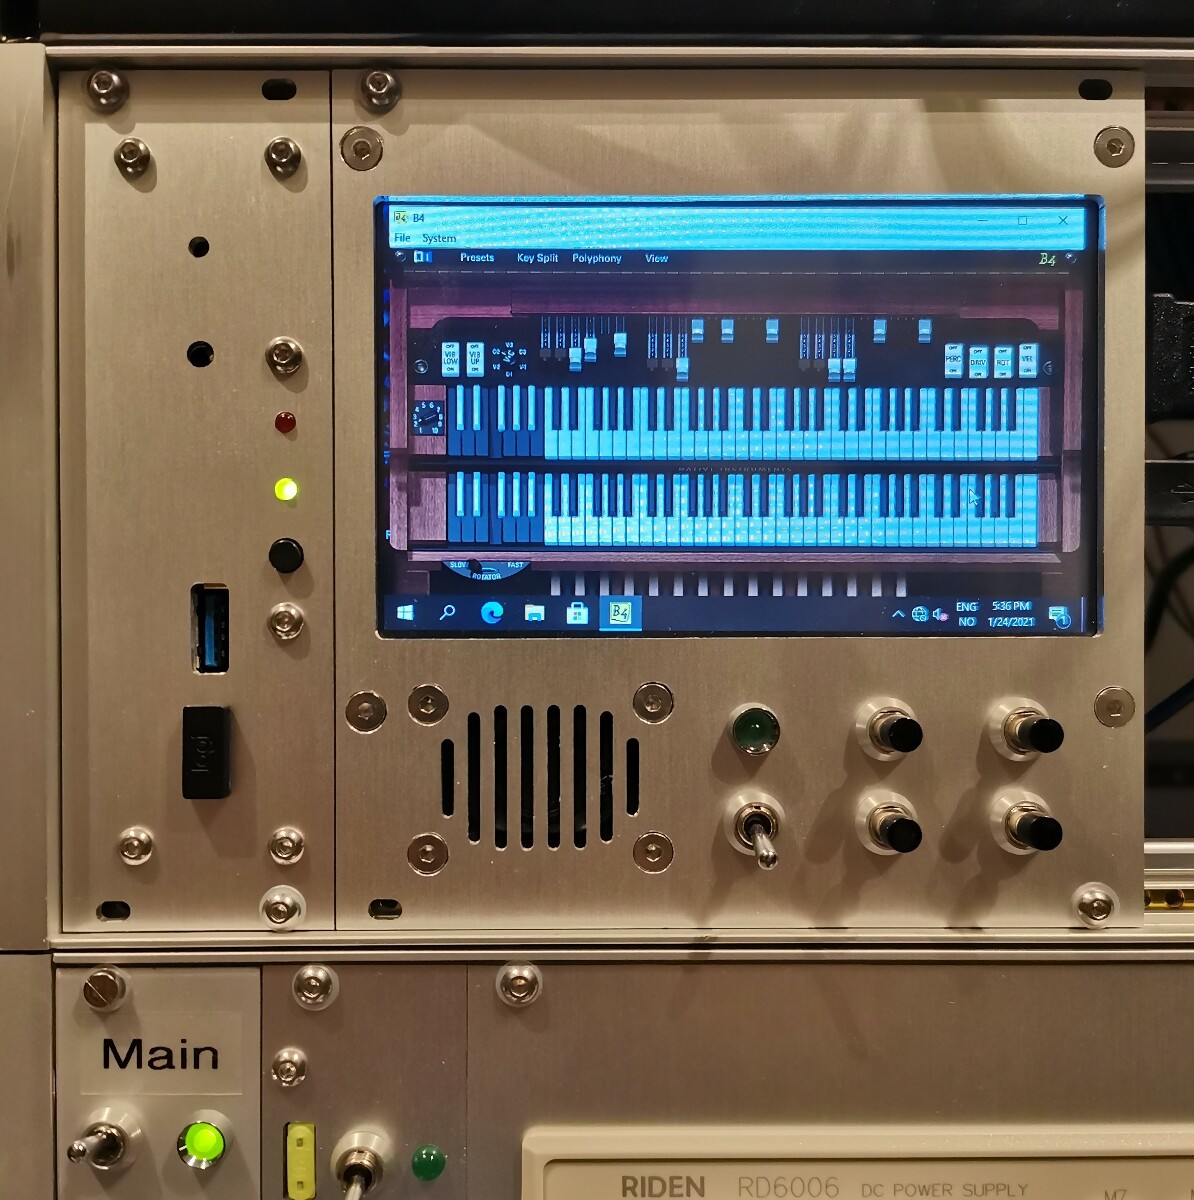
The completed racks
Work in progress, still finishing my last 19" rack in oak and populating the frames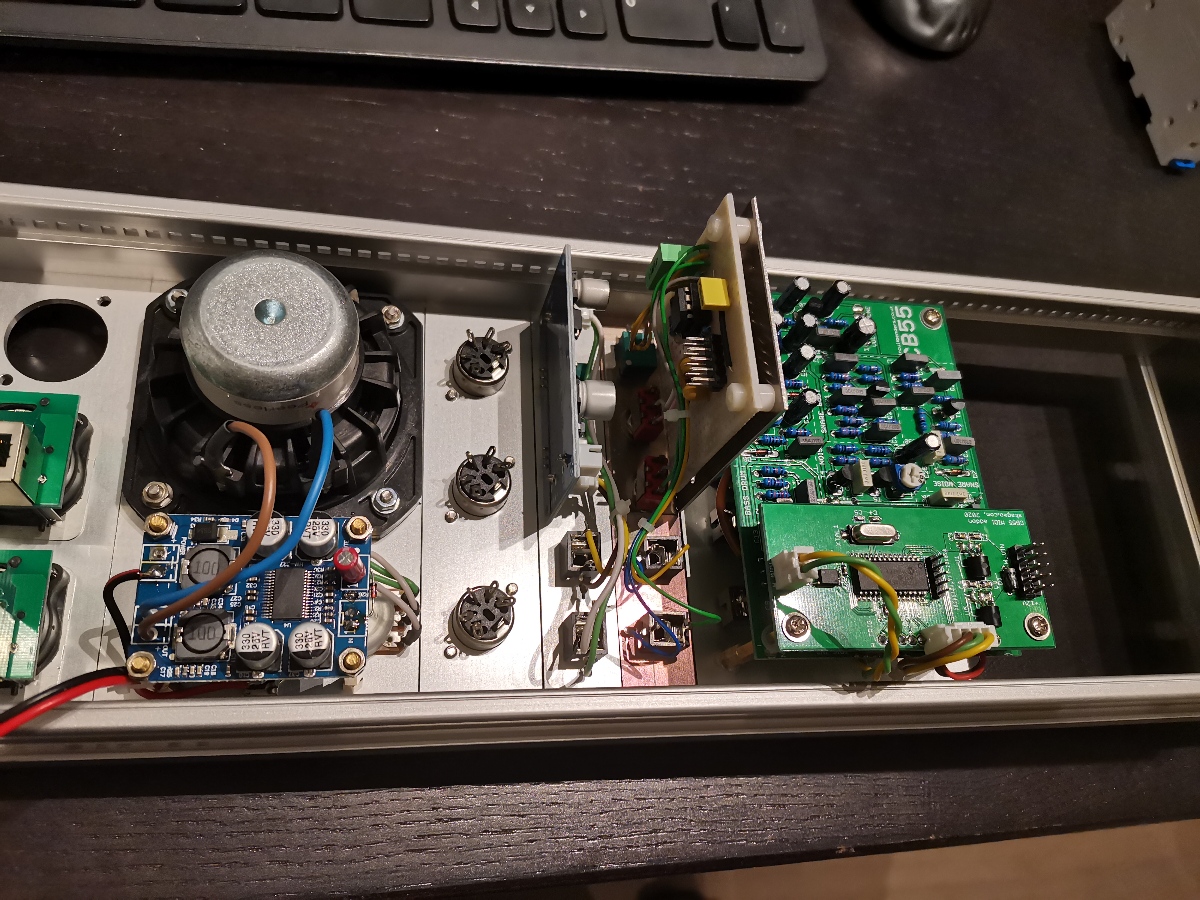
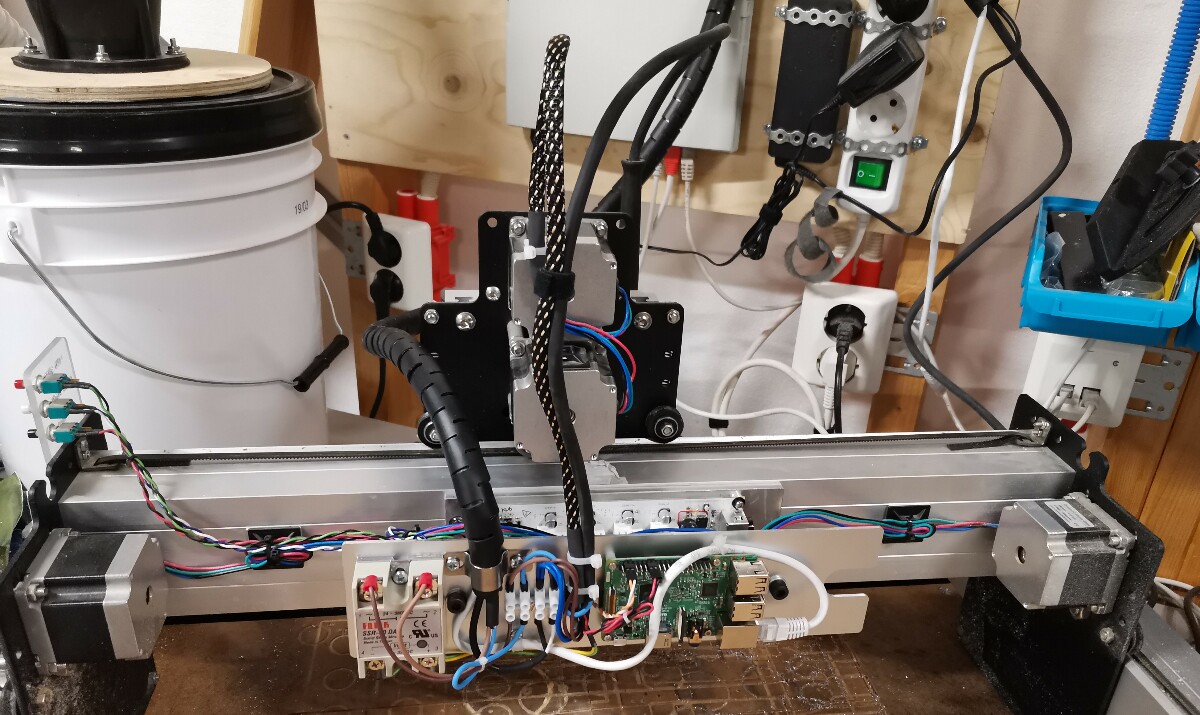
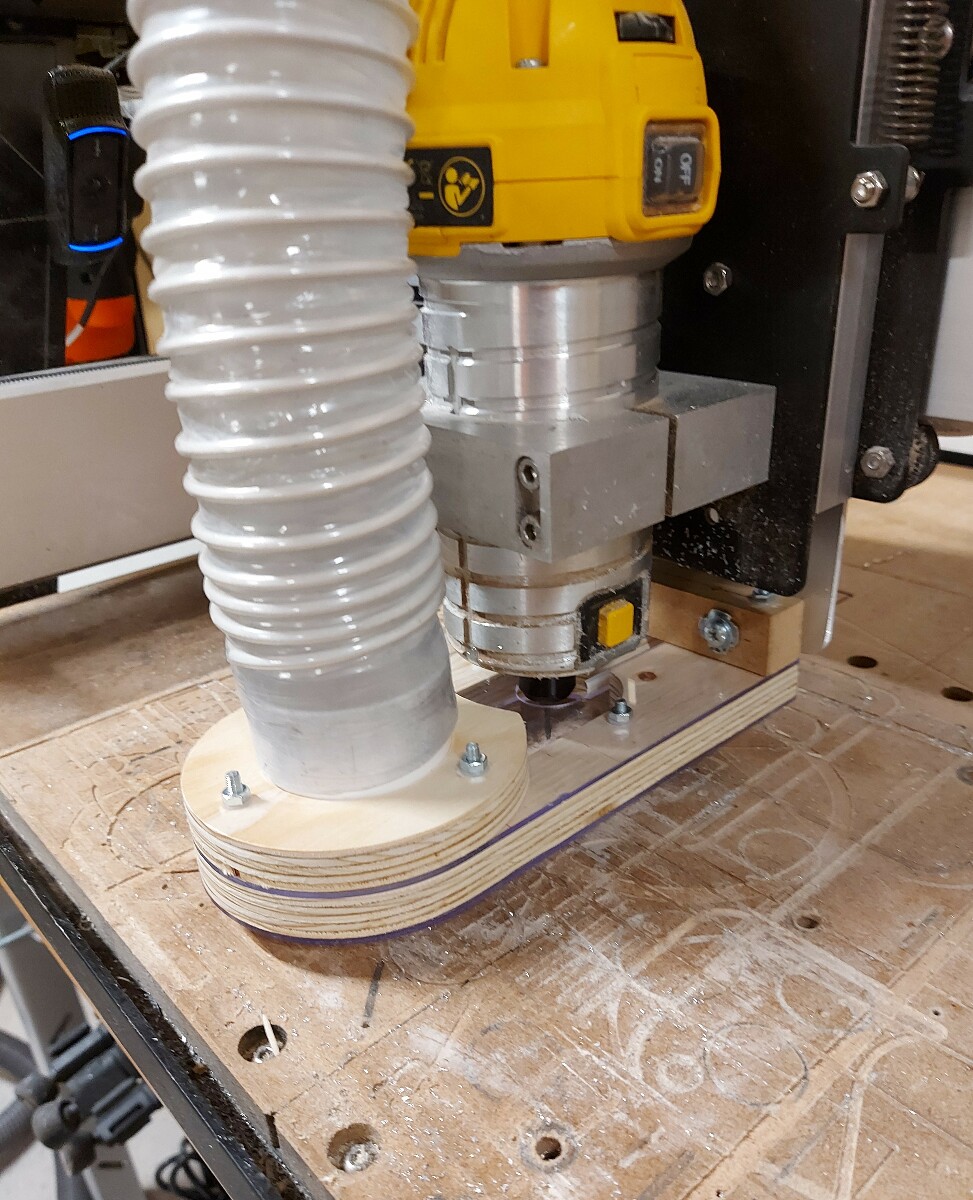
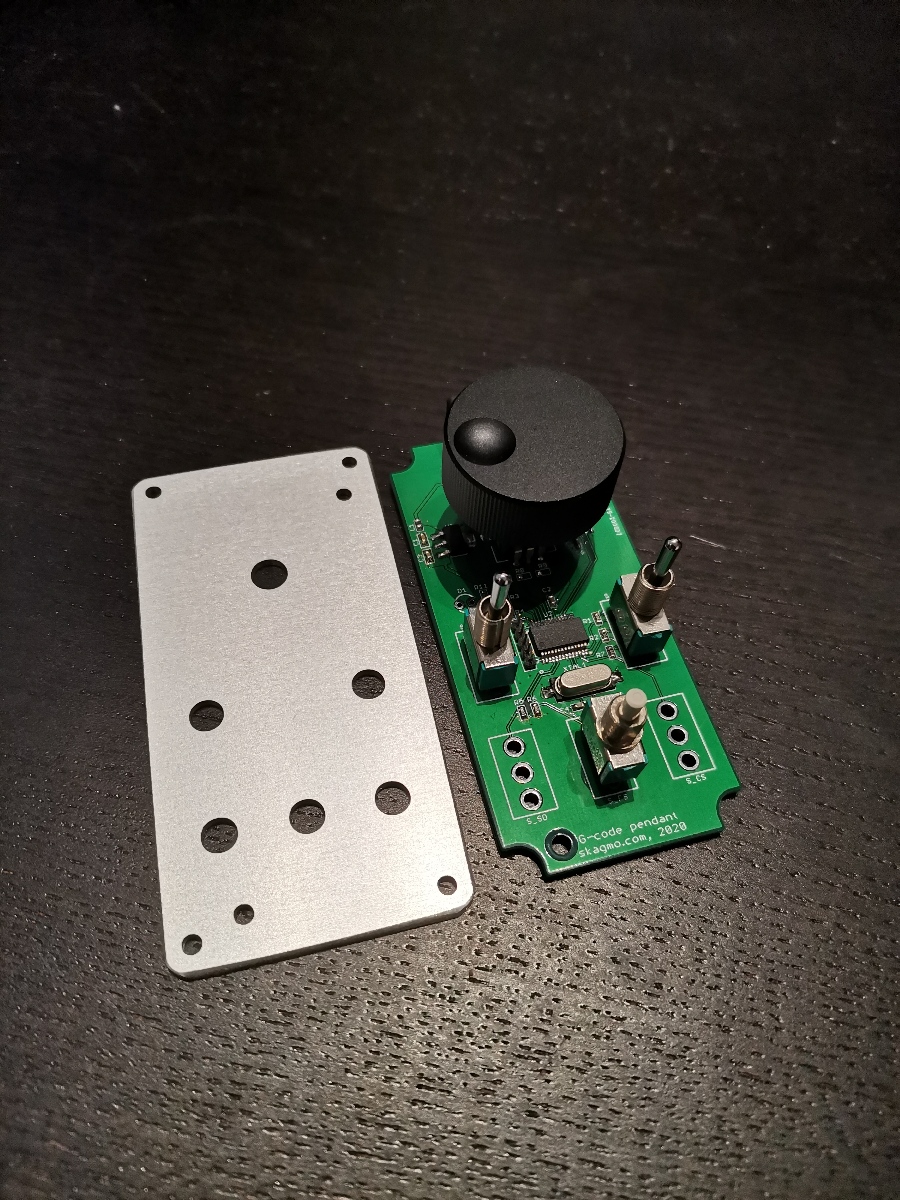
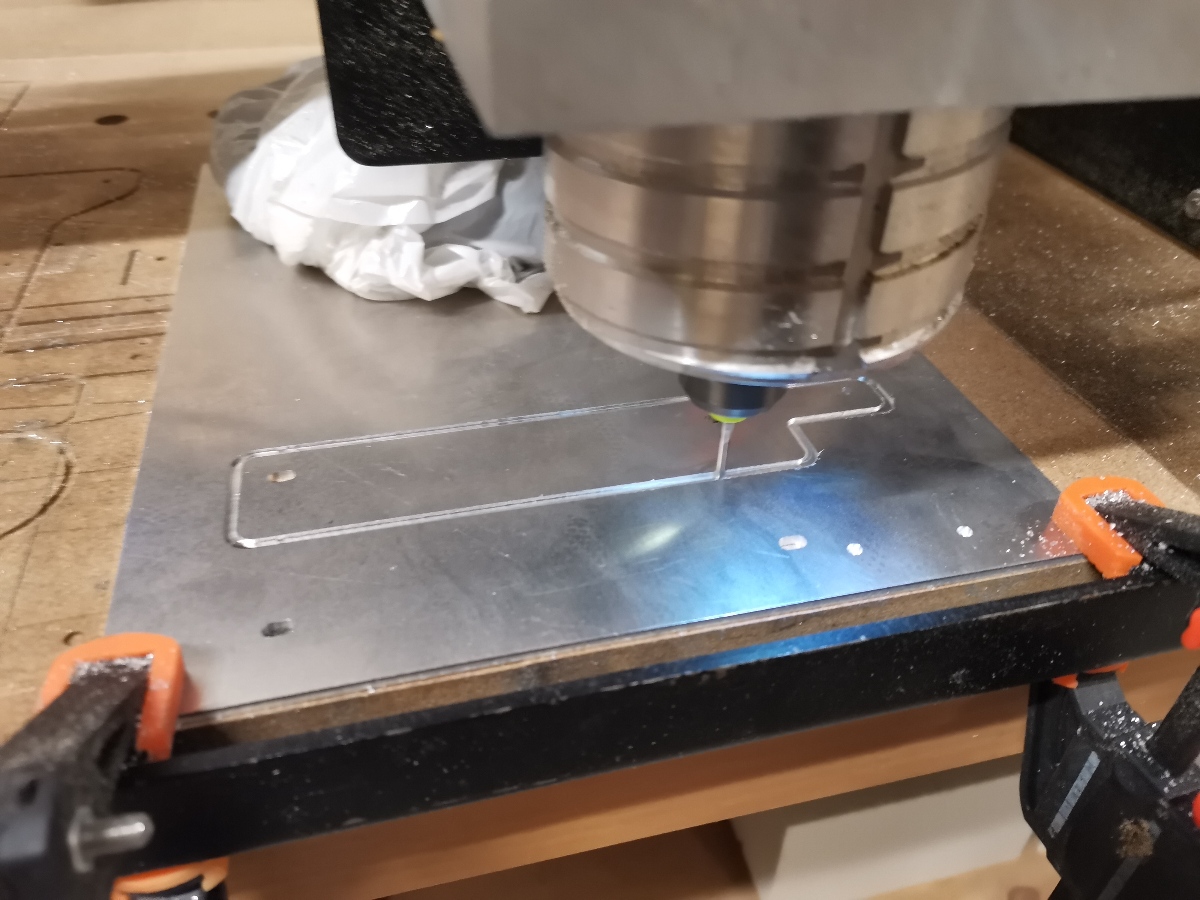
CNC router and workflow
I use a Shapeoko 3 to mill all the aluminium panels. It has a lot of tweaks added through the years (maybe I'll do a separate writeup on this one day).- Using QCad for CAD and Carbide Create for CAM, with CNCJS running on a Raspberry Pi on the router to feed the G-code.
- Front panels milled from 2.5 mm anodized aluminium. I typically use a 2.4 mm end mill with relatively high feed rate (400 mm/min) and shallow cuts (0.2 mm stepdown), while applying WD-40 as a coolant and lubricant. For milling Aluminium, I've written down a table of parameters for each of my typically used end mills, achieved through trial and error.
- Text is typically engraved with a 0.4 mm drill bit (down to 0.4 mm depth with 0.1 mm stepdown), and treated with an acid (Aluoxyd) to form a black oxide layer on the non-anodized engraved text, while not affecting the anodized surface. This works pretty well!